|
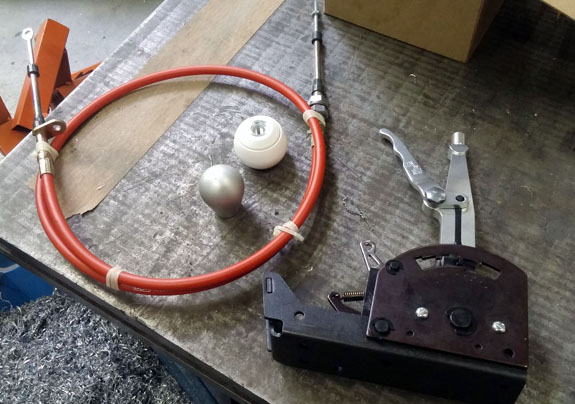
01/14/16 Some of the things we've been working on with the Stiletto are shifter and fuel tank. For the shifter, it was of course possible to create something custom but I ended up finding a B&M unit that should fit well with the overall theme of the car. It comes with a white plastic knob which I'm not crazy about, we might end up machining something similar to what we do for the D2 (but bigger).
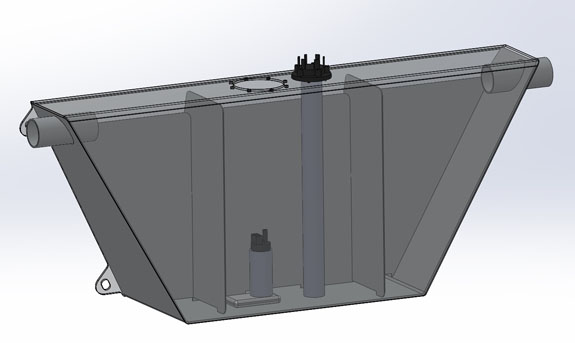
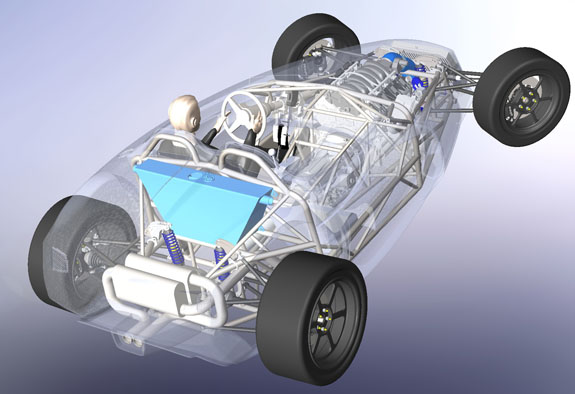
Still need to finalize the position and then we can design and build the mounting brackets. For the fuel tank, we looked at many off-the-shelf options but none fit the requirements. The dimensions are important, so is the mounting scheme. Also, even though this is not a track car and doesn't need a full bladder type cell, it will corner like a Palatov and therefore we need to keep the fuel from sloshing around too much. I also wanted it to be fillable from both sides, have an in-tank fuel pump and an electronic level gage. So we're building a custom baffled tank for the car.
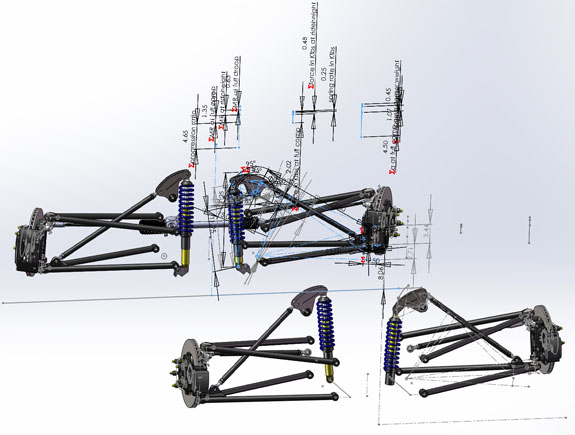
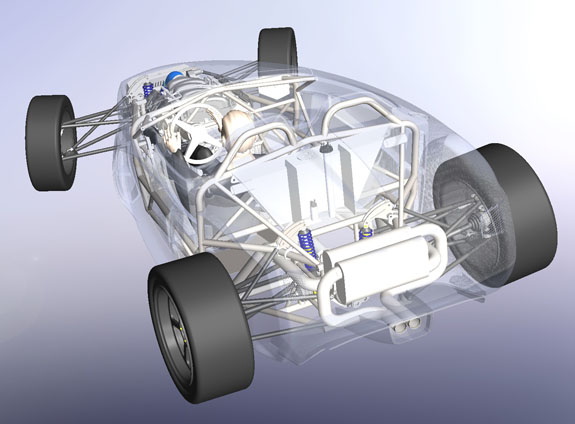
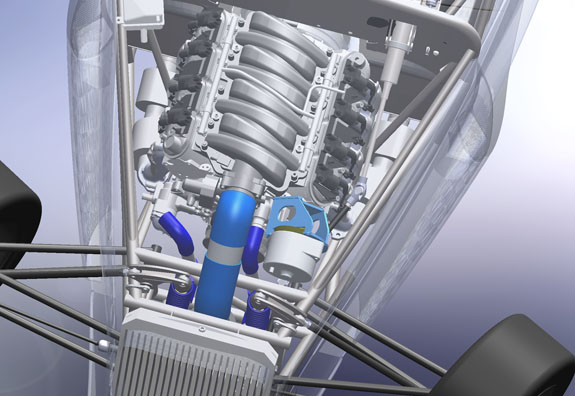
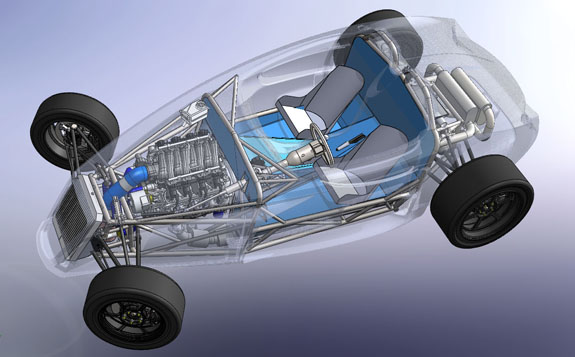
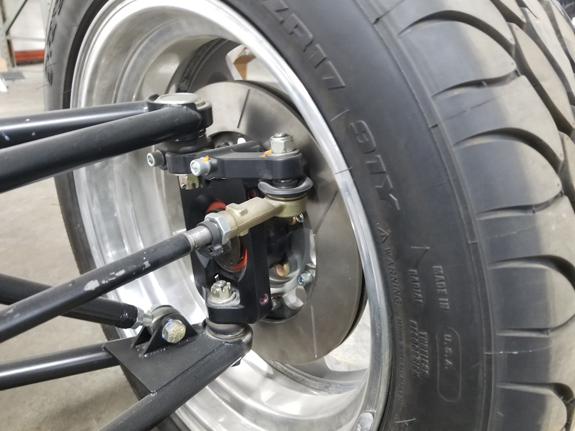
As always we're juggling dozens of things but all are moving forward. 01/27/2016 With everything I've learned about suspension in the course of D2 and D1/D4 development, I wanted to revisit the Stiletto using the latest analysis tools I've come up with.
Some may recall this is actually the second revision of the bellcranks and this design stands up to the latest analysis quite well. Also with all the little tweaks we've been making to get things to fit and clear each other, it's a good idea to check the range of motion. Sure enough, at full droop the left front shock was interfering with the steering shaft, so the bottom mounts had to be relocated. This in turn has an effect on the progression ratio and therefore potentially springs and dampers.
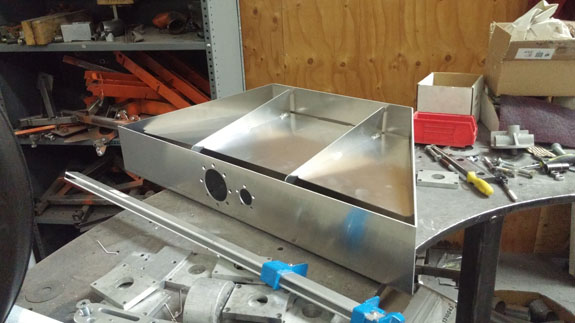
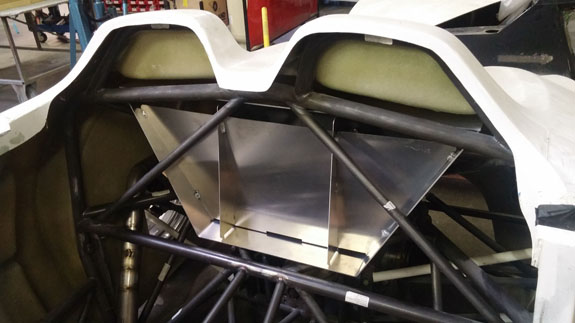
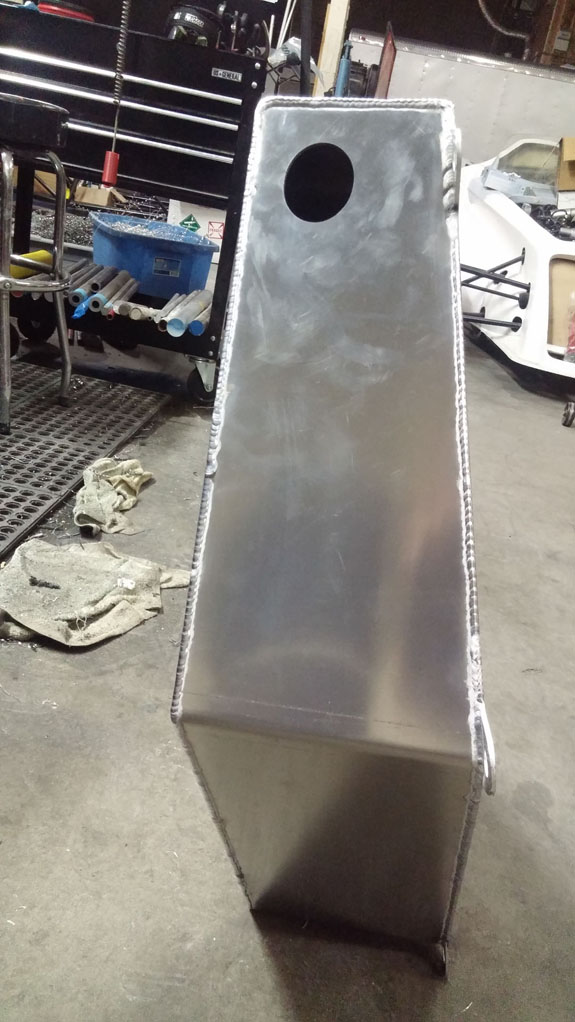
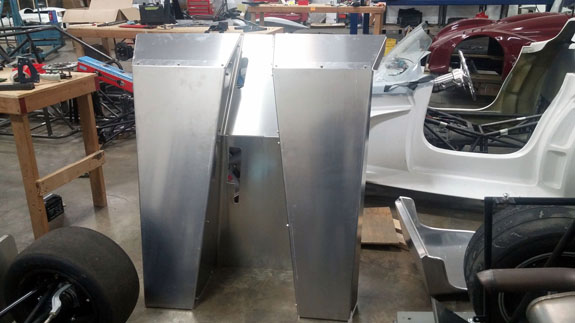
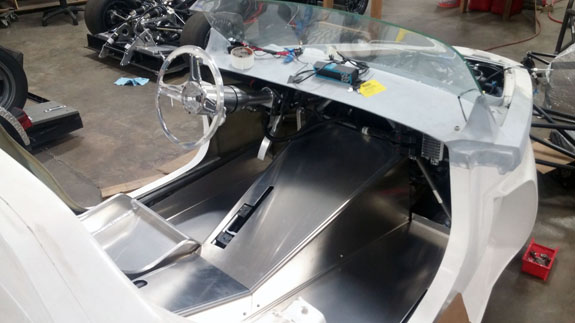
I've already gone through this cycle a couple of times but the development goes on and it gets reapplied to all of the cars, the Stiletto included. As a result I've now (again) ordered new shocks and considerably softer springs for the car. Fortunately we are able to use the previous parts elsewhere. All in all, we've gone from 600lb springs in the front to 450lb and now to 250lb. In the back, progression has been from 450 to 300 to 150. As originally designed the car would have been bouncing over every bump. Now it should be very compliant but still controlled, and will still corner flat without excessive dive under brakes or squat on acceleration. The lasered sheetmetal for the fuel tank should be showing up soon, at which point we'll weld it up and mount it. Ergonomics are nearly final and a lot more of the brackets, mounts and panels can now be finalized and made. 02/03/16 Fuel tank sheetmetal came in so Tristan welded it up.
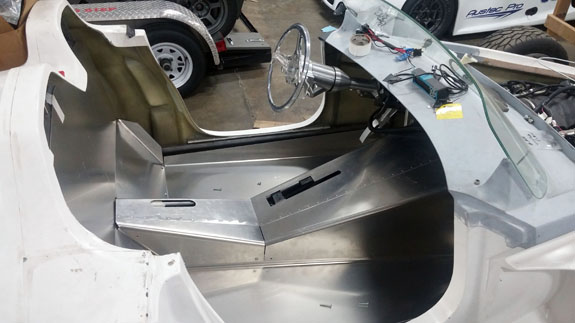
First, the internals are tacked together and to the two of the outer skins.
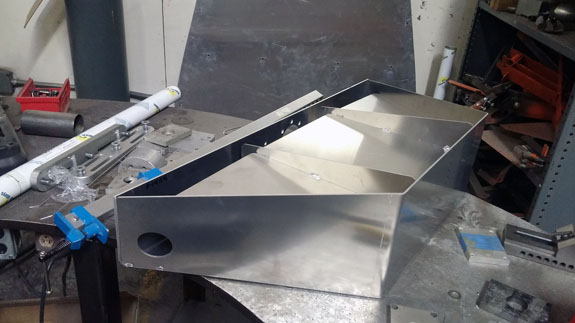
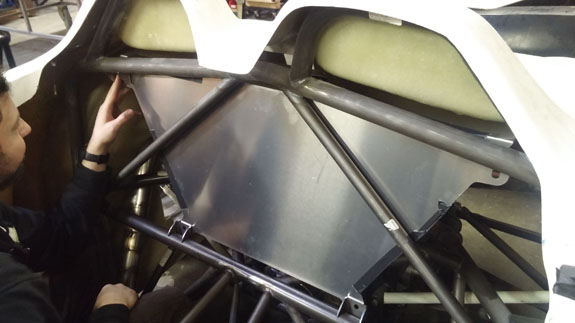
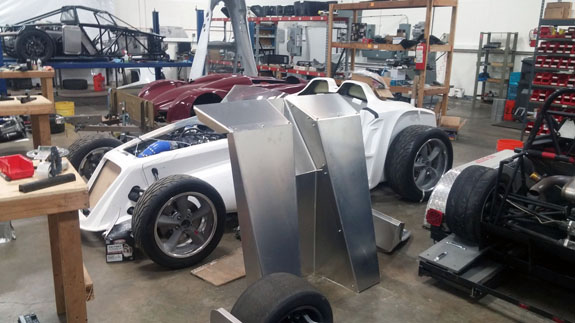
Then we test-fit in the chassis to make sure the mounts will line up. They do.
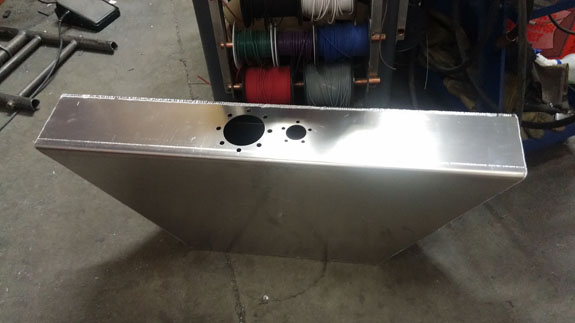
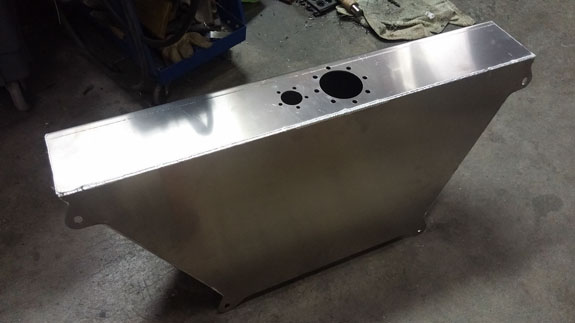
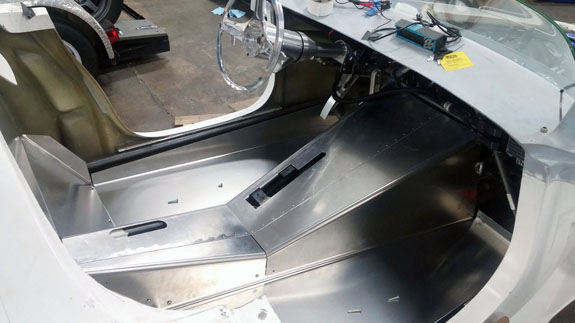
Then the final welds.
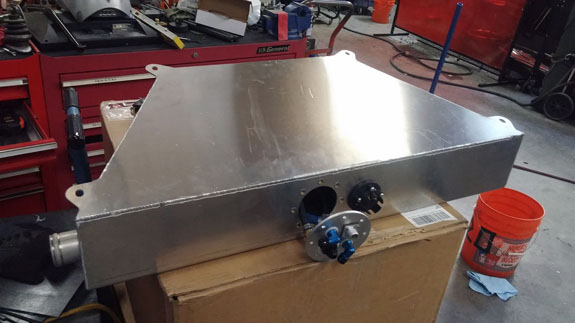
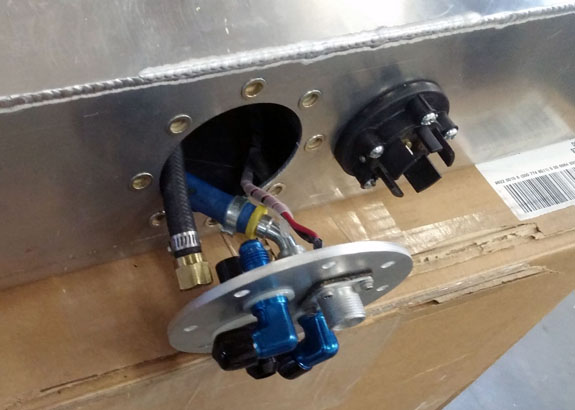
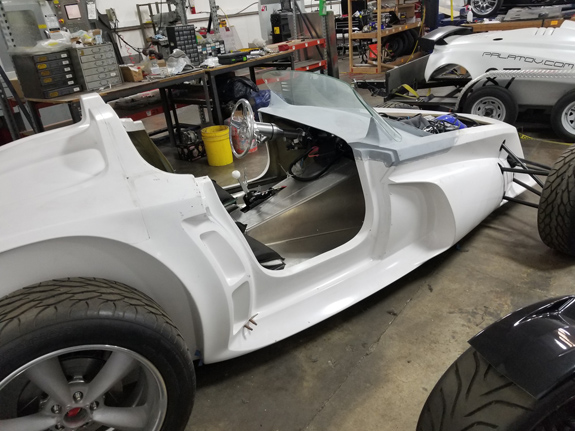
At this point we're waiting for the filler tubes to come in. Once they do, we'll finish the welding and test for leaks. Then it can all be assembled. This is a good example of the custom design and fabrication we can do. 07/21/16 Haven't posted on the Stiletto blog in a while but work has been going forward. The fuel tank is now complete with internals and installed, and we're figuring out the plumbing.
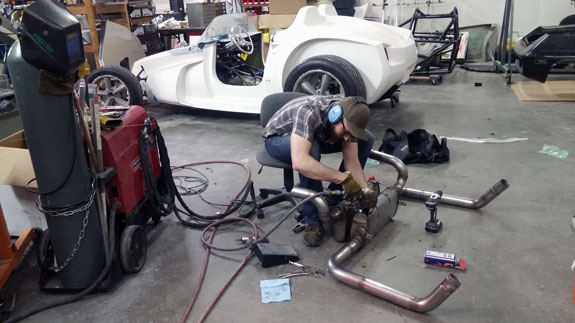
Exhaust has had a number of updates - rerouted the tailpipes to better clear the gas tank and suspension, now relocating O2 sensors on the headers to clear chassis tubes.
Shocks and springs have been updated to the latest specs based on what we've learned from the D2 (a lot softer now with the new bellcrank geometry). Number of engine details are moving along like coolant tank, revised alternator mount, improved coolant plumbing and so on.
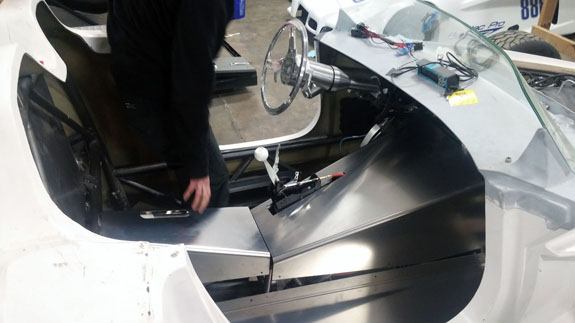
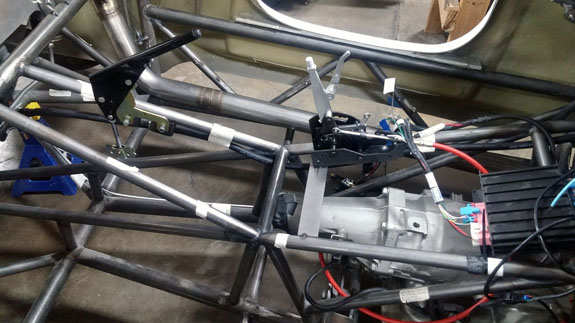
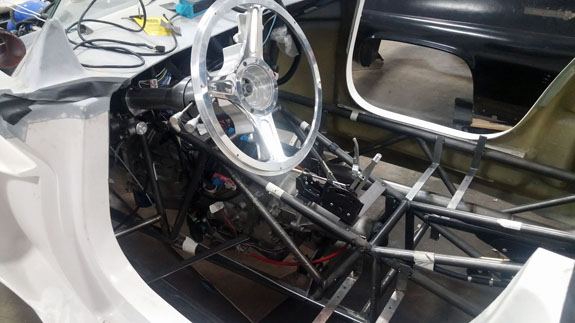
Shifter is now installed and the brackets for the parking brake handle are welded in.
All in all the car is coming along. The upside of the extra time is that we're incorporating things we learn from the other cars as we go.
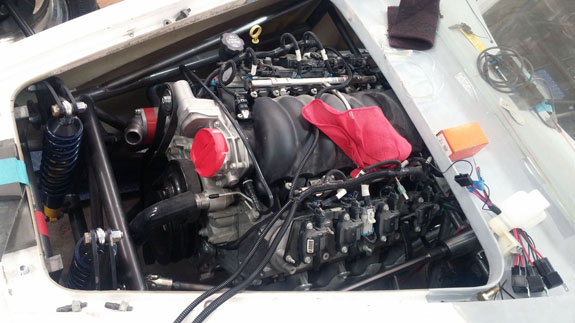
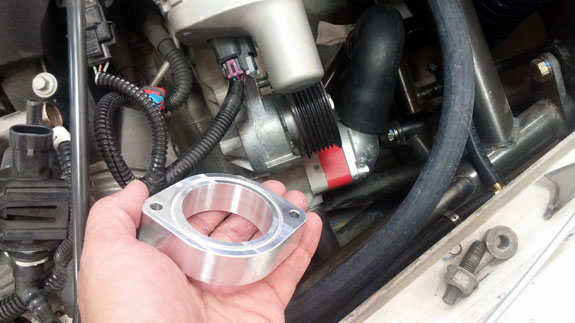
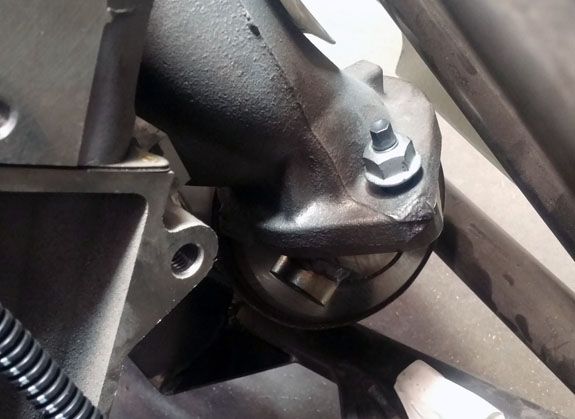
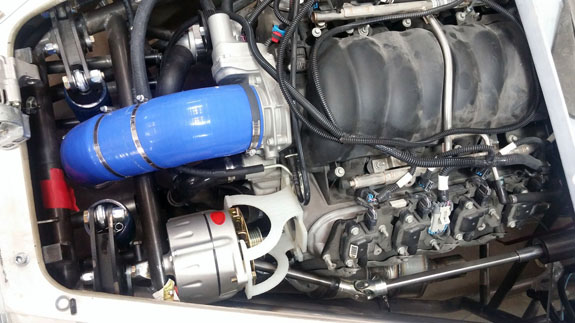
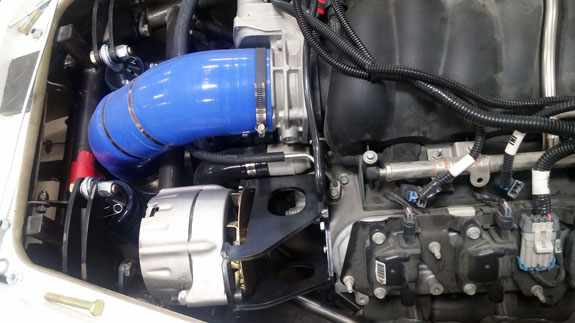
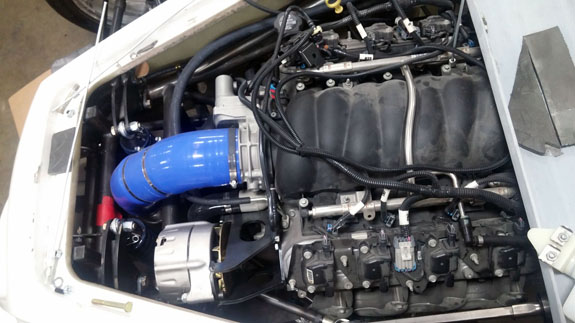
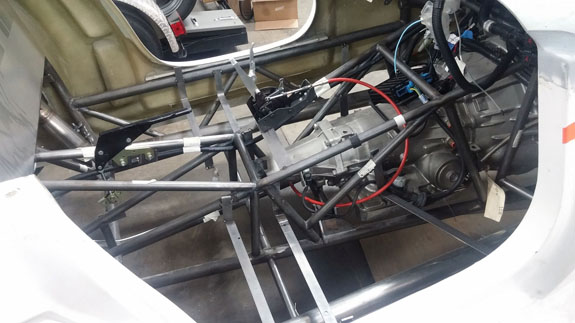
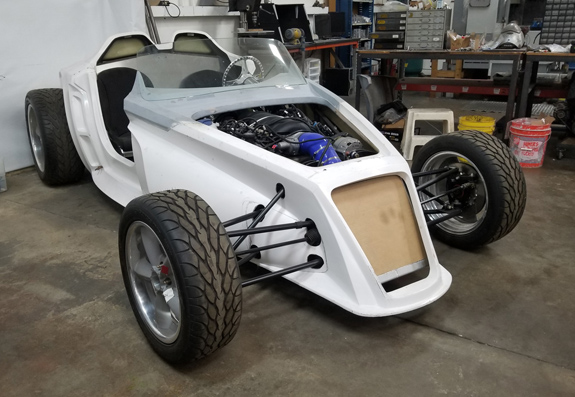
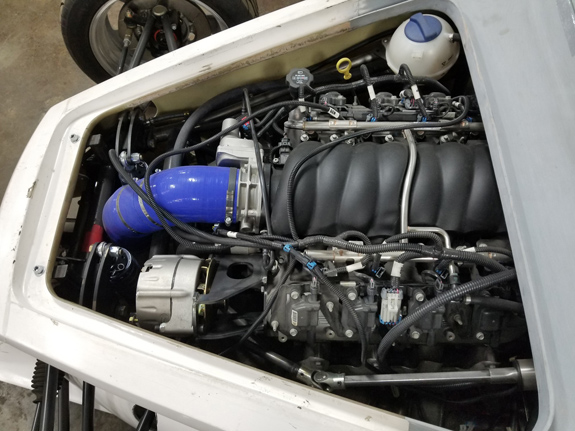
09/19/16 This being the first car of its type we're building, a lot of little details have to be figured out. The tight packaging in the engine bay has created several challenges, some examples of which are below. The water coolant tube routing meant that we had to turn the thermostat housing 180 degrees. That's the easy part. The problem is that now it interferes with the serpentine belt and had to be spaced out almost an inch. Jay created a quick 3D printed prototype (red in the first picture below), then I machined an aluminum part and we installed it.
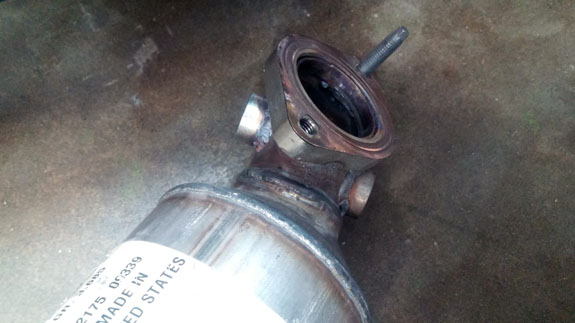
The exhaust is squeezed in there as well, and after bolting everything in and moving on to wiring, we found that the forward O2 sensors on both sides interfered with frame tubes. So out came the exhaust, new O2 bungs were welded on to point the sensor in the opposite direction, old ones plugged, and everything reinstalled.
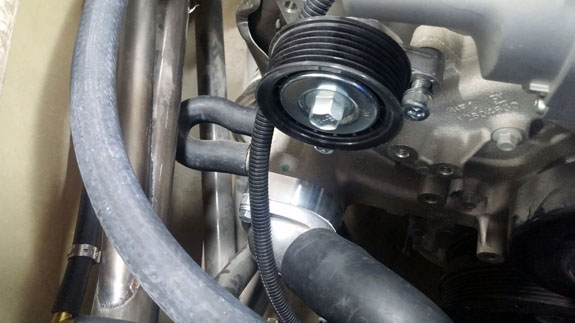
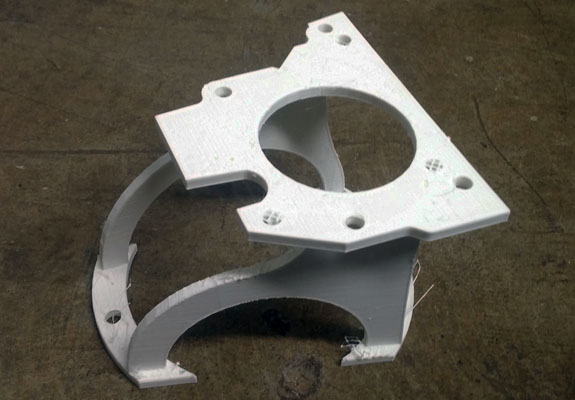
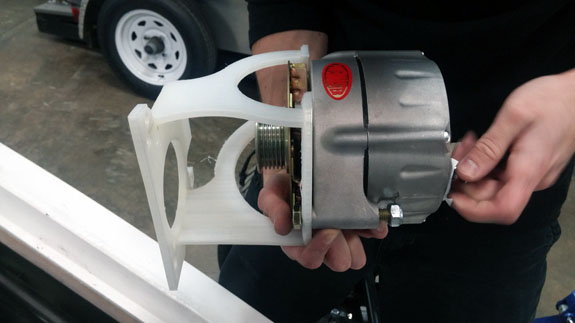
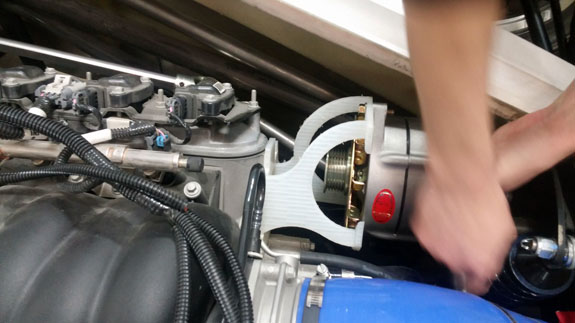
Alternator mount is another challenge. The location we use on the D2 doesn't work here because of the different exhaust routing (front engine vs mid-engine). We tried squeezing an ultra-small racing alternator in there, like we use on the D1, but even that wouldn't fit. So turning it around and mounting it up-top is the only remaining option. The alternator has to clear the steering shaft and u-joints, the frame tubes, stay below the hood line, and line up pulley with the belt on a bracket that is stiff enough to hold the tension. So the bracket has to mount to a structural surface on the engine. Lots of constraints in all directions. Jay has printed several versions of prototype mounts, the current one is close to final but will get more modifications. Once it's finalized we'll check that there is an available belt length for the installation, and if yes we'll laser-cut the bracket from 1/4" steel, weld it and then zinc plate.
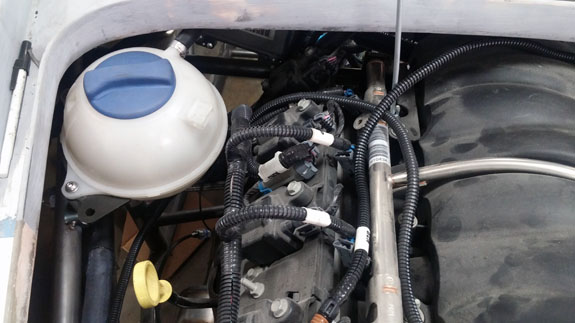
Even the coolant expansion tank mounting was difficult - it has to be located at a high spot, be accessible, and fit with the rest of the stuff. After a few tries we finally got that done too.
So now the engine bay is starting to look more complete. Once the alternator is mounted and coolant is filled, and the rest of wiring harness is fabricated and mated to the engine harness, we just might be ready to try and start it. 10/24/16 After a few 3D printed iterations, we finally figured out the alternator bracket so the design was detailed out and laser-cut sheetmetal ordered. Once it all comes back we'll weld it, figure out the right belt length, install and then see how it all works.
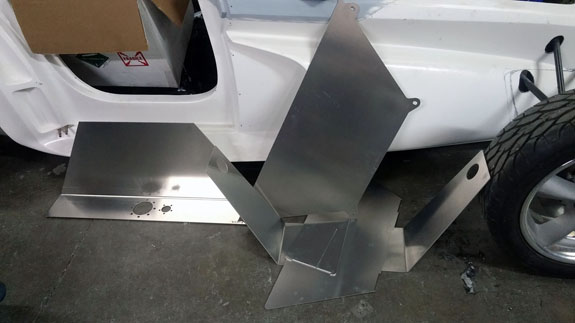
Next is interior paneling. We've done quite a bit of test-fitting, rough prototyping and generally figuring out where things should go. Now the design is nearly complete. Still needs to be detailed out, individual drawings made for each panel, then they can be ordered.
11/16/16 The sheetmetal parts are back from lasering and bending. The alternator mount went together smoothly and fits well.
Now just have to figure out the right length belt and we should be set to go. A fair bit of wiring still remains to be done. The interior panels are here as well. This chassis has been hand-modified several times to fit the bodywork so there are some small discrepancies between reality and CAD. Because of this we have some trimming and fitting to do, but overall looks like it should work.
Like everything else, the interior is a 3D puzzle with some things that are movable, and others that are definitely not. We'll get it sorted. 11/26/16 Some more progress on the interior paneling. We had to cut the center tunel panels and then splice them together. Worked out well and now it fits.
We are now updating CAD to make sure everything is current. Then on to seat mounts, final wiring fixes and then first start. As a reminder, both the project and the car are for sale - contact me for details. 01/09/17 Seat mounts are coming along - brackets and supports have been designed, and sheetmetal is on order.
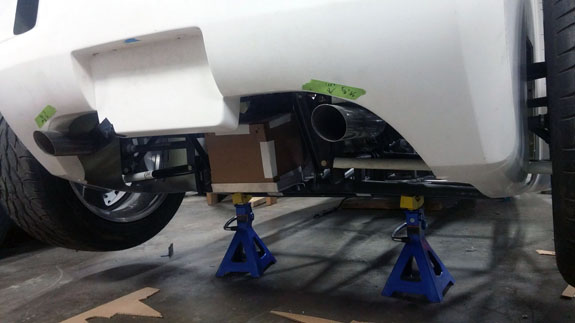
A number of other tabs, brackets and mounts are getting done as well. The battery mount is an example - the packaging of the car is so tight that there is literally no room for a battery in the engine compartment. The only place it can really go is in the back (good for weight distriution anyway) and to be accessible, the best place to put it is behind the differential.
Using the same battery as the D2 and the existing battery tray design is most efficient, so this is what we did. The battery is mocked up with a cardboard box to make it easier to handle. Standing next to the car in a normal situation it won't be visible. I just switched to a new workstation with a RadeonPro WX7100 graphics card so below are screen captures of real-time graphics display, just because they look cool.
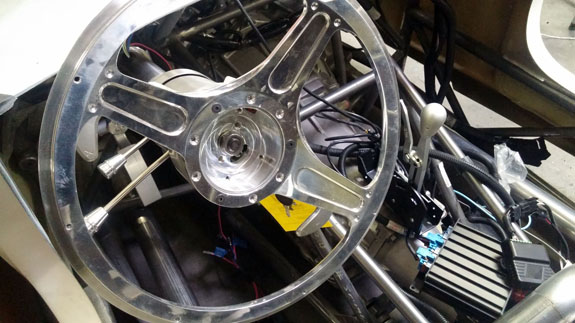
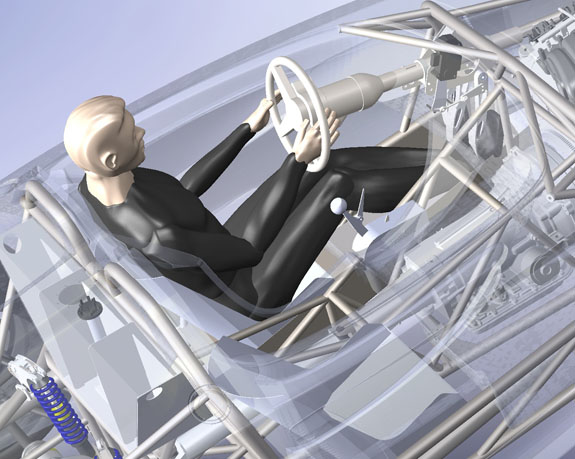
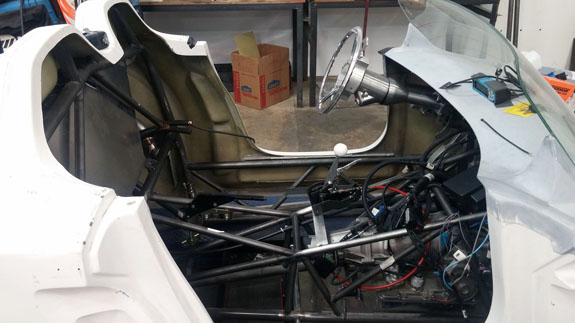
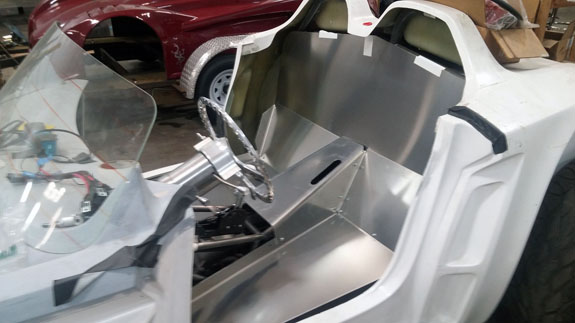
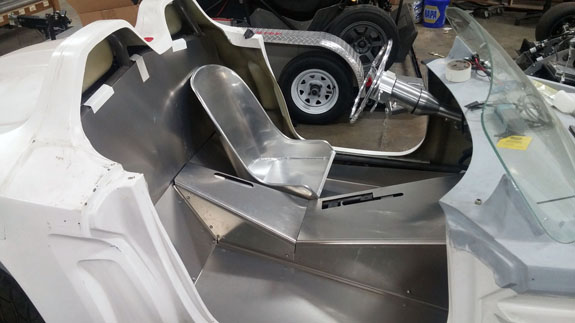
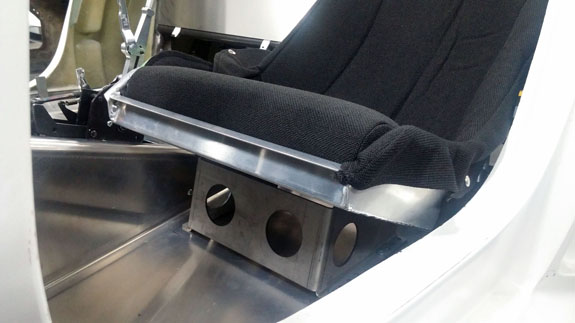
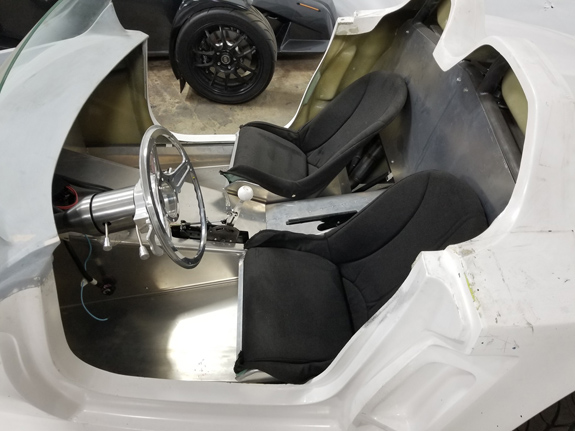
The seats, brakes, seatbelts, engine belt, and some finishing electrical work work is all that I think stands between us and having this car drivable as a door-less roadster. Then door and hood hinges, door latches, more interior stuff, lights, and likely a bunch of testing and tweaks. But the light is at the end of the tunnel. 2/21/17 Finally got the seat brackets in, so we figured out and installed the under-floor supports and test mounted the seats. With this version I've decided to try out my 'knees up' ergonomics that work very well in our other cars. By tilting the seat back and seat cushion up, it's easier to accommodate taller drivers and it also provides a comfortable position with excellent anti-submarining geometry. Basically a version of astronaut seat or those 'zero gravity' chairs. The car is raised on jackstands with nose significantly higher than tail, so pictures are not entirely representative but we didn't pose it for a photo shoot, this is a record of work in progress :)
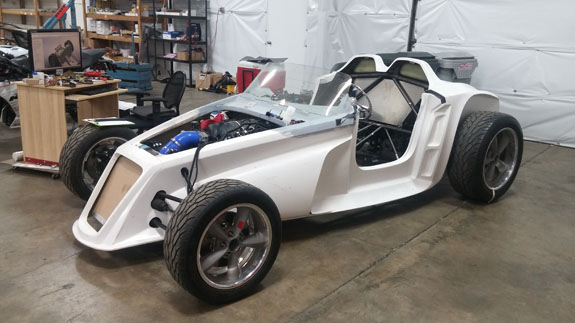
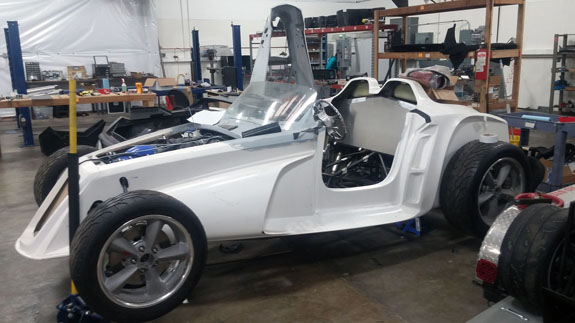
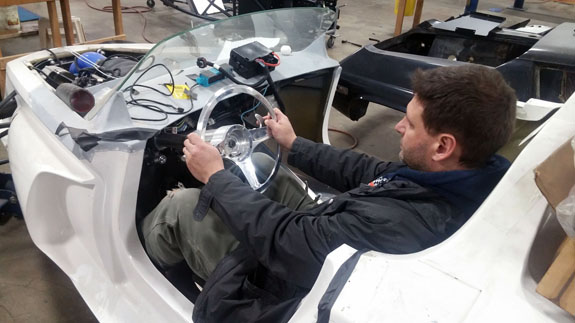
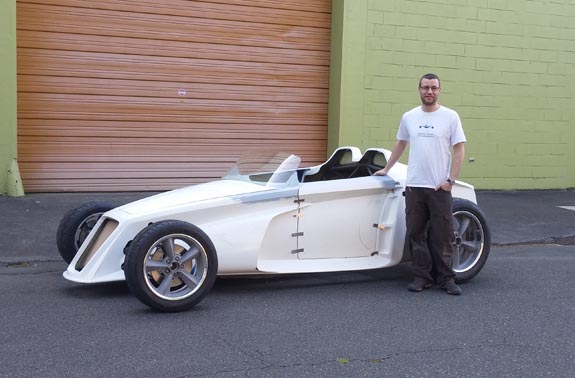
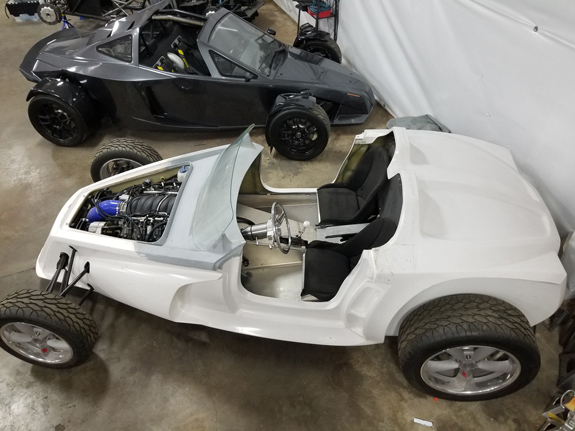
Need to move the steering wheel back some but overall looks like it will work. After we finally drive the car, further tweaks can be made. The brackets have some adjustability and if we feel it is necessary new ones can be made. The key now is get it drivable. A bunch more tabs for mounting panels, some additional welding and finalize all the electricals. Door hinges are on the list too but not strictly necessary for a first drive. Yes we did test the door inner skin fit and while the cockpit is cozy, it does fit well. Having a two-layer winter jacket on is a factor too. All other projects are moving forward as well. We're keeping busy! :) 12/7/17 The Stiletto project is looking for a new owner - the car, in as-is condition, the tooling, the design including CAD and royalty-free manufacturing rigths are all for sale for $120K. This is a fraction of what has been invested to bring it to this stage. Completion services, modifications, and low-volume/prototype manufacturing available from Palatov Motorsport at additional cost - contact me for details. See below for pictures and specs.
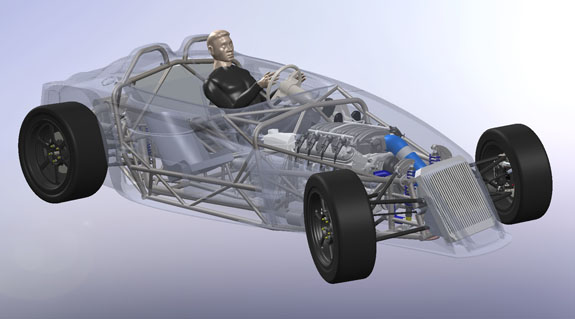
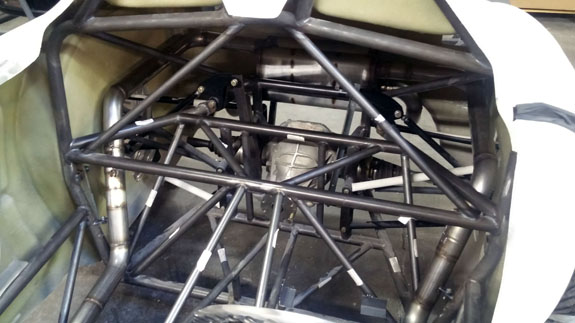
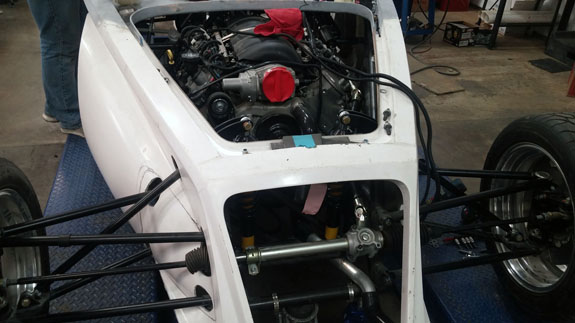
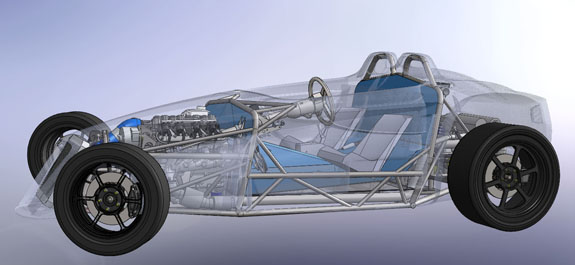
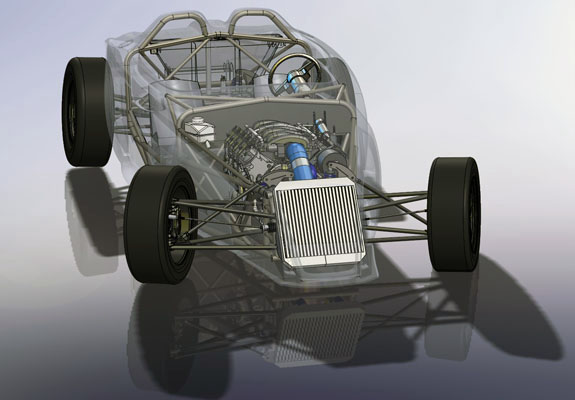
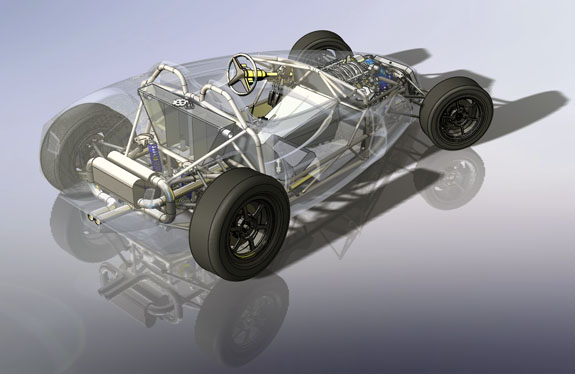
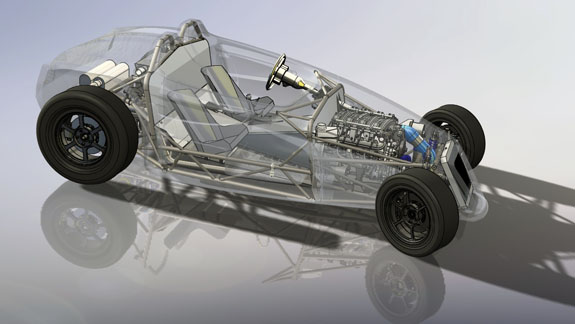
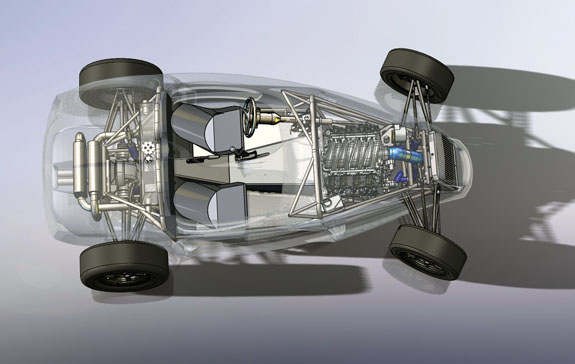
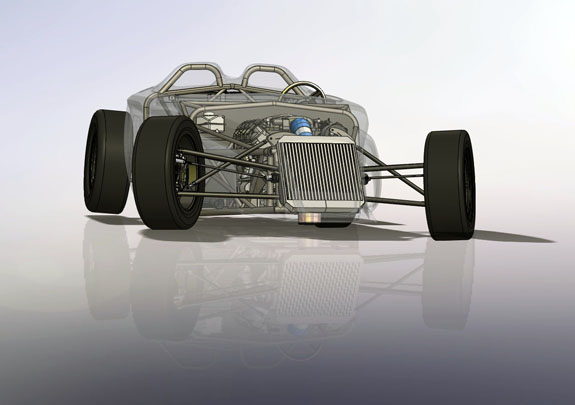
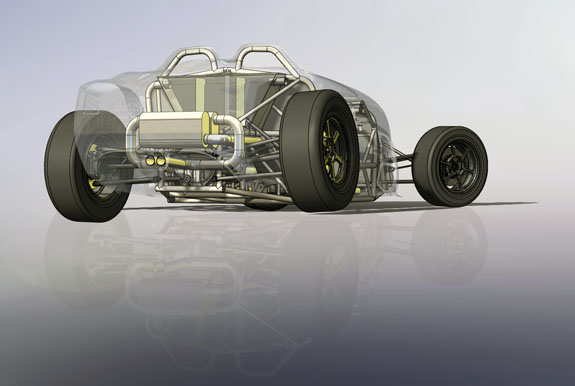
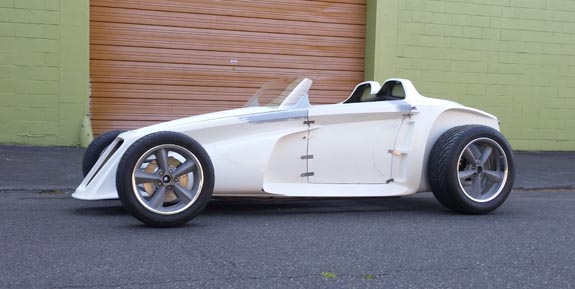
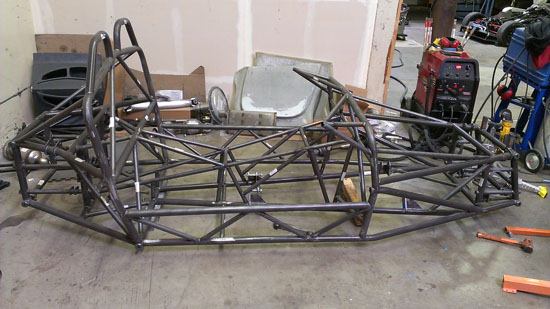
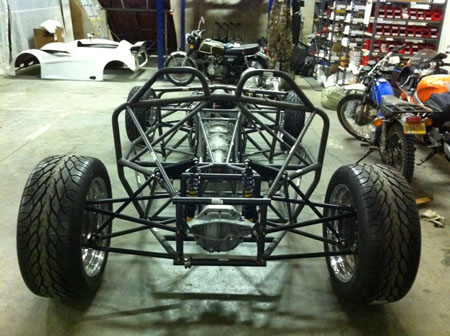
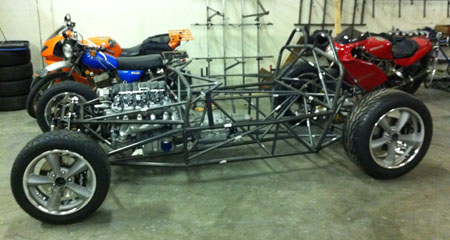
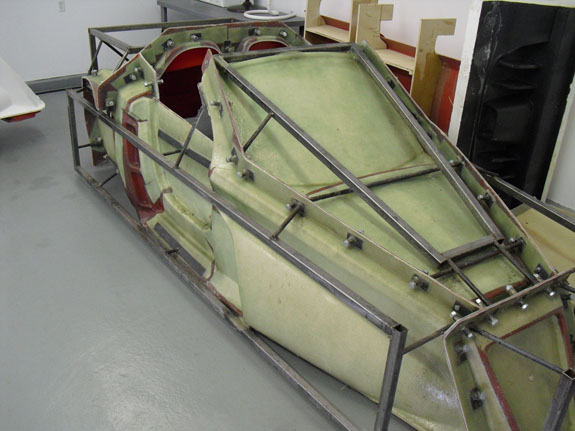
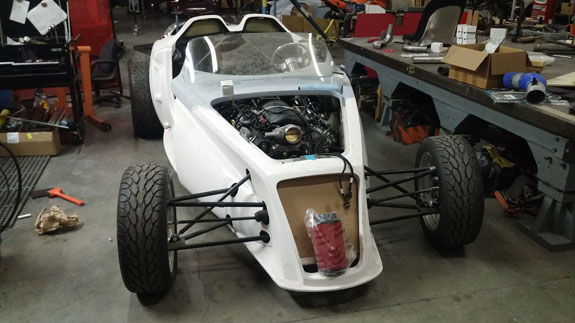
The specs: - Chromoly space frame chassis with double-wishbone pushrod independent suspension front and rear. - LS3 'E-Rod' V8, 430hp, 420 lb-ft, 50-state emissions compliant, stock GM ECU and wiring harness, brand new, with factory catalysts and custom stainless dual exhaust cat-back. - GM 4L65E automatic transmission with aftermarket shift controller, brand new. Custom aluminum driveshaft by DriveshaftShop - Ford 8.8" rear end with LSD, aluminum housing (Cobra). - Weight ~1,900 lbs, 50/50 distribution - Wheelbase 105", length 150" width 76" Chassis:
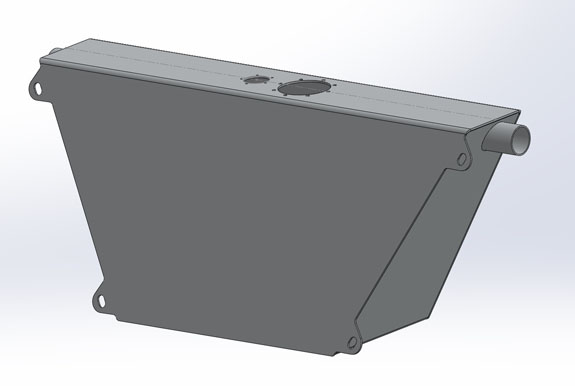
Custom baffled aluminum fuel tank with in-tank Walbro pump:
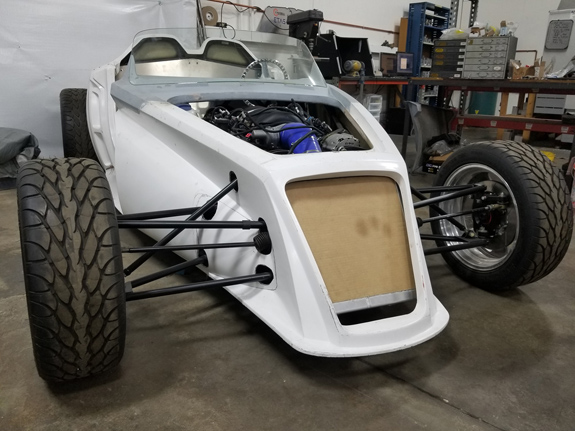
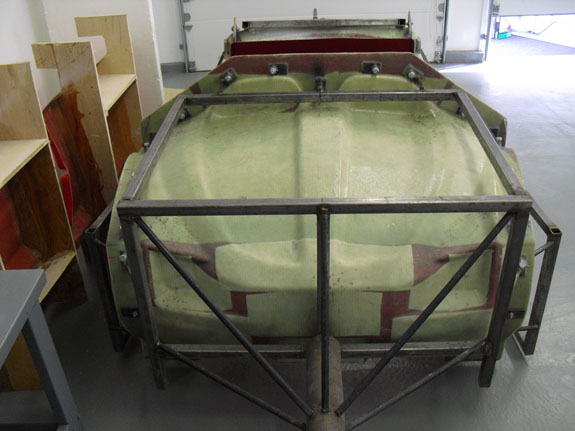
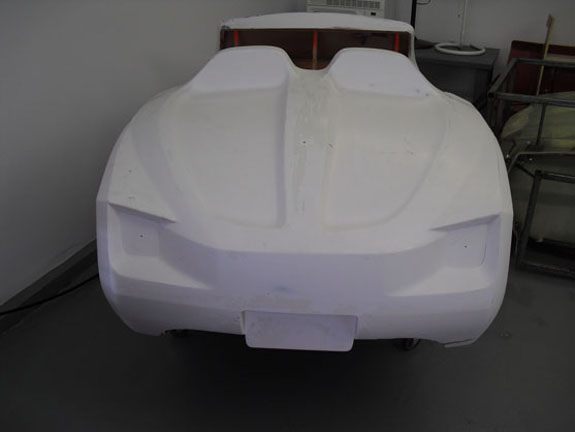
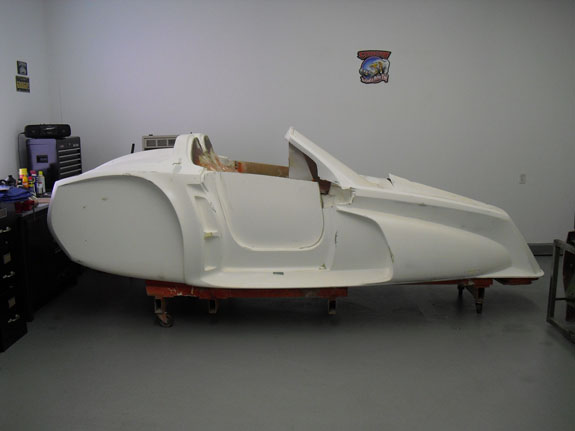
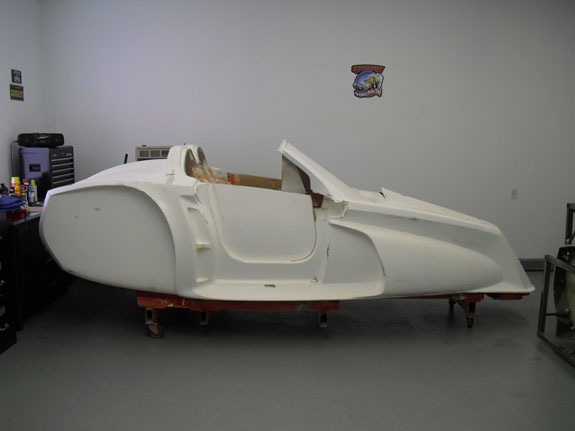
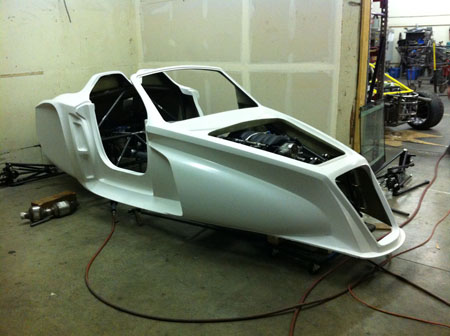
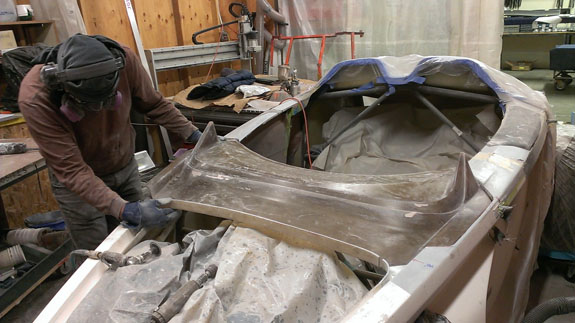
Bodywork and molds:
Design in SolidWorks 3D CAD, with full documentation:
The major remaining items to be completed are door/hood hinges, door latches, interior, gages, some fittings/hardware, installation of engine wiring (GM harness), addition of chassis wiring/lights, windshield wipers, paint. I can provide detailed estimates to interested prospective buyers.
Site Sponsors and Links:
|