|
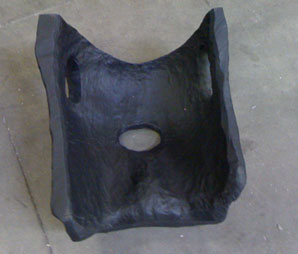
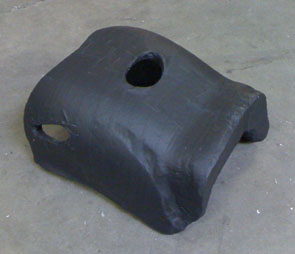
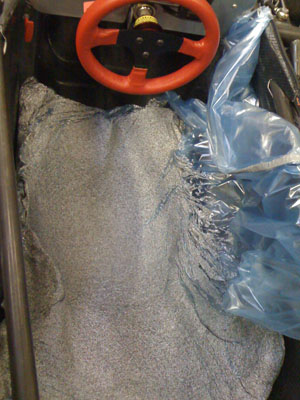
04/06/10 Keep meaning to post another update but keep getting sidetracked... Anyway, the bead seat is now fully trimmed. The kit comes with a big roll of gaffer's tape and it's just enough to cover the entire seat. We split it into three sections, the bottom and two back halves. Makes it easier to handle this way.
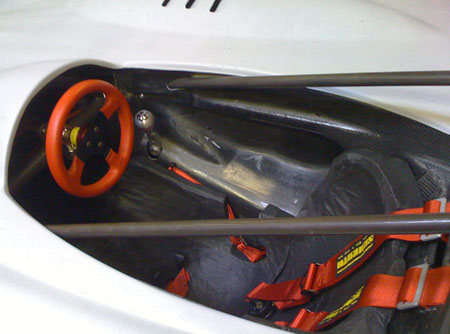
While the 'small' seat kit works well for me, many people would be fine with just some padding in a few spots in the pod. One thing we found out is that the seat belts we have, made primarily for production-based cars with more upright seating positions, won't work here. I looked at many 'formula' type harnesses but eventually settled on Schroth Hybrid 2, it has formula-style anti-sub straps but the lap belts are still adjustable. Even has pull-up adjusters which is a necessity in such tight confines. So the new belts are on their way. In the meantime the car is looking more complete every day.
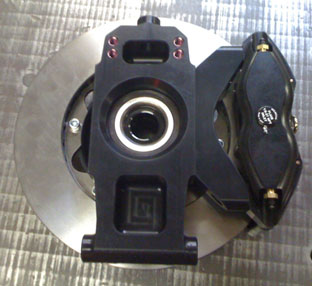
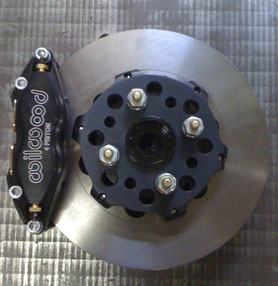
Couple floor mounts are still to be added. Then body mounts, minor tweaks and we're ready to go. One reason we've kind of been taking our time with this is that the weather has been lousy lately and forecast pretty much continues that way. Hopefully that'll change shortly. But in the meantime we've taken the opportunity to attend to other projects - for example we now have Wilwood Dynapro brake package available for the Atom. And much else is on the way, more on that later.
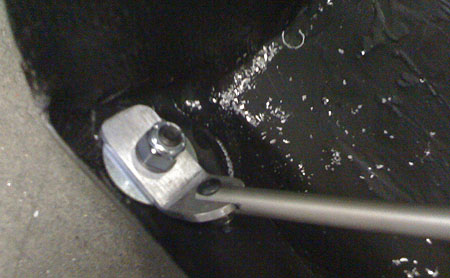
04/09/10 Got the new belts, installed them, put the floor back on. Which prompted me to reflect on the development process - some things are best done in CAD first, others are better after staring at physical parts and visualizing how to connect them. Case in point, the floor mounts. Actually the real structural mounts were designed a while ago (by similar process) but the parts that hang outside the frame still need to be supported. When I spun the model in CAD I just kept drawing a blank. Nothing looked particularly elegant. So we built the car, put the floor on and then I sat there and looked at it for a while. More than once. What I came up with is using aluminum tubes and brackets.
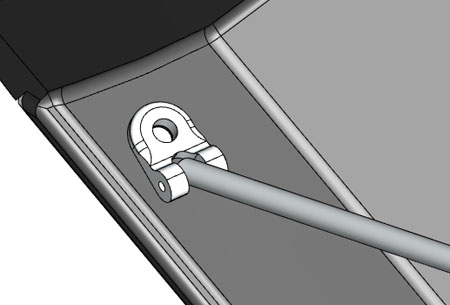
While this works for the prototype, I realized that each bracket would have to be bent to a different angle and the slots in tubes are a pain to make. So for production I made a version that can accommodate any angle without bending and eliminates cutting the slot... Yes, there is a plan to provide adjustability if needed (two, actually, the simpler of which is already tested on the proto).
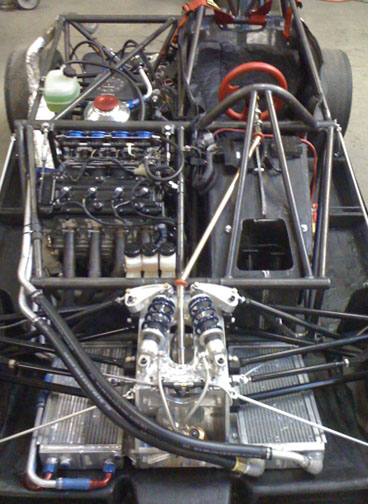
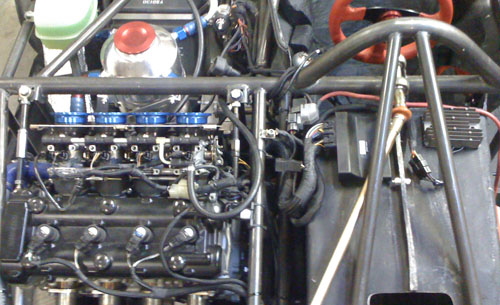
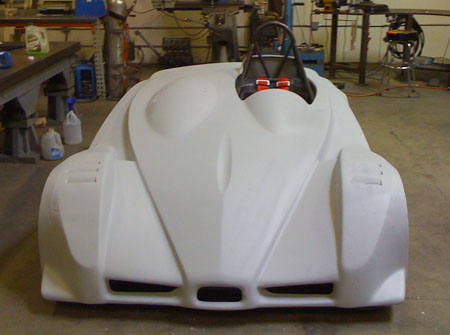
Keeping the physical prototype and the CAD model synchronized (along with the BOM in quickbooks) is an ongoing challenge but it's a necessary evil if we are to be able to reproduce these things in any quantity. It is also a way of ensuring that everything learned from the prototype is actually LEARNED :). Yes, plumbing still needs to be added to the model, mostly because the first prototype install was unacceptable and the second one still needs work. It's getting close though. 04/14/10 Now that the proto is essentially back together I routed the wiring. The Pilot Pod makes a handy place for the ECU, regulator, fuses and other odds and ends.
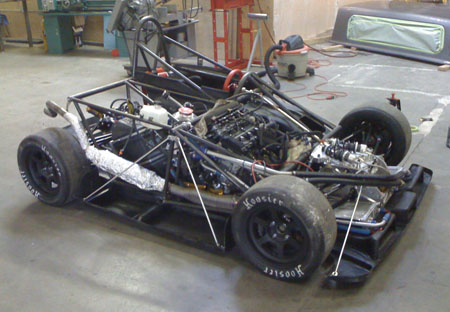
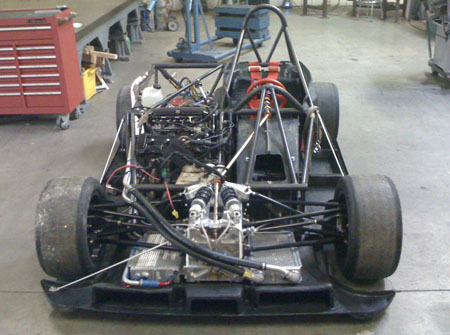
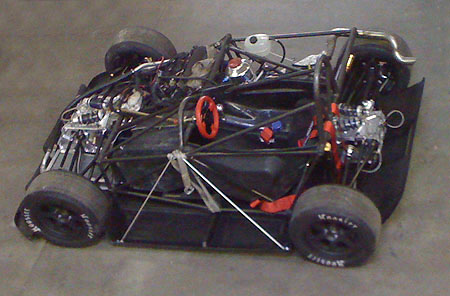
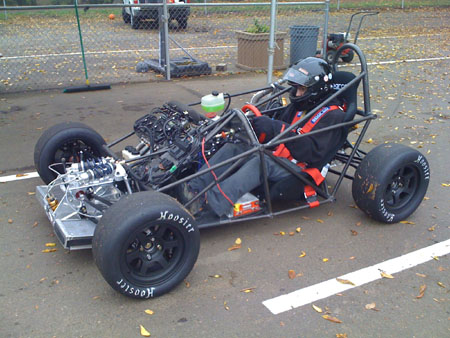
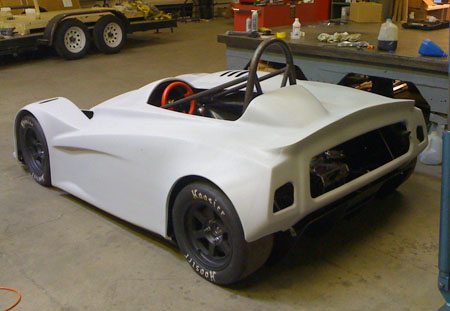
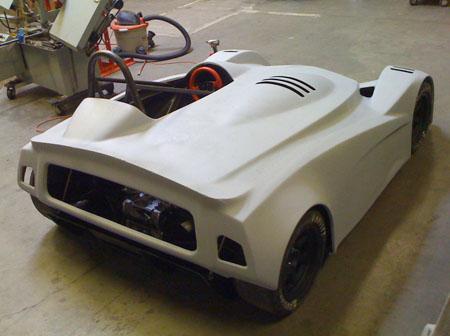
A nice benefit of the engine's proximity is that I can use the original bike harness without splicing into it. All I did was remove the unused wires and connectors and added some anti-abrasion shielding but other than that the harness is 'stock'. Could even use the stock dash from the literbikes (Hayabusa one is too big for the dp4). The car is drivable again. I fired it up and all seems well. Bodywork is being prepped for paint right now, we're thinking flat black with vinyl graphics for this one. We've come quite a ways in the last year and a half. This is what the dp4 looked like on September 21, 2008:
December 16, 2008:
April 29, 2009:
August 27, 2009:
October 22, 2009:
December 2, 2009:
April 6, 2010:
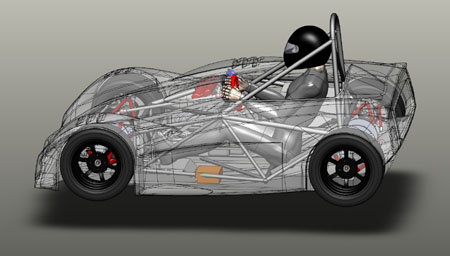
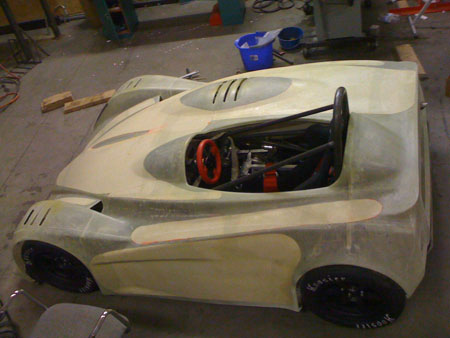
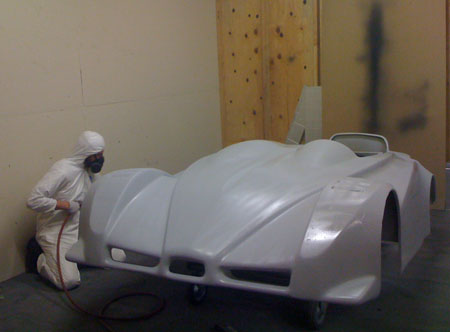
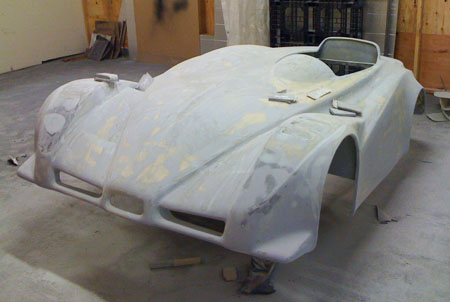
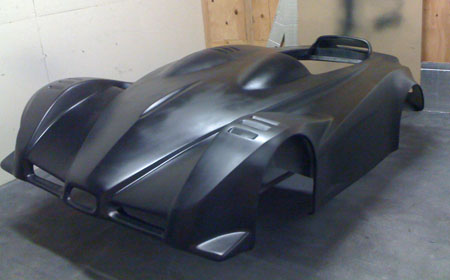
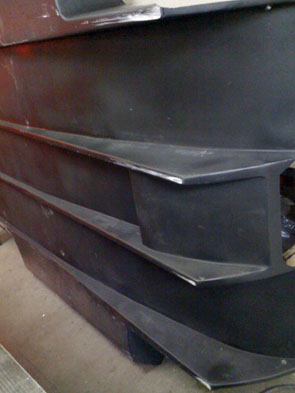
This isn't just a prototype - it's a fully documented design, with a sourced and costed multilevel BOM (including every bolt and washer) and tracked inventory. There are now 505 Solidworks parts, 159 assemblies and 162 dimensioned and toleranced drawing pages. For those wondering what it takes to live the dream, this should give you some idea :) A few things remain to be ironed out but I feel comfortable quoting customers 90 day delivery times for the dp4. Reflecting on what it took to get to this point - Tristan has basically fabricated the entire car, from building the frame and suspension arms to assembly, some fiberglass fabrication and now paint. M did purchasing, accounting, BOMs and inventory (she also organizes and runs our trackdays). I did the design, CAD work, vendor selection, expediting, management and whatever else needed to keep things going including a number of consulting projects, Atom upgrades, etc. I've seen companies with 10x the people and 20x the resources deliver a lot less in a similar timeframe. So by that measure we're doing quite well but many challenges remain. 04/25/10 For the last week Tristan has been doing prep on the body. In production the surface finish out of the mold will be much better but this one is requiring a lot of effort. It'll look very nice when done. Here is what it looked like with the first coat of high-fill primer:
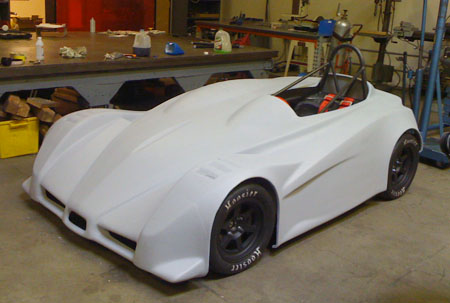
And this is what it looks like now, after much sanding and filling, ready for another primer coat:
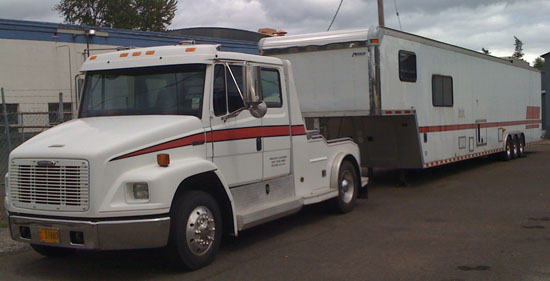
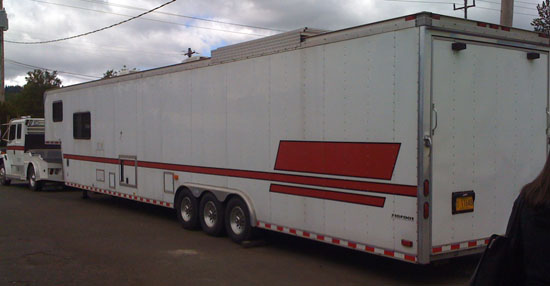
This is where the composites room really pays off since all the sanding really makes a mess. I'm eager to see what the car will look like painted. I think we'll go with satin black paint and vinyl decals, but it's not final yet. 05/04/10 The main focus of my efforts is making very small (but powerful) cars. So it is particularly unusual that I have some BIG news to announce. An opportunity came up to acquire a racecar transporter rig - and so we did. It all started when last thursday Tristan emailed me a link saying 'hey, you should get that!' - mostly in jest. And then he went camping for the weekend. Imagine his surprise when upon his return monday we all went to look it over (second time for M and I) and closed the deal on the spot. Some things just feel right and this was one of them.
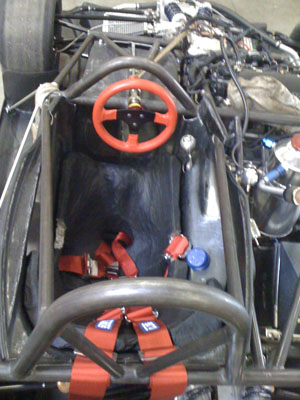
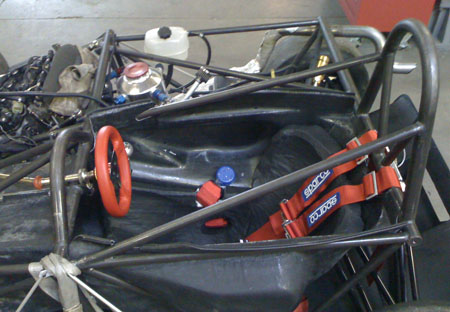
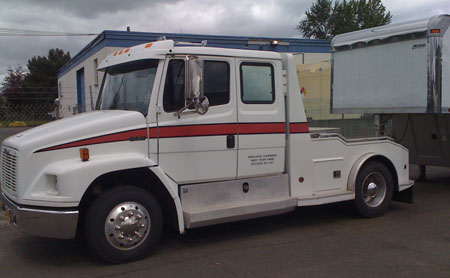
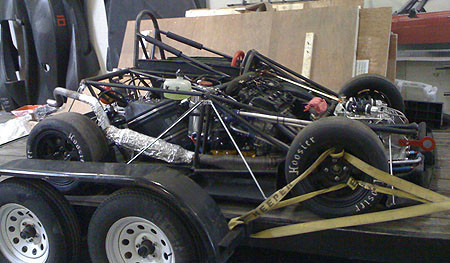
It's a Freightliner FL60 with a 48' trailer, complete with living quarters, stacker lift and a whole lot of other goodies. The truck itself weighs just under 13,000 lbs and has a 300hp, 800lb-ft Cummins turbodiesel (compare to dp1 at roughly 1,000 lbs, 460 hp and 250 lb-ft). Trackdays will be much more comfortable this year :) Most importantly this will enable us to travel to more racetracks so look for announcements on that front. Back to dp4. If the weather cooperates (which it has been reluctant to do lately) we have a kart track test scheduled on the 6th and PIR test on the 10th. In preparation for that we took care of some final details like installing the fire system, putting new switches on the dash and making a separate bead seat for M.
Yes, the bead seats are form-fitting :) With everything going on we haven't had a chance to fully finish out the bodywork so Tristan sprayed it with black primer. It's not the final state but will do for now.
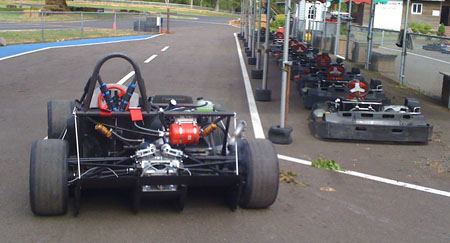
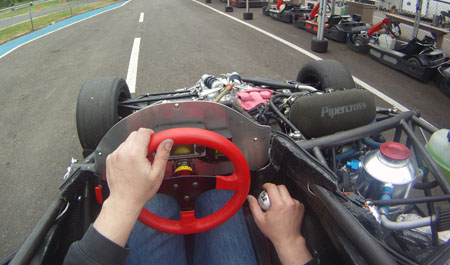
Once it dries we'll see how it looks on the car. For the moment, we'll use quarter-turn fasteners to retain the bodywork and hood pins as safety backup. The production solution will present itself in due time and will most likely be an evolution of this arrangement. Speaking of production, we're now in the process of building two customer cars. Things are moving. 05/07/10 Yesterday we finally got a break in both weather and schedule enough for a quick kart track test at Pat's Acres. With the floor on and its attendant 1" ground clearance it's a bit more of an effort to load the car on the trailer but we figured it out pretty quickly.
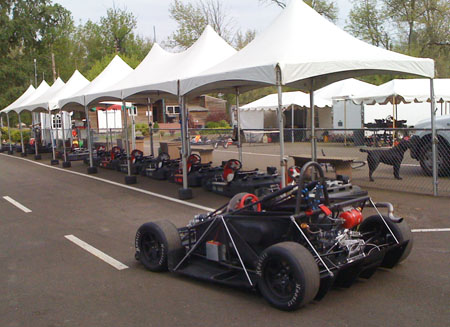
Once there, unloading went smoothly. The dp4 doesn't look TOO out of place among go-karts :)
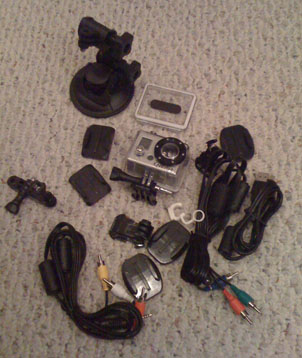
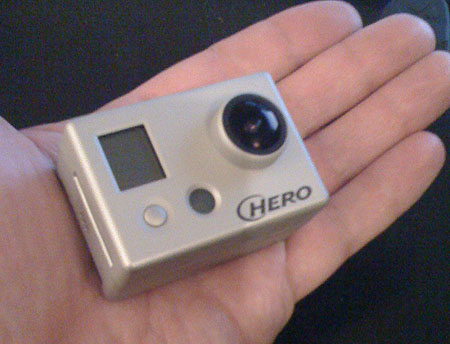
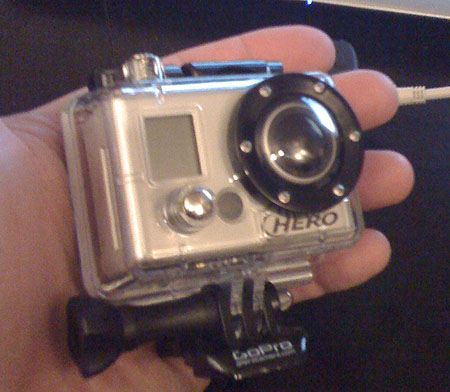
Both M and I got to try out our respective bead seats. They ROCK. I can actually relax in the car and let the seat support me instead of trying to wedge myself in there against g forces. Swapping the seats out is straightforward and the new belts work very well. It is in fact possible to put on and adjust the belts without outside assistance, which was one of the goals for this design. The test went well overall although it did show that we still have work to do on chain guides/adjusters. It seems that under power the chain does a wilder dance than I anticipated. Fortunately I have a contingency for it and parts are already made, we just need to install them and test the result. This outing was also a test of our new GoPro HD camera. This thing is cool. It's obvious that it was developed by someone who actually uses a camera for sports video and a good deal of thought went into both the camera and the overall package. You get a lot for the money - just a couple years ago I paid more than this just for a waterproof case for a point-and-shoot I used to have. The GoPro is a huge leap over everything I've used before both in quality of video/audio and in terms of convenience.
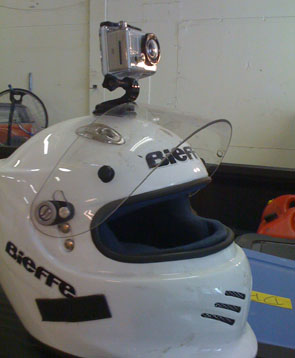
The camera comes with a variety of mounts which can be permanently attached to things and the camera itself can then be quickly moved by clipping it into whatever mount you choose. I decided to run it as helmet cam this time, using the 720p/60fps setting. it'll do 1080p also but at 30fps. It kind of works as an exterior shot camera too although aiming it is a bit of a guessing game, a steady hand is called for and the lens is a bit too wide-angle for faraway stuff. But in a pinch it does fine. Since my old editing software doesn't work with MP4 files I downloaded a trial version of Vegas Video from SONY - works pretty well. Of course I didn't spend any time on the edit other than to splice a few clips together so take it as such. The file is BIG (131M) since I wanted to keep the HD resolution. Click on the picture below to view, or better right-click and 'save as' to download.
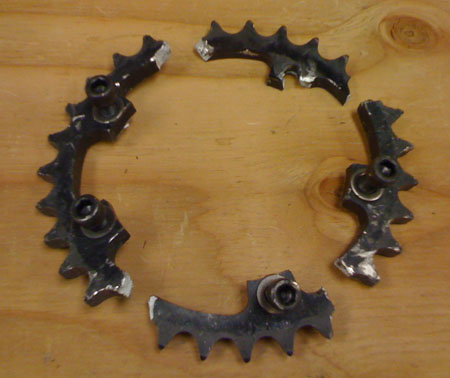
05/19/10 We've been doing some testing lately at Pat's acres. The weather has been weird - dry for a couple hours in the morning, even sunshine (like today) then downpour starting at 11 am or so. We get out to the track, run a couple laps in the dry and then the rain starts. It's just as well though, since we're presently learning a lot about the chain setup. On the original dp1 prototype I went a bit overkill with the chain containment so on this proto I've started at the simple end and am now working up. Up until today, under full power the chain would move around too much and start hitting things so we've tested a couple solutions with varying success. After yesterday's test we finally came up with a setup that we felt would take full power - and we were right! Today I was able to get on the throttle early and stay on it for most of the straight. The car is a BLAST :) But of course other challenges arose. The kart track has a series of bumps about 2/3 of the way down the straight. I was now hitting those at over 80mph, still in 1st, full power and edging up on the rev limiter. Even on a perfectly smooth track this is the most load that the chains would ever see. Now add the bumps and you'd be hard pressed to come up with a more severe test. The car handled it for 4 laps, then on the 5th one BANG! - followed by grinding noises. Peeking inside, the problem is obvious: a sprocket disintegrated.
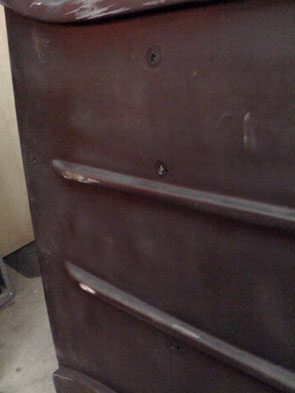
The sprockets are made of 7075 aluminum and hard-anodized. They lived just fine on the dp1 proto but then I never drove it full-throttle at this spot on the kart track and gearing was different anyway. Also, on closer examination, the way this particular sprocket was mounted probably contributed to the failure. Since higher-power versions of the dp4 are planned I've been meaning to get some 4340 steel sprockets made but it hadn't been a very high priority. It is now. While we wait for the steel sprockets to be made I've come up with a different mounting method that should let the replacement aluminum one survive for a while so the testing can continue. Other things we're finding is where the floor rubs. Have a solution in the works for that too, in the form of rub strips which just arrived today. Will mount them tomorrows.
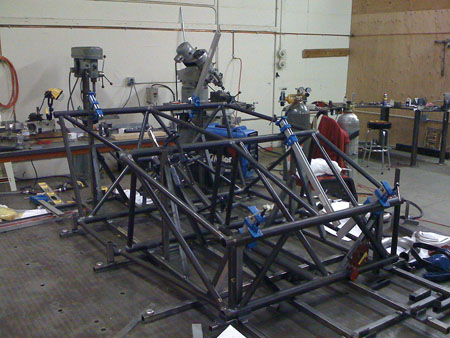
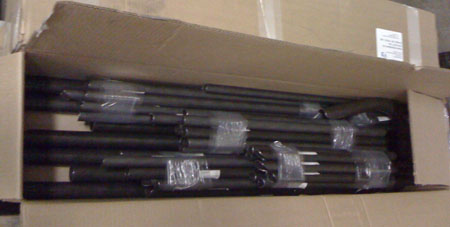
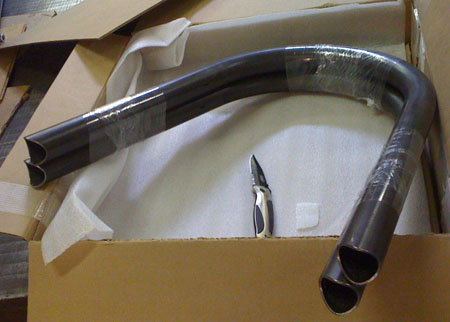
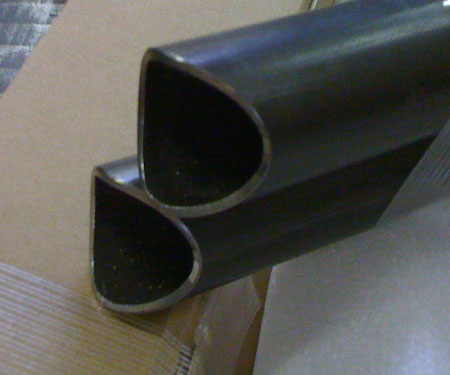
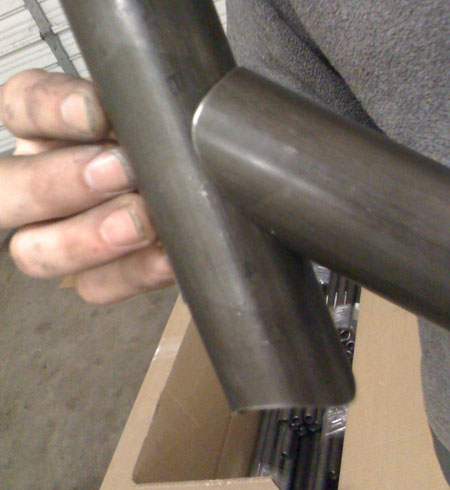
In other news, we have received two CNC-cut frame tubing kits from VR3 Engineering. These are cut on a proprietary CNC mill rather than laser and the cuts are much cleaner and ready to weld. They also fit great.
Tristan is actually looking forward to welding these frames. After doing the proto dp4 frame manually on the Bridgeport he proclaimed "I'm never doing one of these again" - so this is definitely a step in the positive direction. Don at VR3 is great to deal with and the response is prompt, as is the work. We'll see how well it all goes together...
|