|
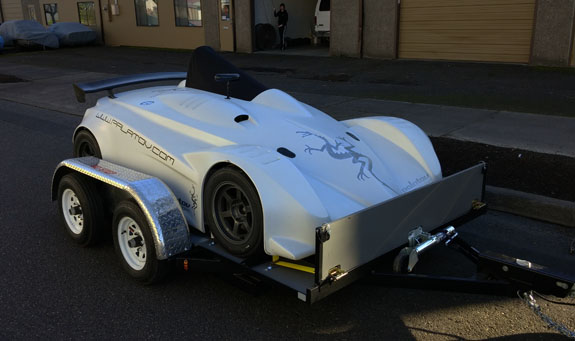
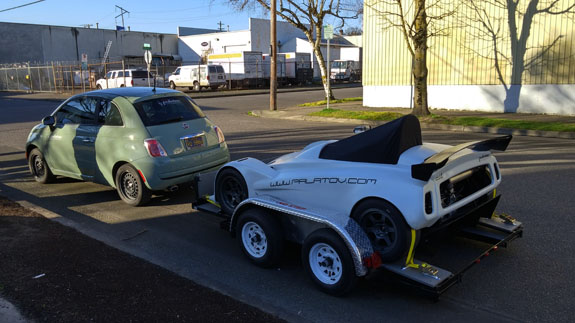
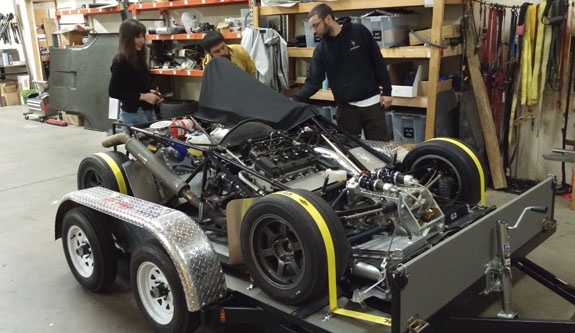
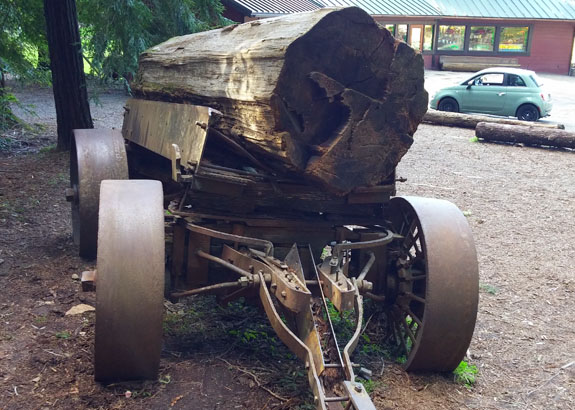
03/04/15 There's theory and there's practice. Sometimes they don't agree. But when they do, it's rather gratifying. In this case, the theory is that a very light racecar on a very light trailer can be towed by pretty much any vehicle. To prove the point, we just happen to have one of the smallest cars available in this country and the fourth toughest road to tow. We also need to get Pearl down to Monterey to reside with Jonathan, where he will continue to demonstrate what the car is really capable of. We have one day to get there and 740 miles to cover. We've tested it a few days earlier with M towing to ORP and back. But this is kicking it up a few notches - mountain passes, distance, and variable weather.
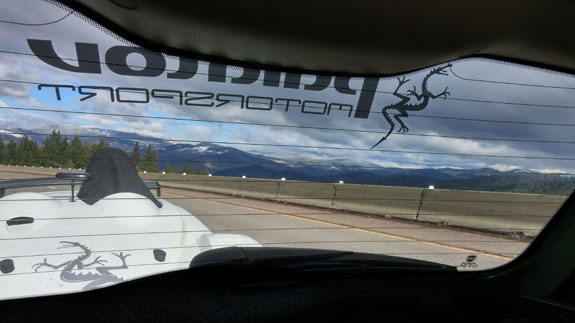
We depart 9:30 am, about an hour later than intended. There is a roughly 11-12 hour drive ahead. The weather in Portland is great and generally favorable along the route. This is the first time driving this setup for me, other than a slow circle around the block earlier. The most remarkable thing is that you can't really tell the trailer is there other than by looking in the mirror. I expect in the mountains that will be different. A few hours later I find out. The answer - yes, you can notice the difference. But no, it's not a big deal. The Fiat motors happily up very long 6% grades at 60 mph without straining in 3rd gear (about 4.5K rpm out of 6.5K). It coasts down similar slopes at a steady 65 mph in fourth without touching the brakes. This is actually more relaxed and comfortable than towing our 20' trailer with the van. And we get 23 mpg in the mountains, 25-ish on the flats where 75 mph is rock steady. Wind gusts don't have any effect.
A resounding success for the setup. I really should have done this years ago, but better late than never. The drive is uneventful but lengthy. With a 10-gallon tank we stop for gas every 220-240 miles, topping up with around 9 gallons each time. We arrive around 10 pm. Next day is spent updating two customer D2s that are in the Bay area. We do this at HSE Racing, in Sunnyvale, who are now our authorized service facility for northern California.
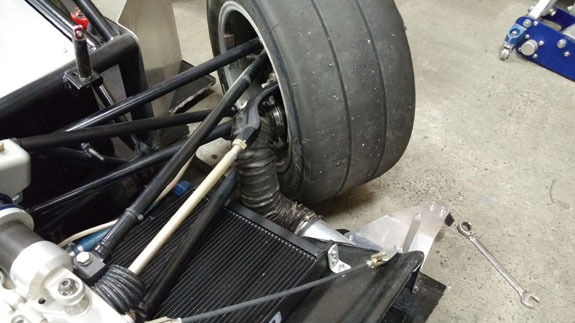
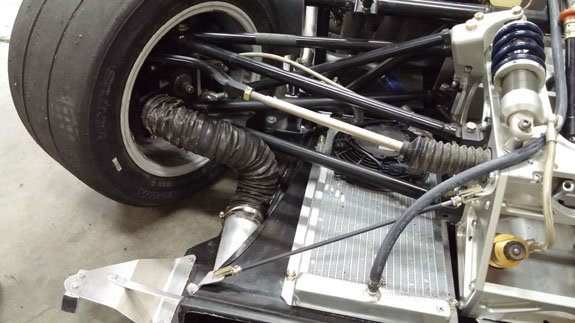
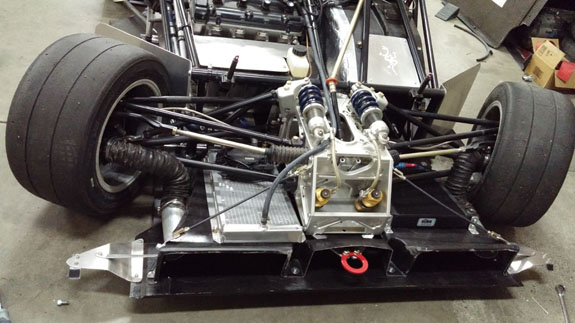
The updates have mostly to do with the electronic dash and some other miscellaneous bits. Speaking of updates, Pearl has had a number of them before traveling down south. Everything from suspension to cooling system to brake ducts.
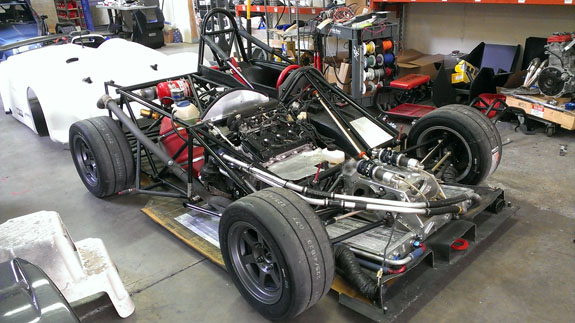
Quite a change from just a couple months ago:
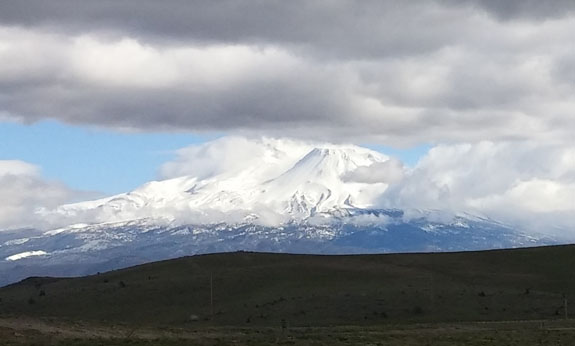
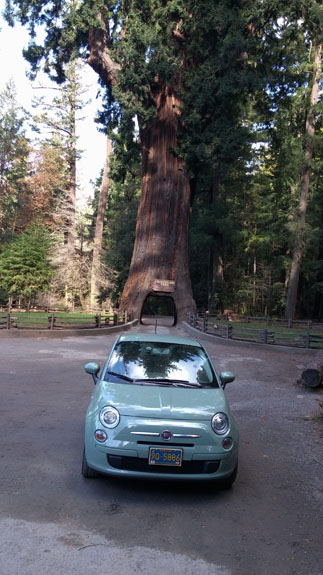
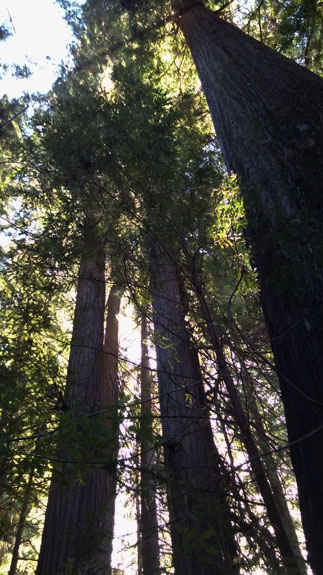
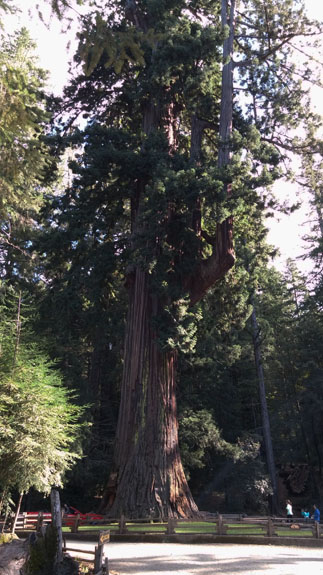
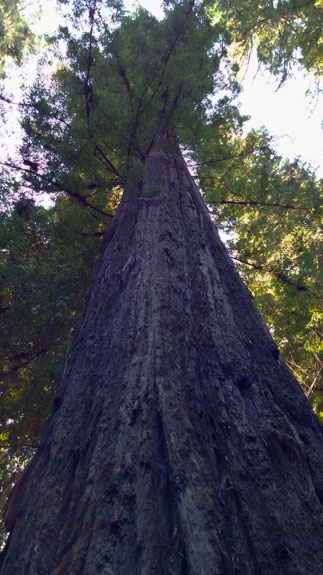
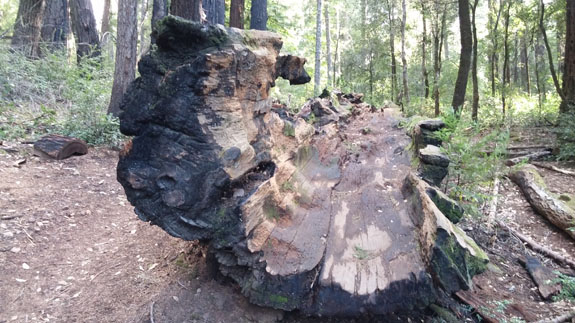
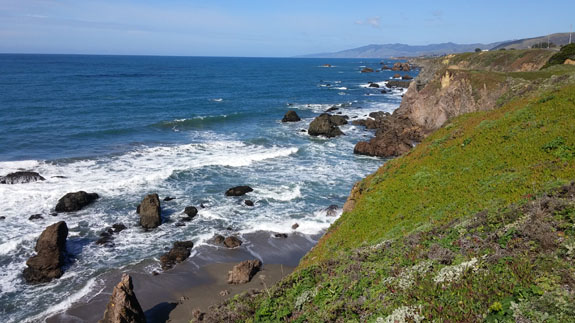
Then there is the trip back up to Portland. It's going to take a full day no matter what, so M and I decide to take the coast. It does add 4 hours to the 11-hour travel time, but it's much more interesting. Basically re-tracing the last two thirds of my ride up from California on the 900 some twelve years ago, even stopping by the touristy but still amazing drive-through tree.
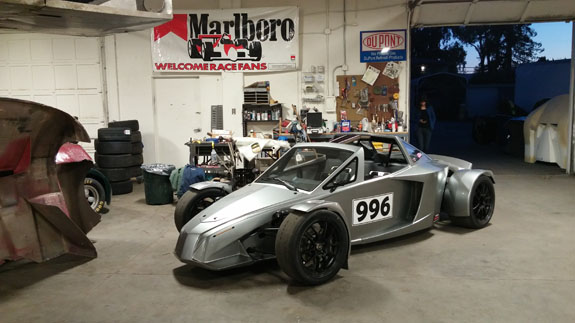
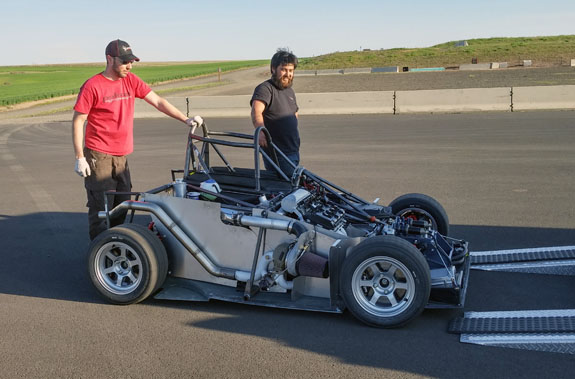
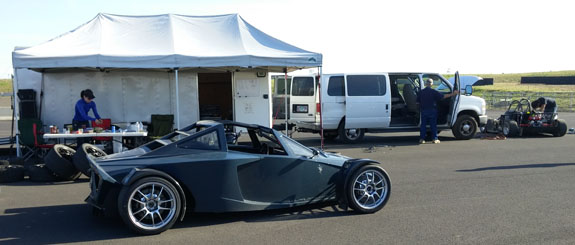
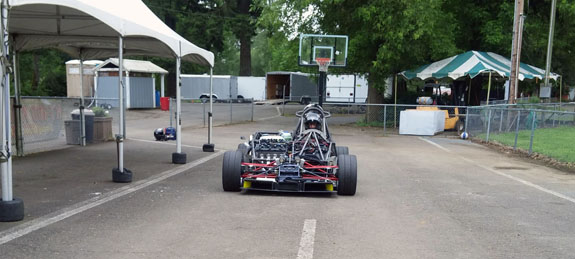
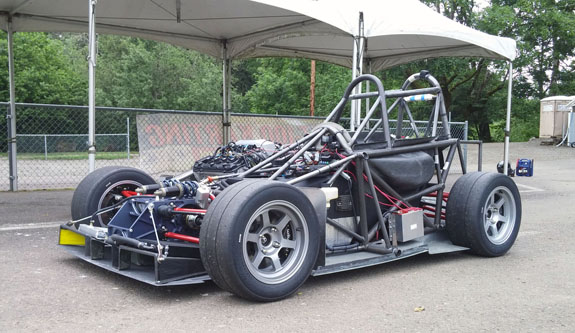
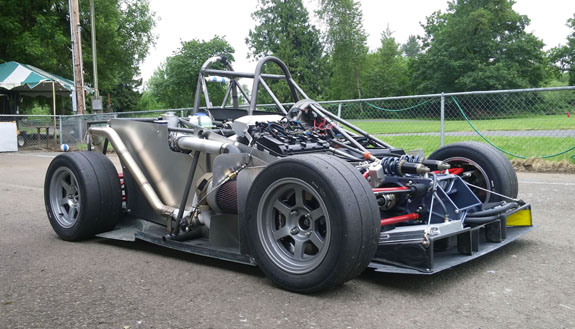
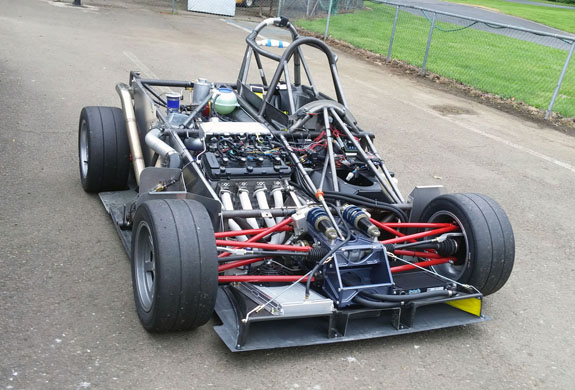
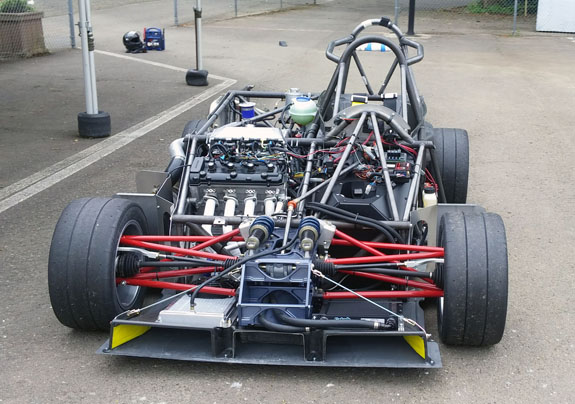
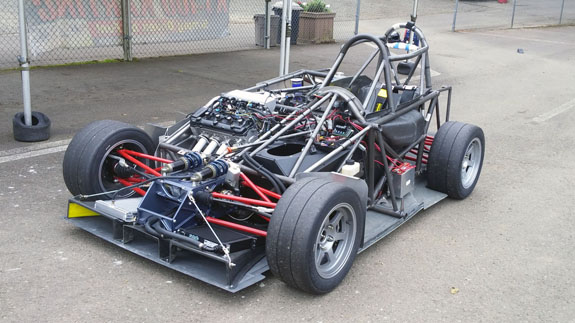
Finally, getting home at nearly 1am, this trip is done. Many more to come. Soon. 05/04/15 Finally the first day out for the turbo D4. The customer flew out for this and a week ago we felt everything was coming together rather well. First start went smoothly enough although it did seem to run on the rich side. Heatshielding and other systems took a bit longer than hoped for but we got it done. The first track outing would be without bodywork but the floor was fitted. Gettng to ORP the weather is perfect and we unload, then do a series of final checks.
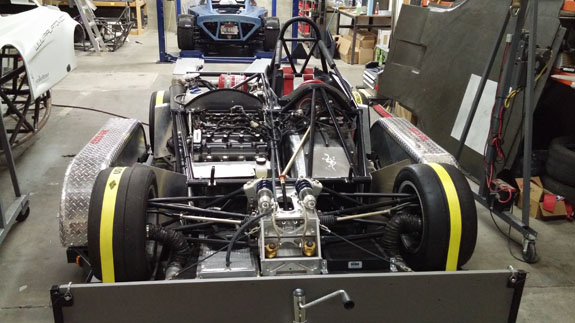
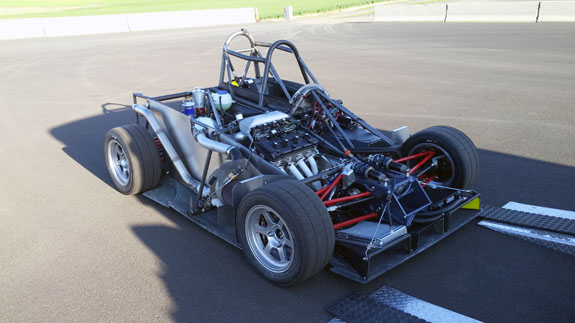
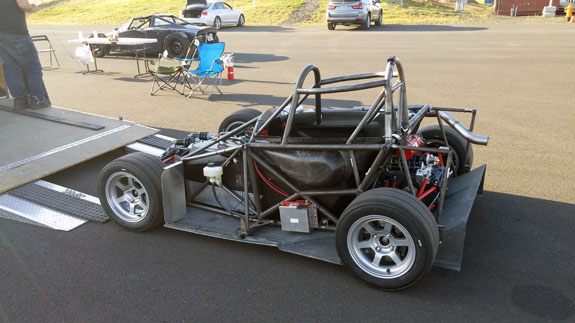
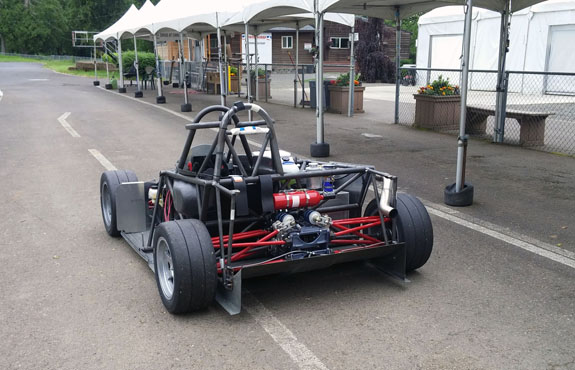
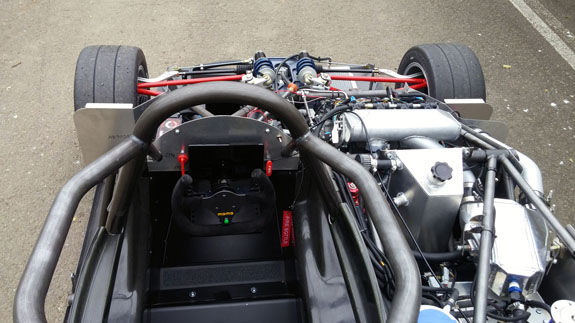
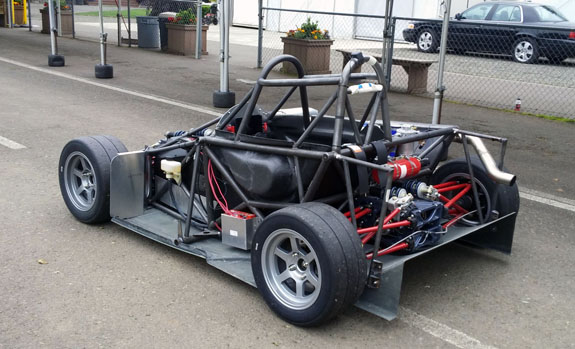
We go to fire it up and that's when things start to go less smoothly. The engine runs but very rough and rich. We go through a number of diagnostic steps but nothing seems to help. Something changed from when the engine was run on the dyno (which was pretty much perfect) and when it was actually installed in the car. The main suspect is the wiring but we check out the vacuum lines, MAP sensor and other things too. At some point I decide that rough or not, I'll at least try it out in the paddock. Here's the video. On the plus side, the chassis feels awesome and I don't say it lightly :) The D4 with AWD is a really symbiotic combination. It is the reason for the side-engine layout, the design was basically created around the AWD system. This would be the ultimate autocrosser - in a parking lot you really can't ask it anything it won't do. The engine - well, witnessing the dyno pulls I know what it's capable of but it wasn't doing much of that now. So we spent a lot of time trying to diagnose what is wrong and for a brief moment we did get it to cooperate. Enough for a lap wth the customer at the wheel, then it regressed into not running. Fortunately we had our ever-faithful demo D2 along to provide track time (and blistering pace with Jonathan at the wheel, more on that on Pikes Peak blog).
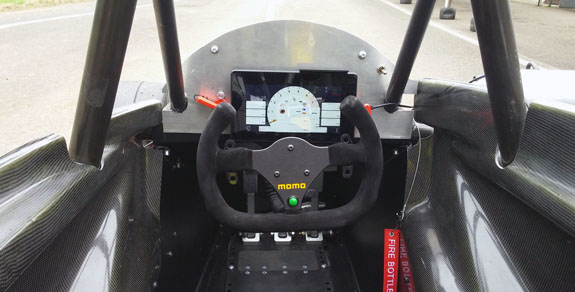
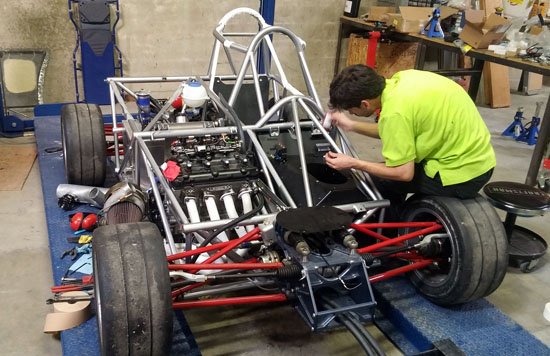
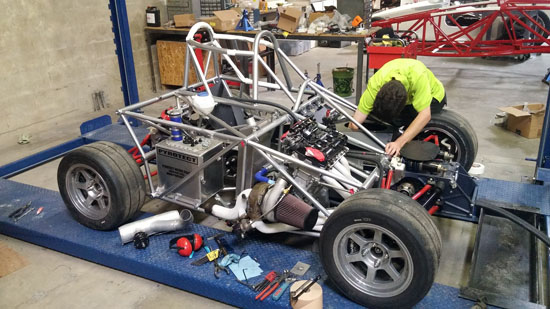
The weekend done, we are left with an urgent puzzle to solve. We followed a couple promising leads today but no solution yet. This reminds me of my past electronics days. Sometimes things just refuse to work and you know it's a simple fix, a half-minute thing (the 'make-it-work' bit) but it can take a frustratingly long time to find. We'll get it figured out, I have no doubt. In the meantime the virtual version of the car is nearly ready for release. Here is a video of the rFactor2 D4 on a beta version of ORP. 05/20/15 To get the engine figured out I took the car up to Seattle to George Dean who did the dyno tuning. Sure enough, he fixed the issue in about 20 minutes. When we installed the Geartronics paddle shifter we replaced the standard gear position sensor with Geartronics-supplied one. The new sensor has a connection for the ECU but that wasn't hooked up so the ECU was thinking the car is in neutral. The neutral map wasn't updated outside idle and low rpm. Our injectors are almost double the flow of stock and fuel pressure is 55psi vs 42 stock, so it's no wonder anything off-idle would run super rich and foul the plugs almost instantly. George added a resistor to make ECU think it's in 5th gear and all is well now - that was the simple fix I expected. Six hours on the road roundtrip but sometimes that's what it takes. Yes, I could (should?) have gone through everything wire by wire but just way too much on my plate to pull the harness out and focus on the meticulous task. Now things can move forward. Before we take the car apart for paint and powdercoat, I wanted to run it a bit to make sure all the systems are working properly. Scheduling a test took a few days but finally I was able to use Pat's Acres kart track for a couple hours this morning.
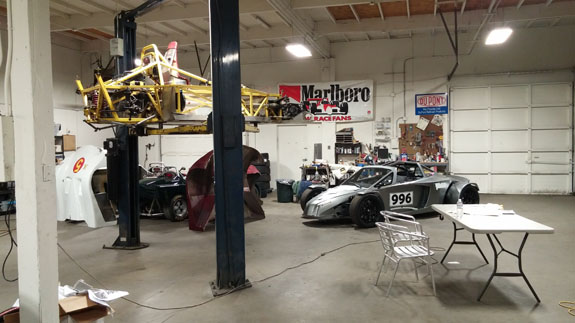
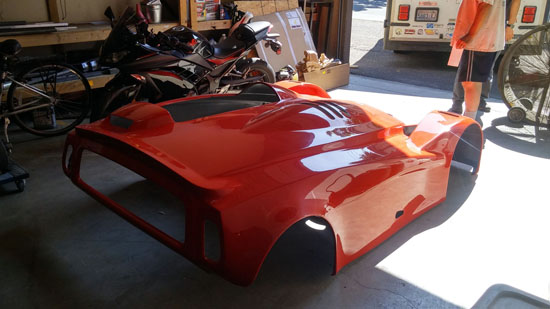
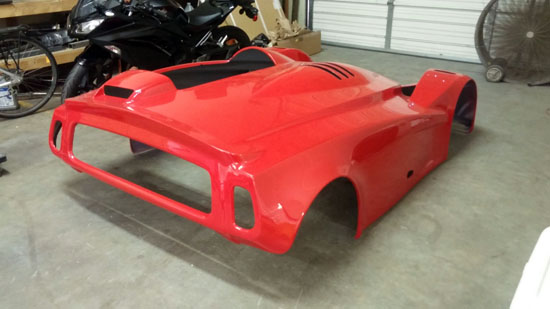
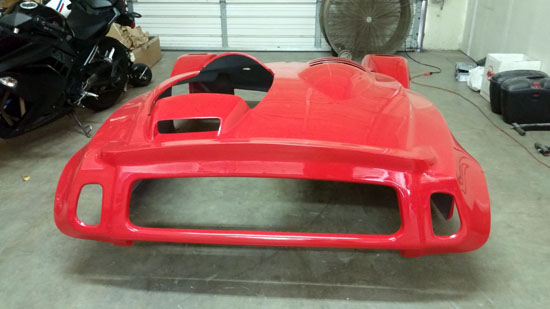
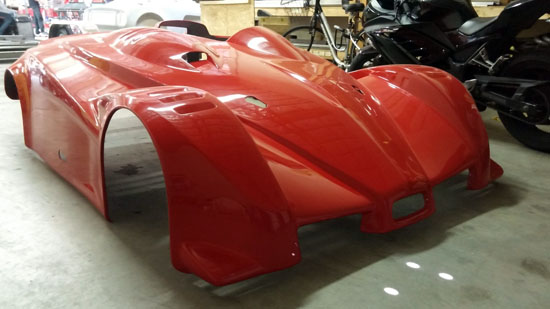
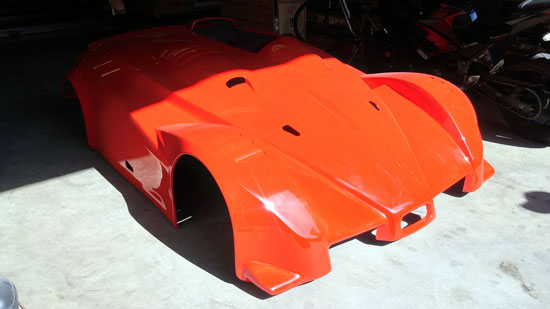
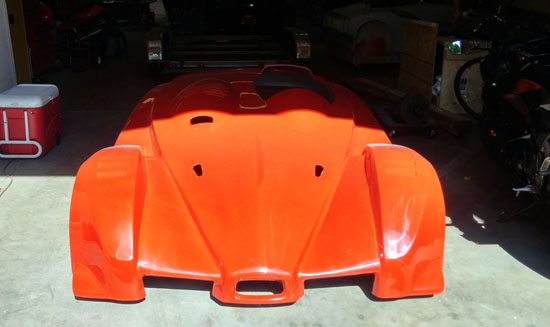
The car is FUN! :) AWD is working great and even with cold tires manages to put all the power down. You can feel it scrambling for traction but it gets the job done. Throttle can be applied crazy early in a corner and the car just tracks out. Lift-throttle can be used to rotate it to get pointed in a direction and then just nail it. This is also the first time on this bumpy track with the new patent-pending bellcranks and the car is totally planted. You can see some of that in the video. This is definitely my favorite D4 configuration - AWD and turbo. I need to build one for myself now :) But before that, this car will get taken apart, a couple details finished up, powdercoated, painted and then put back together and finally delivered to a very patient customer. Unfortunately no onboard footage this time - we really need to get a couple new GoPros, the old ones are first generation, have seen a lot of wear and tear and are just not working well anymore. In another bit of D4 news, the rFactor2 mod is now officially released - check it out. 07/08/15 Upon the return from our second Pikes Peak class win (in as many tries), we hit the ground running. Lots of projects await. Completion of the turbo D4 is one of them. Building Sector111 Drakan cars and continuing work on the Stiletto are others. The frame is back from powdercoat, it looks good in silver! So the assembly is now coming right along.
And yes that's a Drakan frame in the background. The bodywork is also back from paint. It's a Ford Race Red color, per customer request. I took some pictures in and out of the sun.
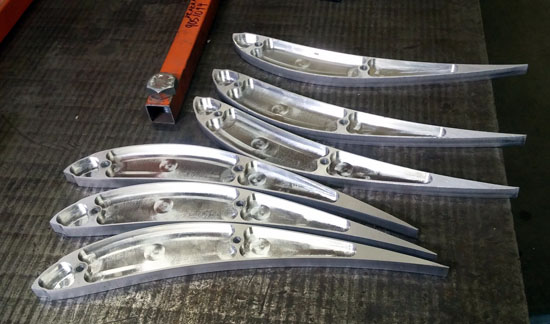
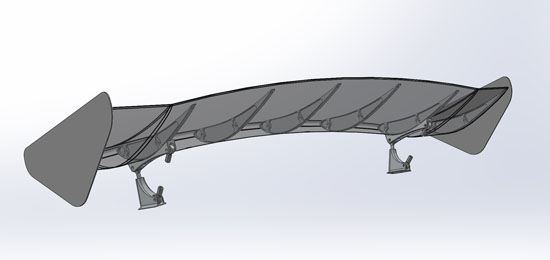
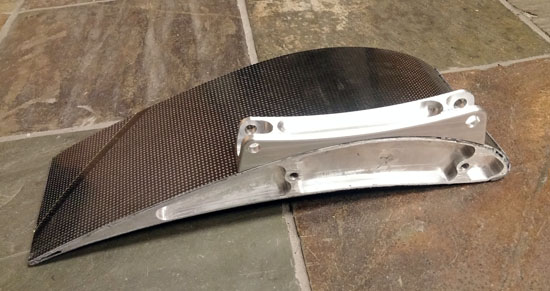
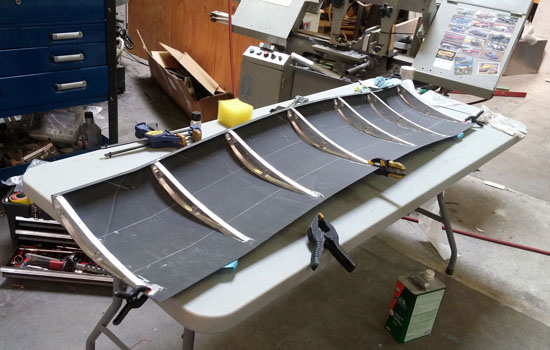
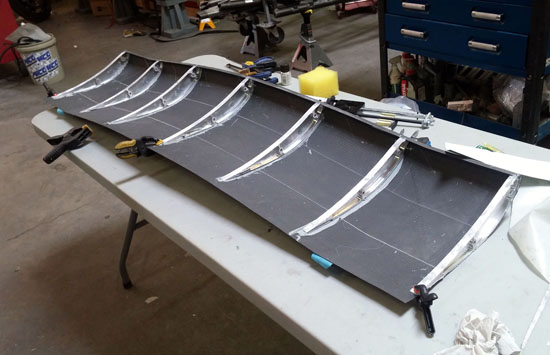
In the process of getting the Pikes Peak car ready we learned a few things about wing construction, so I'm now applying this to making a new wing for the D4. The key change being the use of aluminum ribs, with a layer of epoxy adhesive electrically isolating them from the carbon skins while providing a solid bond. A few experiments with different adhesives were in order, primarily to figure out the best work time and mixing/application procedures. First, a batch of ribs are made on the CNC. They end up weighing 0.2 lbs each so five of them make a pound. The airfoil itself is an Eppler profile originally developed for high performance gliders. I chose it because we operate in its design R number range. CFD in Solidworks has already confirmed that it works and Pikes Peak testing provided a reality check. Jonathan could tell the difference even with minor adjustments and everything worked as expected. So now we just have to get the construction process refined.
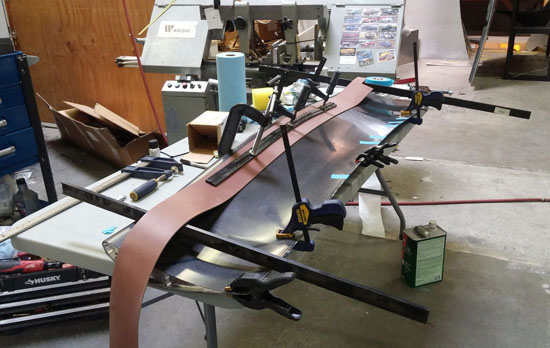
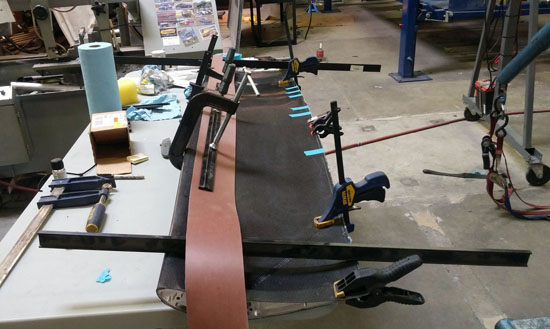
Next I tried a fairly fast adhesive on a test piece but it did not give nearly enough work time so the piece ended up misaligned and rough.
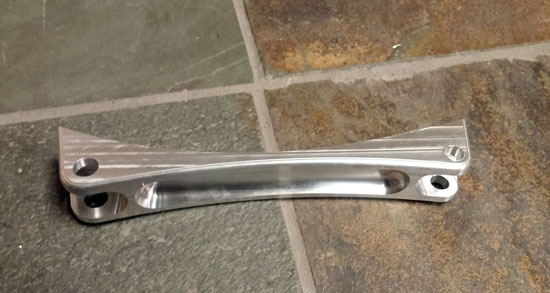
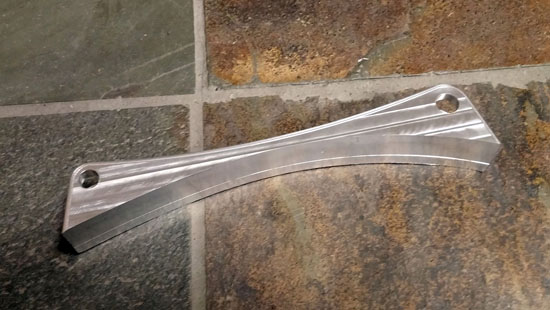
Another test with a slower compound produced good results and after letting it cure overnight, I could not pry the test piece apart without physically breaking things. So the bond is good. Next step is finishing the design of the billet mounts. We've used fabricated ones previously but I wanted something nicer and more production-oriented. I didn't go with a 'swan neck' design because in this applicaton it wouldn't have produced any meaningful gains but would have been a huge pain to make. So just a nice, manufacturable bottom mount setup with some adjustability for angle. Vertical location was already checked in CFD and tested in real life (including our 2012 Pikes Peak effort).
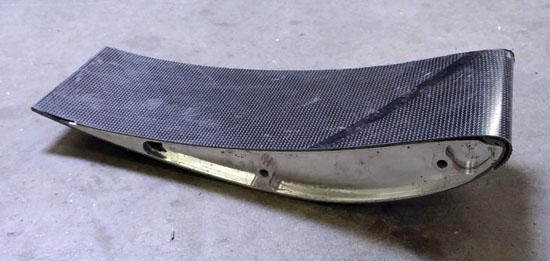
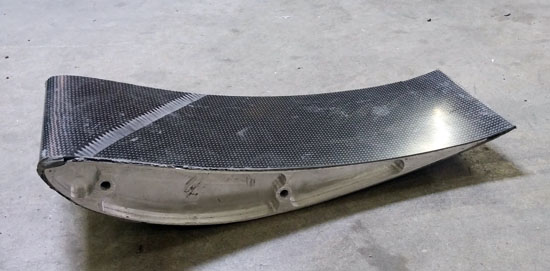
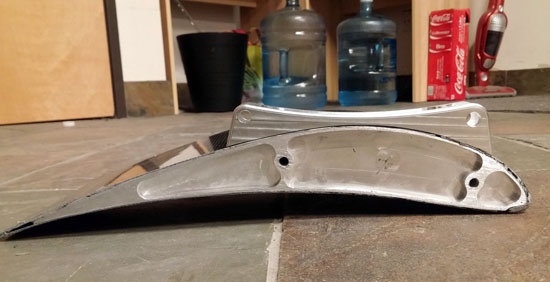
The wing side of the mount is bonded under a rib and then a pair of rivets are used as mechanical backup. The final step in the design was to finalize rib locations that would be compatible with mount locations on the bodywork and the underlying frame hardpoints. While the wing attaches to the body shell for convenience, loads from it are supported by the frame underneath. To make the wing, the ribs are first bonded into the lower skin at predetermined locations. After the adhesive sets, the upper skin is bonded on. The straight pieces you see in the last couple pictures allow making sure there is no twist in the wing as it cures.
The holes in the ribs allow the wing to 'breathe' and not build up internal pressure when sitting in the hot sun. Tomorrow after it is fully cured, there will be some trimming and sanding, then we'll be ready to attach the mounts. I still have to machine the bodywork side of the mounts. Will write the program tonight. Really looking forward to seeing this car completed! This is the version I want to build for myself at some point, when I get the time. Oh and for those wanting to try out a beta of ORP in rFactor2, it can be downloaded here. Site Sponsors and Links:
|