|
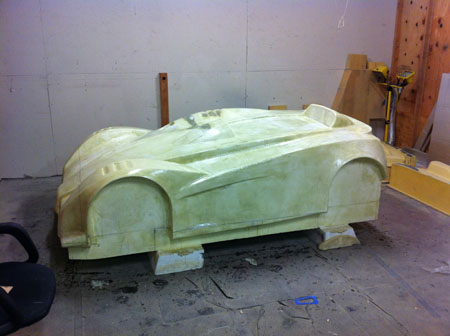
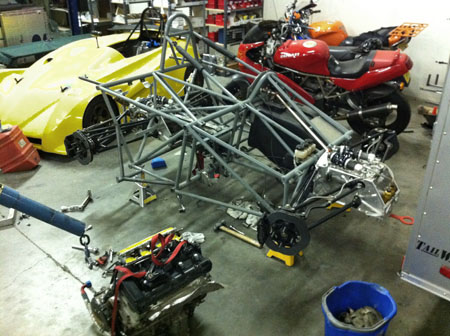
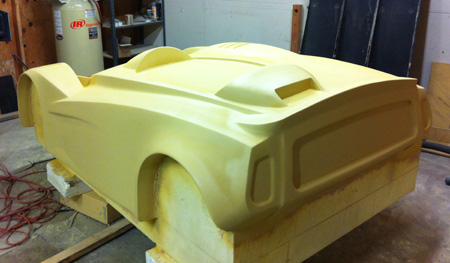
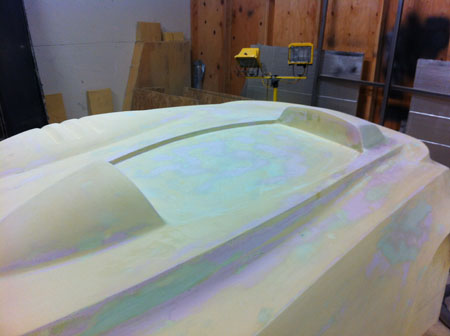
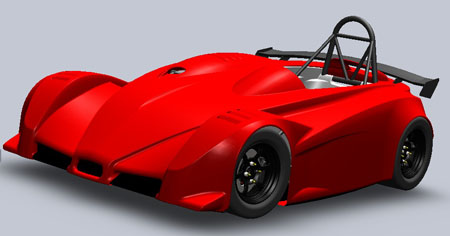
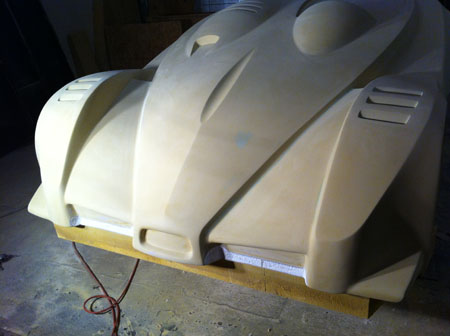
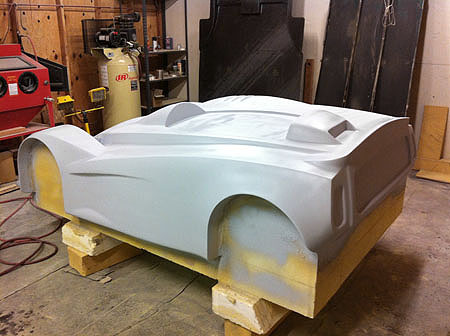
10/23/11 With all the activity on the D1, D2 and Stiletto one might think the D4 is on the back burner. Not so. In fact there are several major things going on. Gaizka, our 'virtual intern' in Spain, has been hard at work running CFD on various configurations of floors, wings and bodywork. We're learning a lot from this. Most of it will not be posted here but one thing I will share is that the 'hump' behind the driver causes more problems than it solves. Turning it into an 'air funnel' helps but not enough. I still want to retain it for styling but it has become clear that the hump needs to be made smaller (well, we basically knew it from earlier simulations but here it is again). I continue to be impressed by how much the flow on top and behind the car affects the function of the underbody and how a seemingly small change can produce a massive difference in overall performance. This has been confirmed with the real-life testing so far. For example, while the rear wing only produces about 50 lbs downforce at 100mph by itself, it has a night-and-day effect on the car overall and is quite sensitive to placement. Somewhat coincidentally I've been working on prepping the new plug (it's nice to do some hands-on manual labor after sitting at the computer all day and I often switch to it for the last couple hours of the evening). I had actually gotten as far as putting bondo on the hump but it was still very open to modification. So that's what I did - it was encouragingly easy and validated a few experiments in the process. And I think it looks better, too, now that I see it.
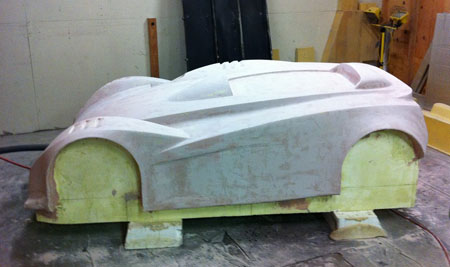
There is a whole lot of sanding ahead but so far the new approach seems to be working quite well. One of our goals is to become very efficient at doing custom composites to support our various projects and this is getting us quite a ways down that road. The CFD work continues and while some initial guesses have been confirmed there have been a few surprises as well. So far it seems the differences between D4 and D1 are all in D1's advantage, i.e. if we were to change D4 architecture to improve it aerodynamically it would be more like D1, so I'm really looking forward to the development on that car (for many reasons :). I now have a set of strain gages and amplifiers to eventually correlate the theoretical testing with real life. In the near term Pearl will be taken apart, updated, powdercoated, refitted with a new floor and then instrumented with the strain gages. Still hoping to do some testing later this year. We'll see. M has been quite successful at restoring her old bike so maybe she'll have to take the lead on Pearl's updates. It is her car, afterall. 11/21/11 The next big push will be the three D2s that have been pre-ordered. That will happen when the first tubing kit arrives a couple of weeks from now. In the meantime we've been busy getting ready for it, which means moving other projects along. The D1 is all taken apart, finish welding is complete, all the tabs and brackets are in place and parts are ready to go out for paint/anodize. We'll combine them with the Pearl parts in a batch so Pearl disassembly is nearing completion as well. M did a lot of the initial work and now Tristan is finishing up big items like pulling the engine and suspension boxes.
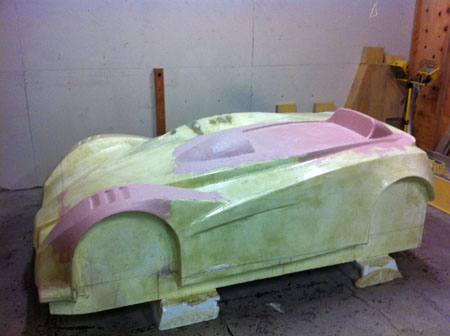
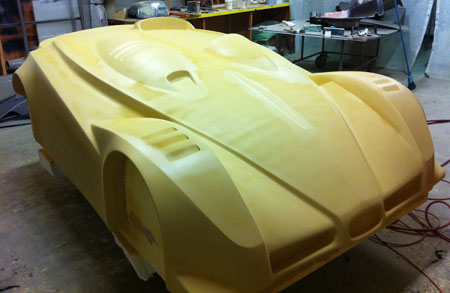
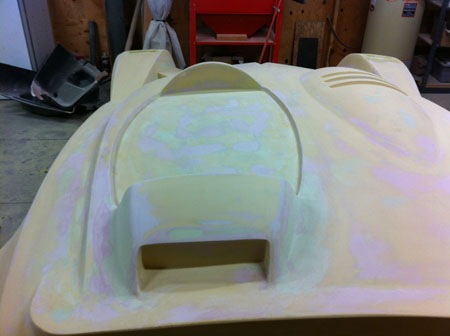
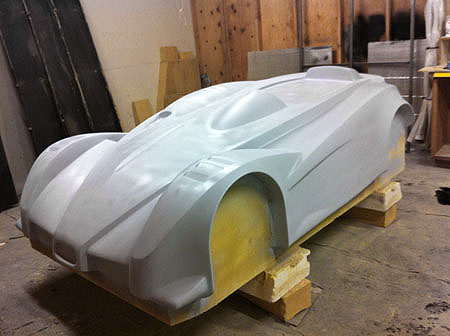
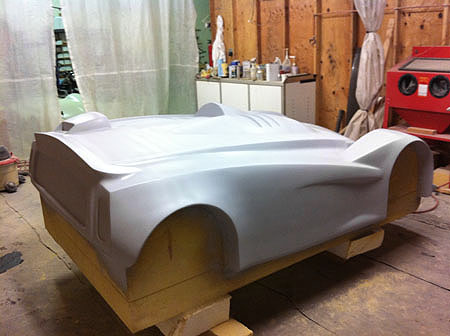
The Stiletto page will see some updates shortly as well. Another item that has been moving along is the new D4 plug. I only spend a couple hours a day on it at most (many days less) but progress is being made. Today was a big step of spraying the first coat of primer, after all the bondo and sanding. After a while the multicolored bondo starts acting like camouflage of sorts and it's a little hard to see the real surfaces and lines. The primer brings them right out and makes it easy to see what areas still need work.
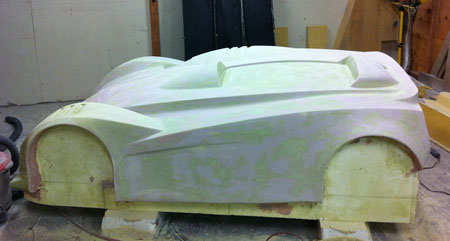
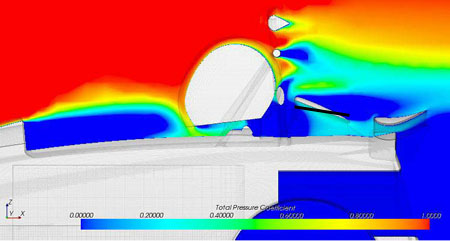
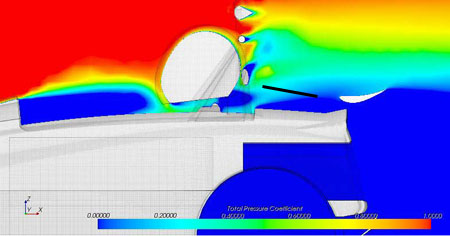
At this point I figure I'm only a little more than half done with the prep. The styling updates are subtle but I'm pleased with how they are turning out. All future D4 builds will use the newer bodywork and we'll update the existing cars as well. 11/27/11 Gaizka is now done with the CFD project and impressively he has been able to achieve, at least in simulation, a 50% improvement in downforce over the baseline D4 configuration (or some 200% over the no-wing version that ran at Laguna a while back!). I'm impressed with his approach and analysis and it correlates well with what we've seen so far in testing. Much more testing will be done next season when we install the strain gages to actually measure the downforce being produced. In the meantime, one of the main points learned from the simulations is that airflow on top has a HUGE effect on the function of the underbody. The addition of the rear wing is very significant and anything that can be done to help it function is a good thing. The original 'hump' behind the driver pretty much prevented the left side of the wing from working. This has been pointed to in an earlier CFD study and again confirmed in this one. I have already changed the shape of the 'hump' once - the pictures below show the airflow with and without. The black line in both pictures indicates the new profile which I'm hoping will be a significant improvement.
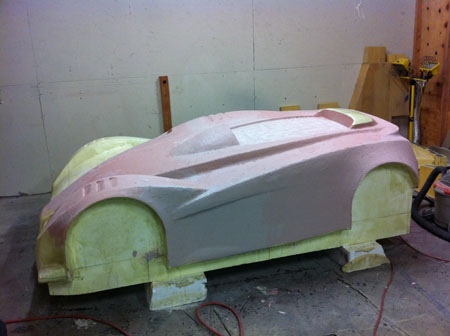
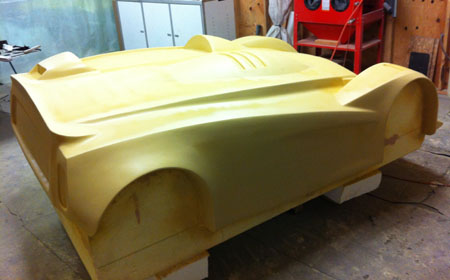
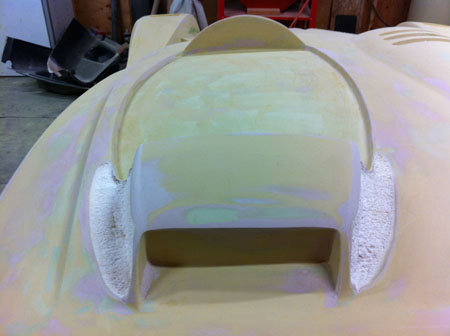
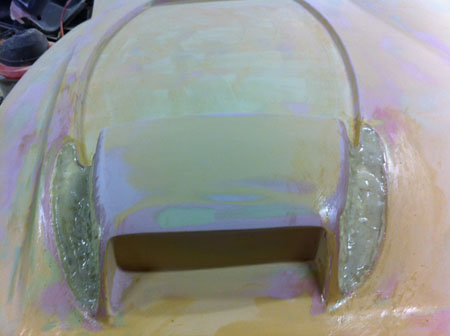
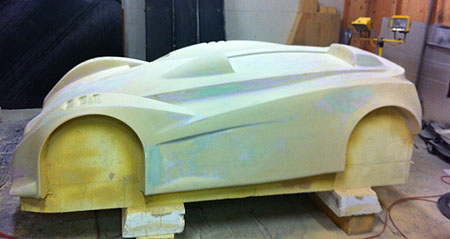
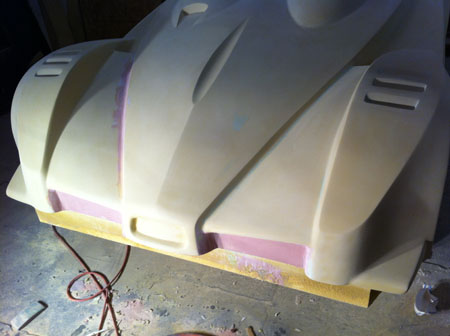
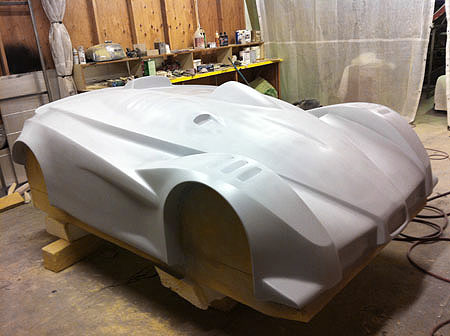
Additional studies showed that the wake of the rollbar and basically any object ahead of the wing has a big impact on its performance and thereby on the performance of the underbody. So the more I stared at the modified hump the more its width bothered me. I think with the right shape it can be better than not having anything behind the driver, but the shape I had wasn't right. So, as painful as it might be to take a saw to a nicely sanded plug, that is exactly what I did. You can see how much material was cut away in the pictures below (it is worth noting that the D1 is already shaped like this and a number of changes I'd want to make to this plug which are not practical at this point are already in place on the D1 bodywork).
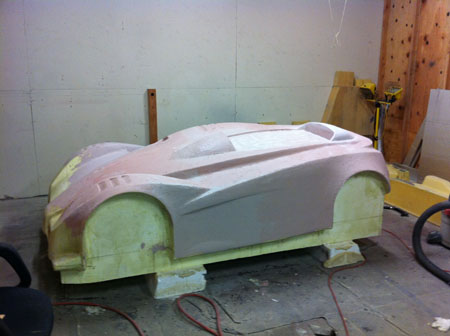
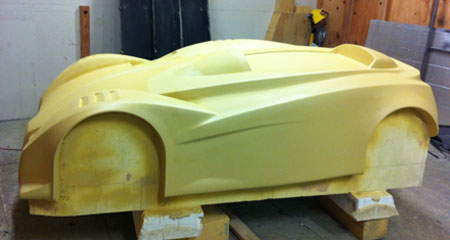
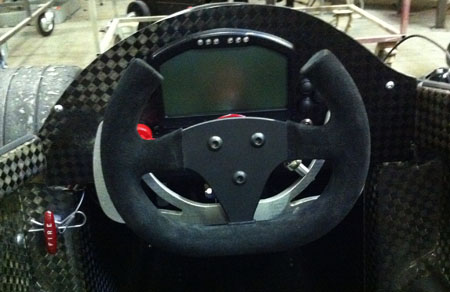
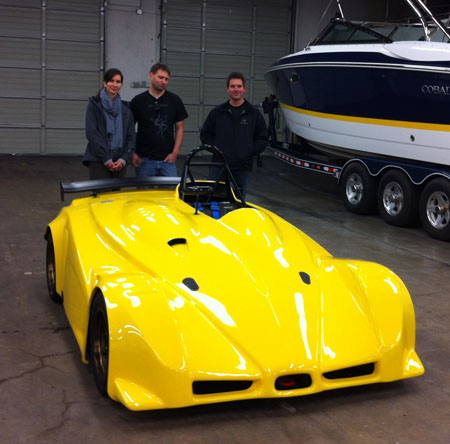
The new shape will fit directly behind the rollbar and serve to straighten airflow instead of disturbing it. Or so the theory goes. At any rate, a couple more hours of sanding (on top of about 20 since the last post) and we'll be ready for another coat of primer. Since I spent a bit of time assisting M in the kitchen recently she agreed to work alongside me in the composites room on a Sunday and fabricated a carbon dash for a D4, while I was sanding and bondoing. She's getting good at this.
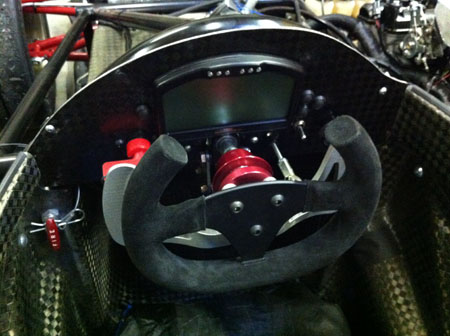
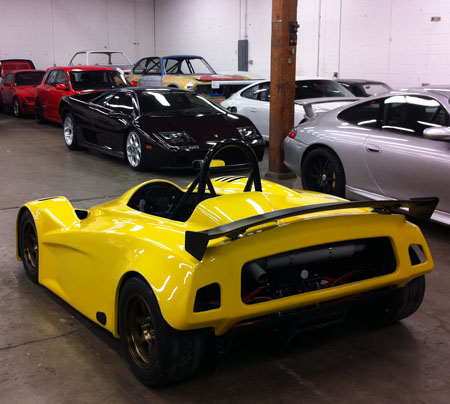
A final thought on the D1... You saw how capable the D4 in its last-season form is. Now, increase the power by 2.5X. Add a 30ms electronic paddle shifter just for fun. And AWD. Penalize it with about 150 lbs weight. Roughly double the downforce. And cut drag a bit. Next summer will be fun. 12/03/11 First, the big news that those who follow us on Facebook already know - we are looking for individual and commercial sponsors to help us compete in the 2012 Pikes Peak hillclimb. Details are on our site but I do want to point out one unique thing about our program: contributions over $1K can later be fully applied towards the purchase of one of our cars and if someone puts up the full 'price tag' (which is quite modest) they actually get to OWN the racecar after the event. Won't find many deals like this one :) On the D4 front, the new dash is now installed in the customer car - turned out nice.
Rather than having the car sit at our shop, Colin Cantrell of Cantrell Motorsports has kindly agreed to display it at his facility so if you're in the Seattle area be sure to give him a call and check it out.
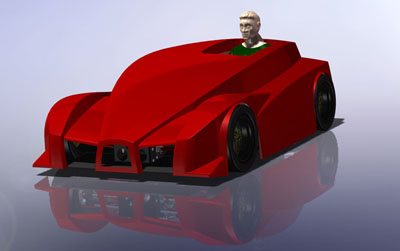
Cantrell Motorsports will service Palatov cars for Seattle customers. They are also our first commercial sponsor for the Pikes Peak effort! 12/10/11 With all the other stuff happening I haven't done much sanding on the D4 plug lately. So today, a Saturday, I set aside pretty much for that. A great deal of progress made and then much staring at the result. There's one thing that's been kind of bugging me, the way the nose looks currently. It is compounded by the fact that as I've learned there needs to be a change there for optimum function of the underbody. The original rough concept had an 'open' nose (as did dp1):
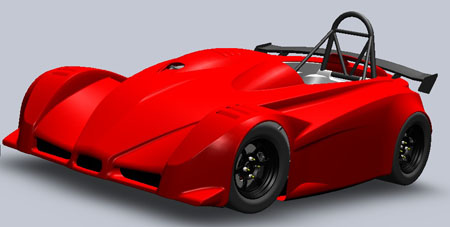
Now granted the design has come a long way since then but there's something about the early rendering that still looks 'right' to me. So I tried a modification in SolidWorks - the first picture is the current design, the second one is the proposed mod.
Functional benefits aside, I think it looks cleaner and more aggressive. If I'm going to do it now is the time. About an hour's work on the plug before molds are made. After... it'll be more difficult. There are pros and cons both ways so it's not an obvious decision but I'm strongly leaning towards grabbing the saw once more. In other news we have just passed $20K in sponsor contributions for our Pikes Peak Quest, vast majority of it from individuals - many thanks to all our sponsors for the support! The financial aspect is obviously awesome but equally as important is the fact that there are people out there who believe we have a shot and are willing to show it. I'm honored, truly. 12/13/11 Well it was more than an hour (probably closer to 3 altogether, spread over two days) but the nose mod is done.
After the surgery a new coat of primer - in different color (and type) this time. The color difference will help to prevent sanding too far down. When the old primer shows up it's time to stop. There will be one more coat after this one then sanding to 600 grit and it will be ready for molds.
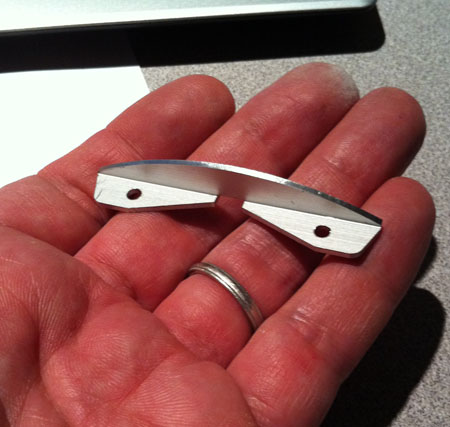
12/15/11 It's a steep learning curve but we finally made our first part on the CNC. To get to this point we had to take care of some maintenance, get tooling, tool holders, collets, coolant and a few miscellaneous supplies. There was also the task of getting a computer to talk to the mill, getting Mastercam set up and the most time consuming - actually figuring out how to use it. I'm accustomed to the intuitive way SolidWorks operates. Using Mastercam is a huge contrast and not in a good way. It is almost as painful as trying to use Autocad. When people hear CNC they think you just load a file, push a button and the computer figures it all out for you and makes the machine spit out a part. Nothing is further from the truth. There are two aspects to what makes CNC machining difficult. The first is the art of fixturing and this is actually the fun stuff. Figuring out how to hold a part in place to accurately machine it, which tools to use and how. For all but the simplest parts fixtures have to be designed and often machined. Sometimes one can get away with a vise, a few clamps and various wedge-type devices but if the part moves it (and usually the tool) is trashed. So at least some degree of custom fixturing is the norm and the ability to figure out an efficient and effective way to do it for each part is what separates a good machinist from the rest. Fortunately we know a couple good machinists to call for help when needed - and have already. The second part is the really annoying stuff - just knowing all the idiosyncrasies of Mastercam, the machine and the way they interact. For example when defining new tools there are parameters for tool number, diameter offset number and depth offset number. The machine expects them all to match since it stores offsets for each tool when they are set up (quite a process in itself). In Mastercam the default number for these parameters is zero and each has to be set manually, in different dialog boxes. If they don't match the machine can crash so normally it gives you an alarm... unless, apparently, the number is zero which it lets slide. Took us half a day and a broken tool (thankfully nothing worse) to figure it out. It would be trivial to make offset numbers follow tool number as a default in software, or at least put them next to each other in same dialog box, and for as long as Mastercam has been around it is baffling why this isn't the case by now. There are countless little items like this. I'm sure we'll be discovering them for months to come. Anyhow, our first part had to be simple enough to not spend a lot of time on programming or fixturing but complex enough to get a feel for the process. Enter the vortex generator - a nifty aerodynamic device that we plan to use a lot. This particular flavor of it is called the Wheeler VG and was invented by Gary Wheeler (US patent 5,058,837 for those curious about what makes it special and yes we have permission to use it). The reason for choosing this design is the fact that unlike conventional VGs it's compact, robust and creates a very large vortex pair for its size (or conversely allows a much smaller device for a given vortex size). Perfect for putting on the bottom of a floor that's 1" off the ground.
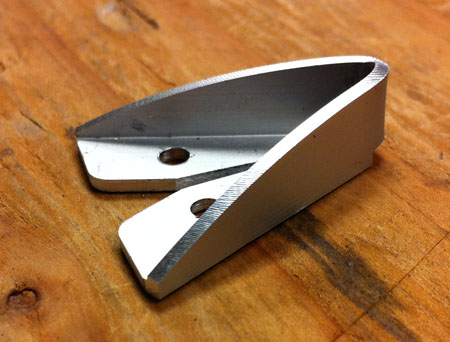
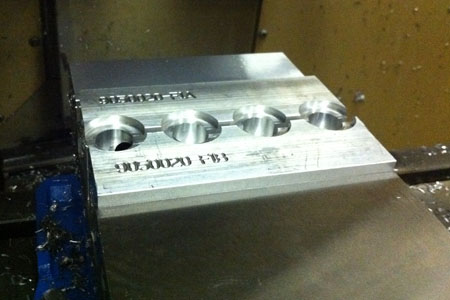
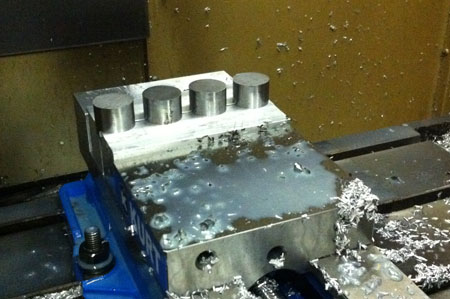
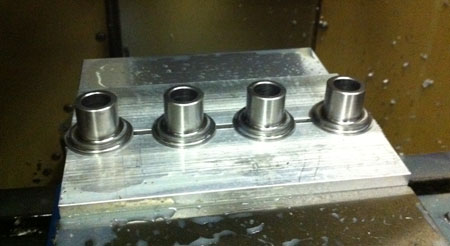
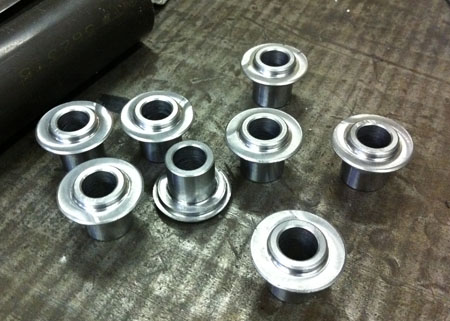
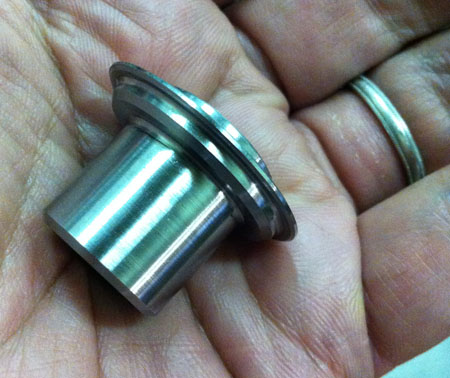
The part is cut from angle stock and uses two vise setups with no fixture and two different tools. Exactly what we need for figuring things out. Yes we'll have to make a fixture for making the bend properly, this one was just a quick test. So, a small part but a big step. Next up is something far more complex (a set of bellcranks and then a set of uprights). We'll see how that goes and what we learn by doing it. 12/25/11 Happy holidays to everyone! Check out our seasonal greetings card (and sign up for the e-mail newsletter, too). The big announcement (already made on facebook) - we are officially moving forward with the Pikes Peak Quest. David Donner will drive our D4 Turbo on the mountain in July in the Unlimited class, going for the overall win. Go big or go home, right? :) The competition is sure to be intense so we have our work cut out for us. Needless to say the car will have to be something special to take on Tajima, Millen and other top contenders, especially since our budget is nowhere near theirs. We're looking at a number of aero options, upgraded drivetrain choices and so on. There are some rules-driven rollcage mods too but I pretty much have them figured out already (reality: safety trumps style when you're faced with sheer cliffs and rocks). It will be a fun journey and will be documented on the sponsors-only blog. Yes, sorry, if you want to track our progress you'll have to join the Quest - we don't exactly want to announce everything we're doing to the whole world, yet. And, well, we can use all the support we can get :) Things that I will talk about here - CNC parts for example. Below are some pictures showing what it takes to make a few simple bellcrank inserts (yes, I'm aware that it would be much easier on a lathe but what we have is a mill so we have to make do). It starts with making a set of 'soft jaws' for the vise. Basically two blocks of aluminum that are bolted in place of standard jaws (having been previously machined to fit) which then have some features machined into them to hold the parts. The fixture is assigned a part number (as is the program) and will be used for these parts from now on.
There are two operations so after the first one is run the parts are flipped in the jaws and the other side is machined. Soft jaws are some of the simplest/easiest fixtures to make, the more complex parts will require more setup. But this does show the process and illustrates why prototyping and low-volume stuff can be expensive. Fixtures have to be made whether making one part or a hundred. Now that we have this particular part all set up we can make a set of 8, enough for one car, in about half an hour. It took a couple days to get to this point but we'll definitely get better at it. The long-term goal is to get to this stage with all our machined parts. There are several hundred so it'll take a while but only a couple dozen really critical ones. Anyway, 2012 promises to be a fun year with more than its share of challenges! I'm very excited about the Pikes Peak adventure in particular. This is us going up against the world's best with the clock as the judge, no wimpy rules to 'level the field' and no excuses. Given David's track record on the mountain we know the driver is up to the task so it's all on us to show what we can do as a designer, manufacturer and tuner of race cars. Wish us luck! :)
|