|
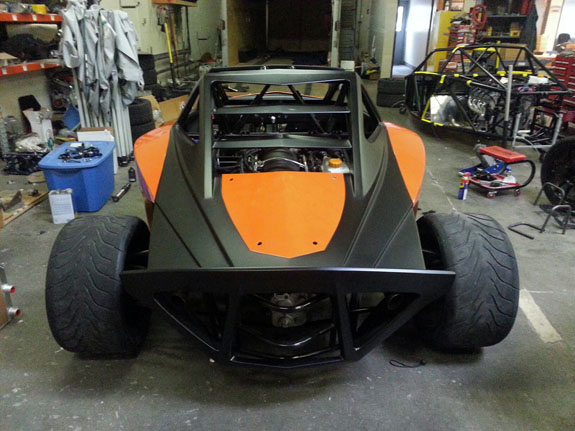
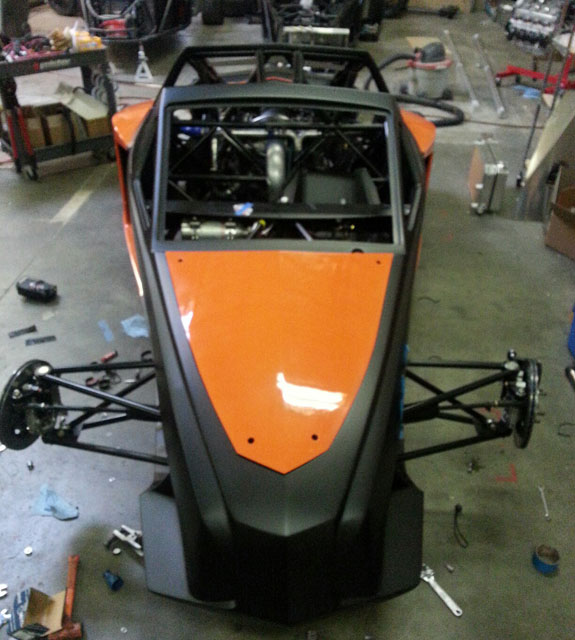
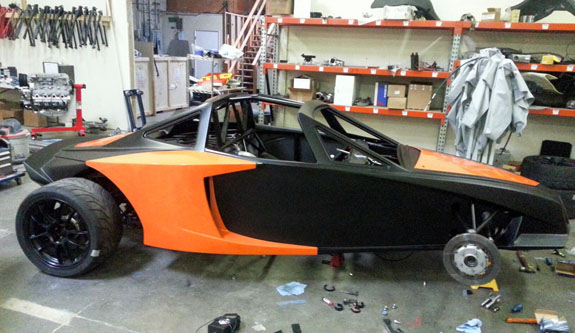
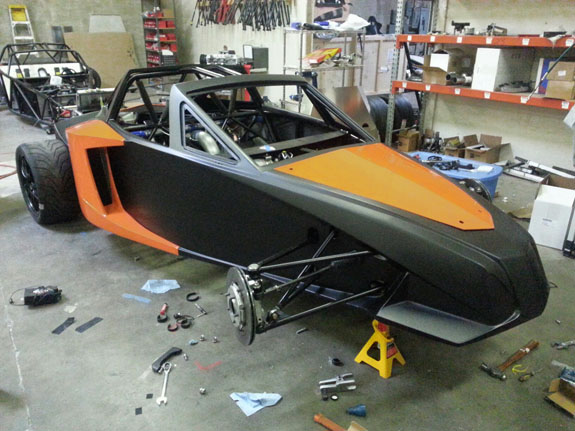
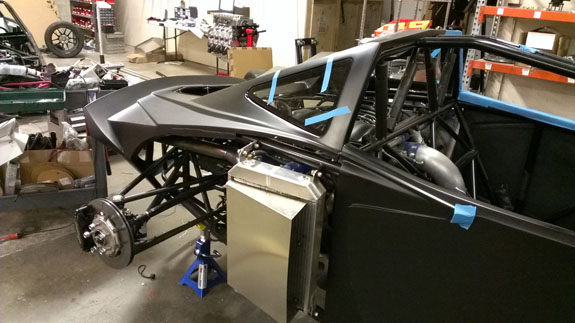
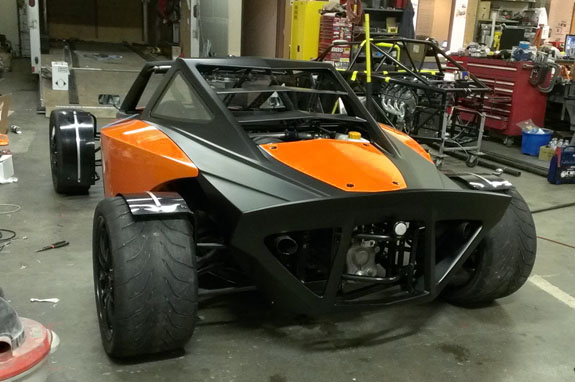
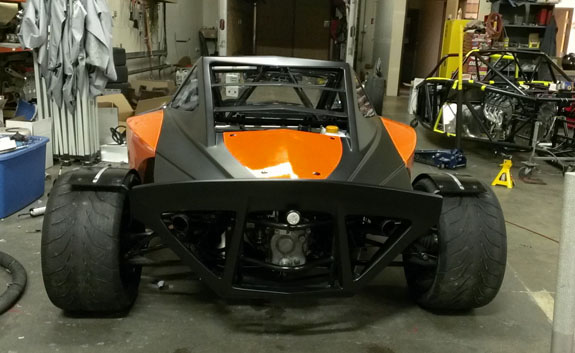
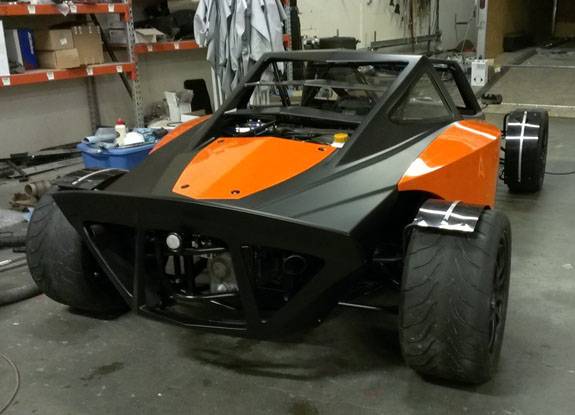
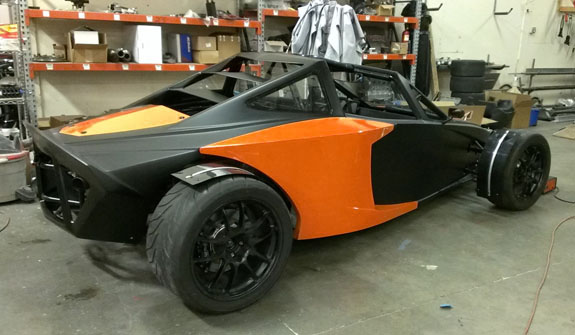
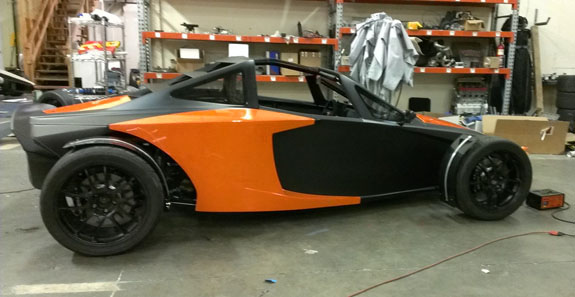
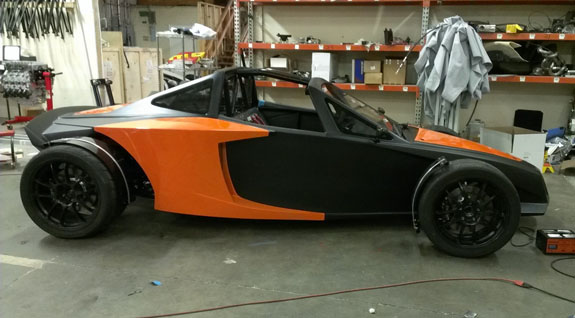
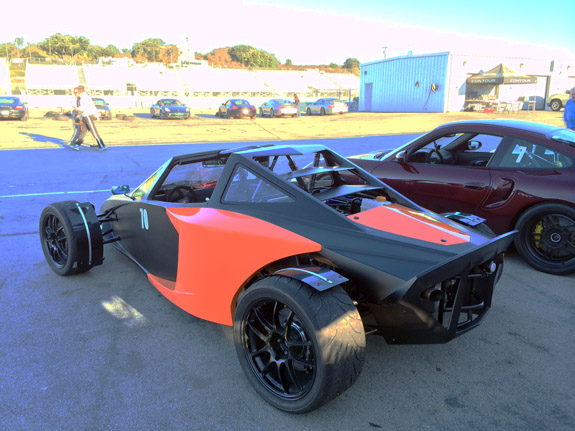
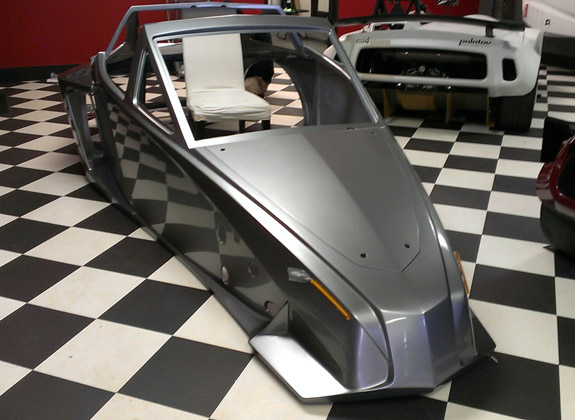
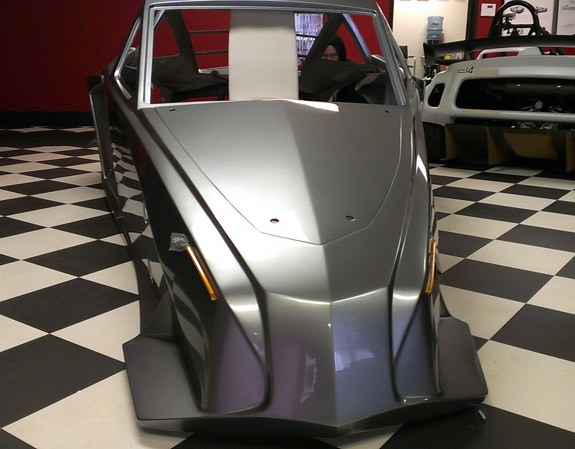
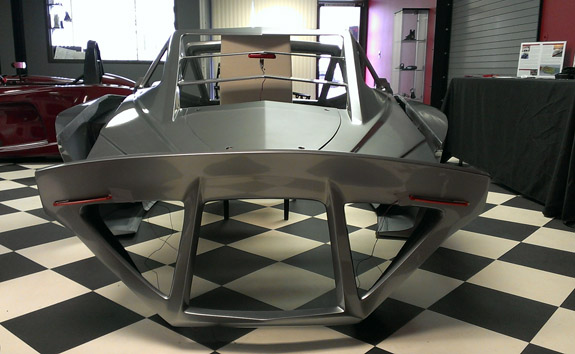
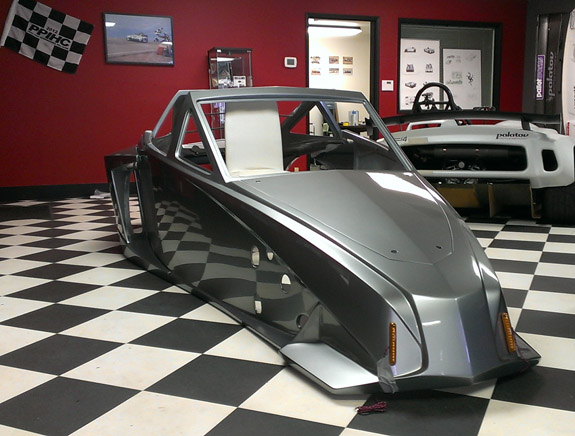
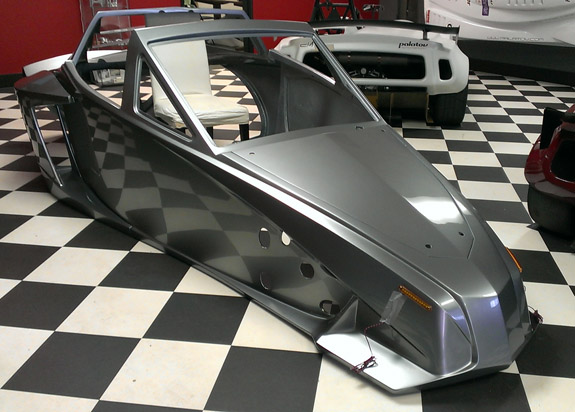
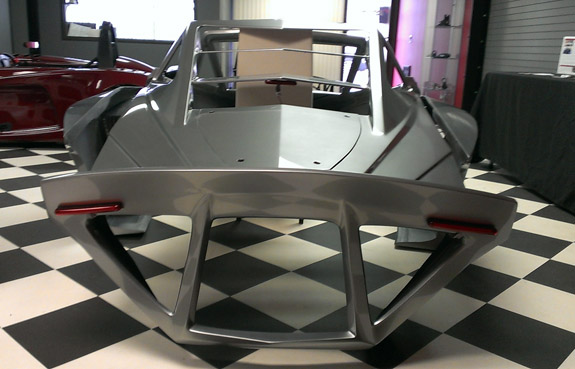
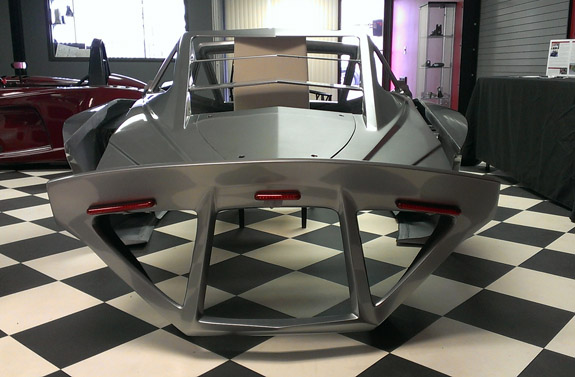
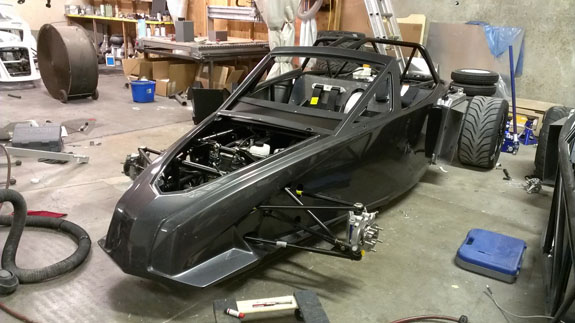
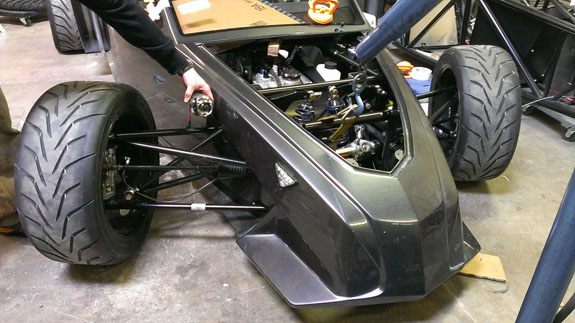
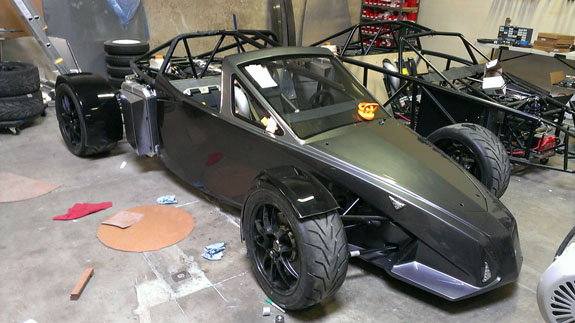
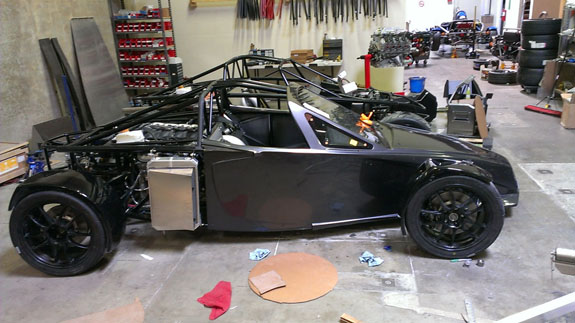
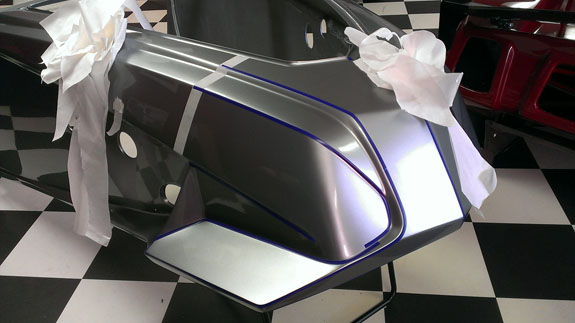
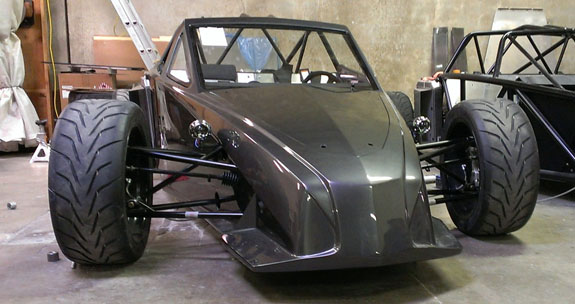
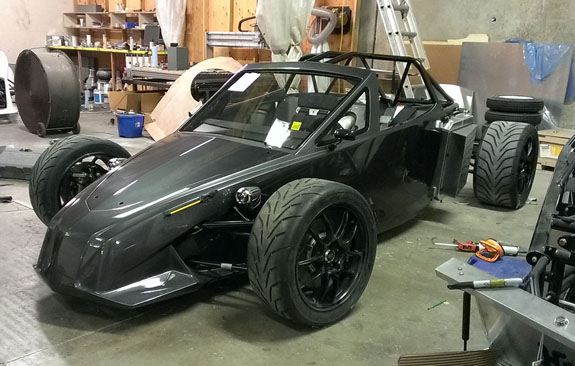
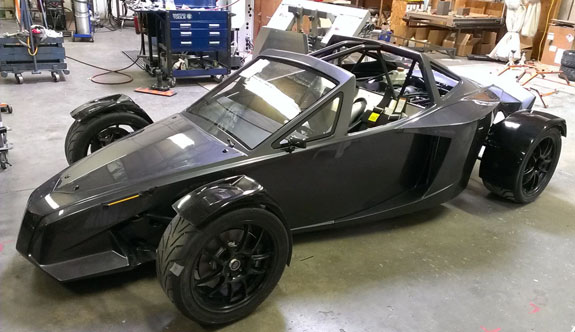
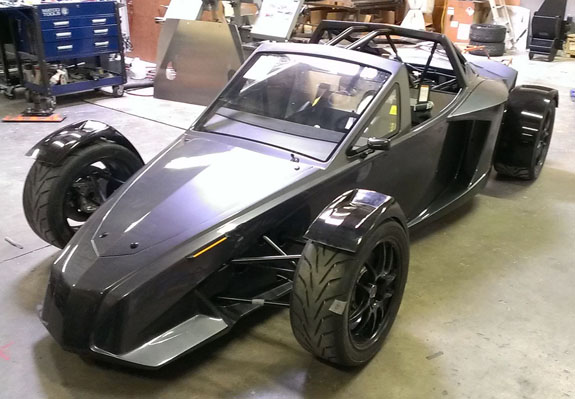
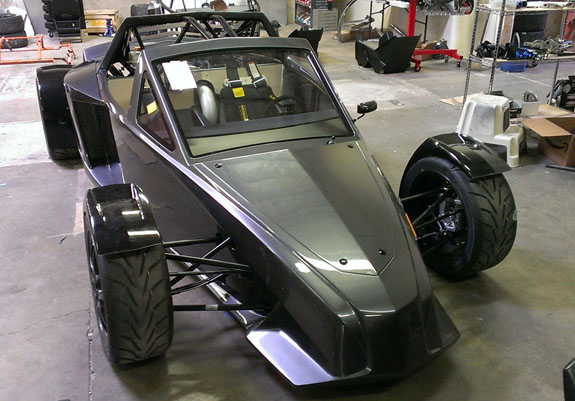
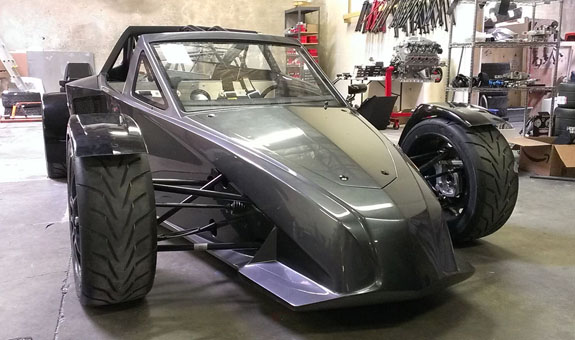
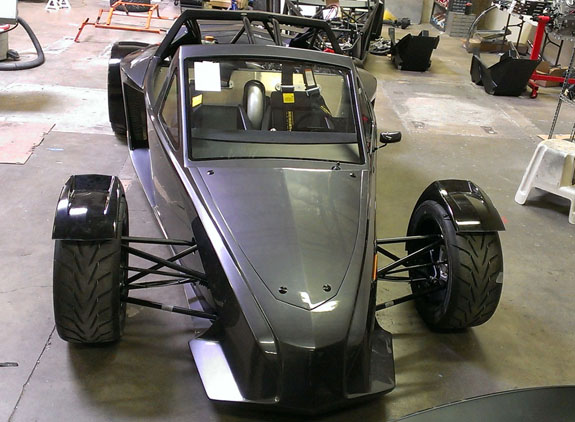
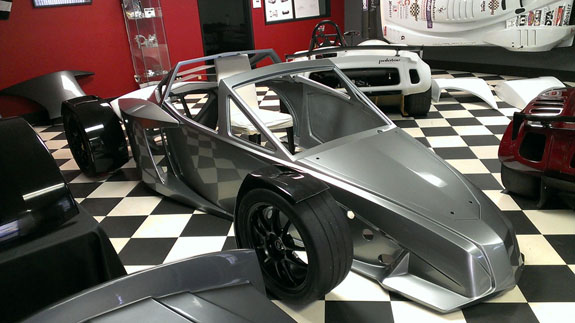
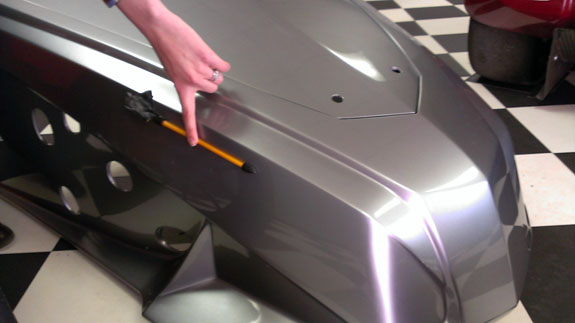
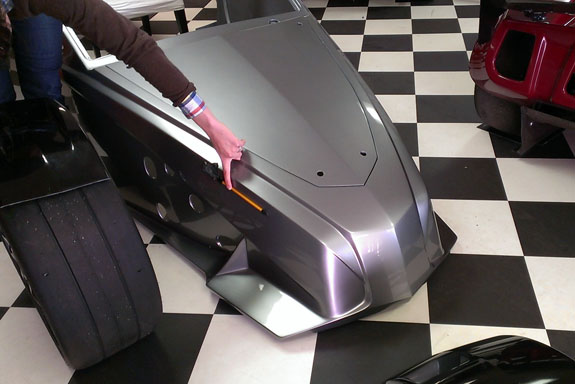
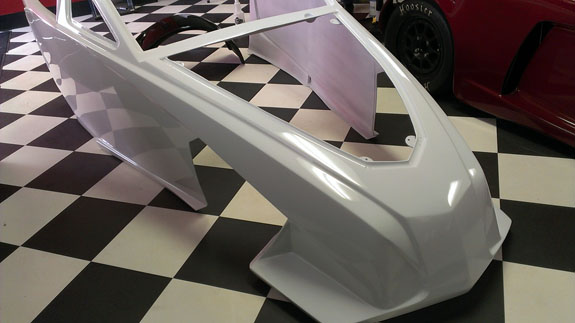
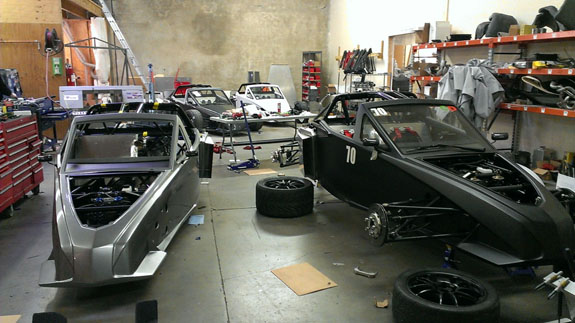
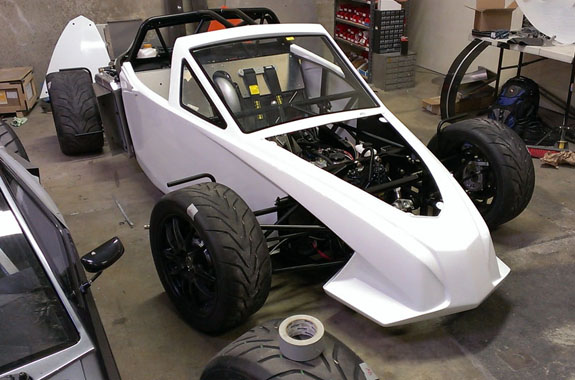
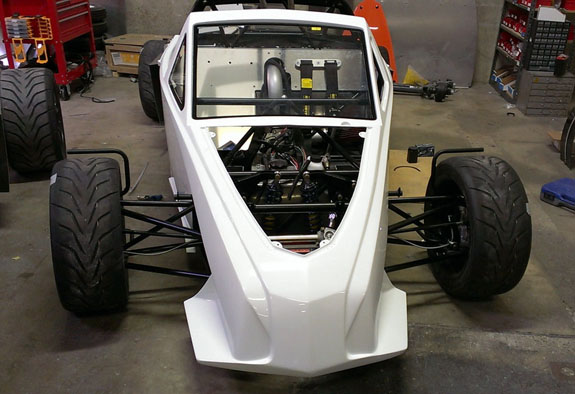
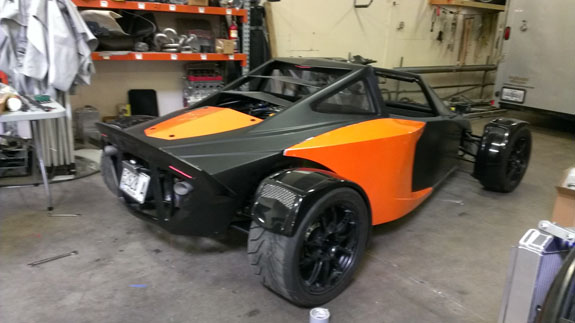
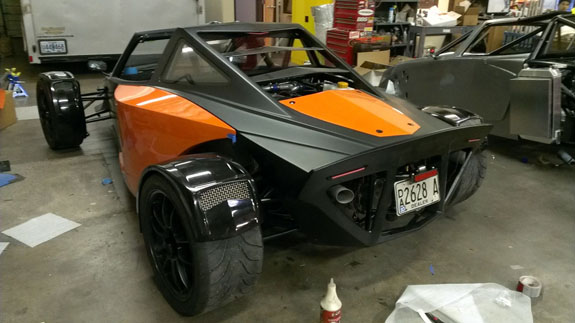
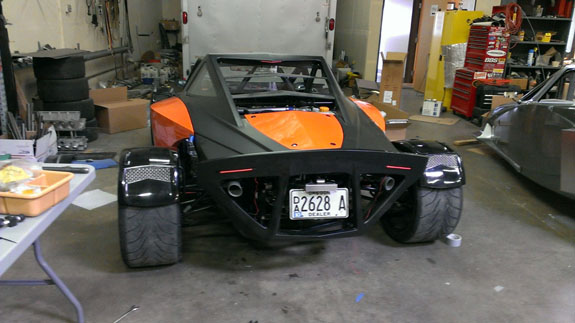
02/15/14 Some visible progress to report - Pete's bodywork is back from paint and being installed on the car. The grey is graphite metallic with a flat clearcoat, it will look lighter outside in the sun.
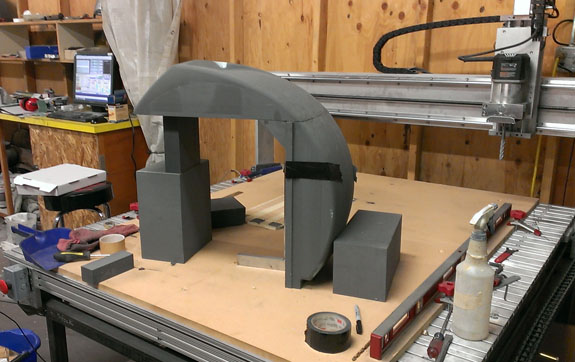
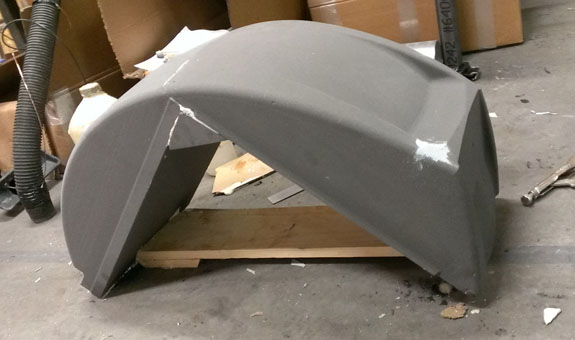
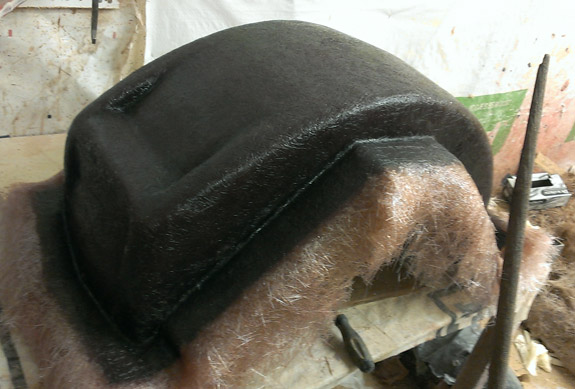
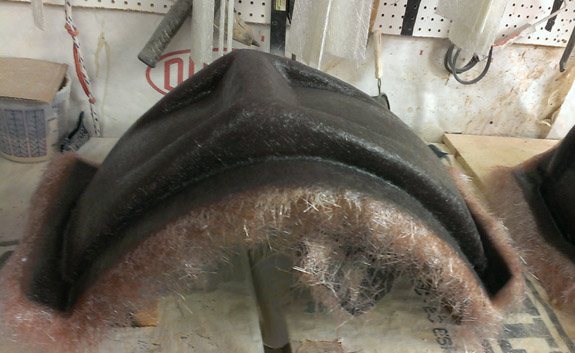
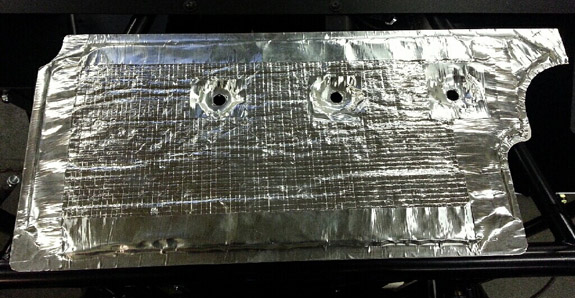
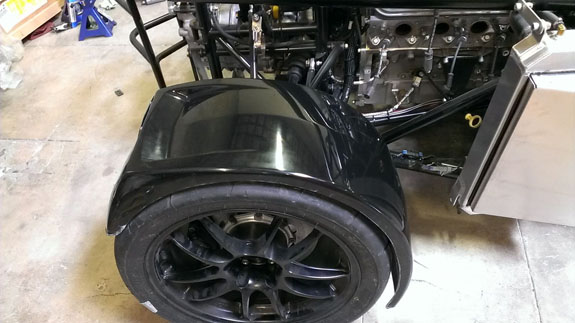
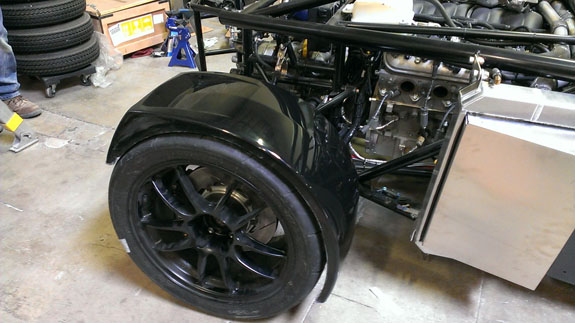
The rear fender plug is done and was dropped off at M&W a couple days ago. Both plugs are now primed and ready for molds - I'll check them out tomorrow to see if any last minute tweaks are needed.
While I'm there I'll review the planned main bodywork mold updates as well and then we can move forward with making more bodies. I'm still looking for the right lighting components - ordered a bunch more parts to try last week, we'll see how those work out. There isn't much out there that could be readily used on a car like this. Some custom fabrication is inevitable but I"m trying to keep it to a minimum in the interest of time. 02/20/14 The fender mold prep is coming along. The foam + primer process seems to be working fairly well.
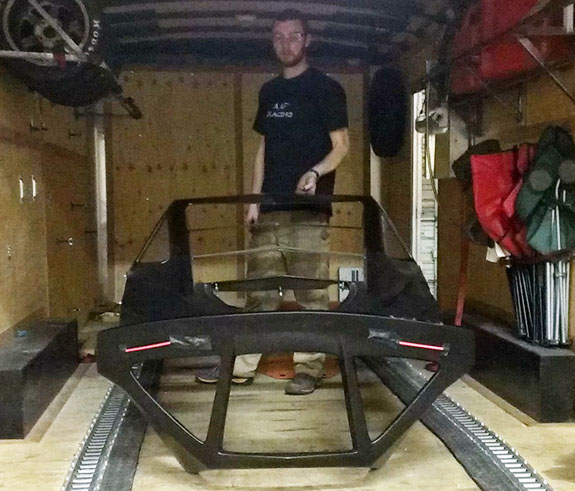
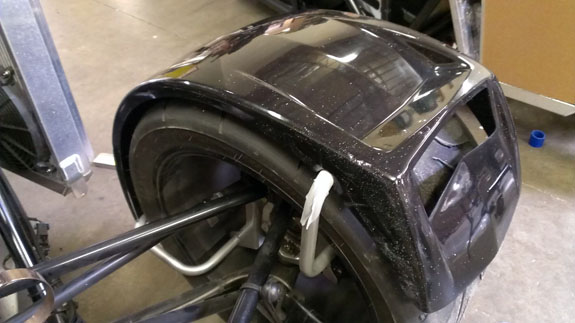
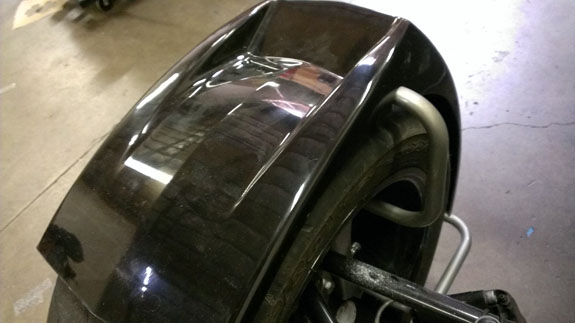
In the meantime the revised mount parts are here and Tristan welded up a set to which we've attached some temporary plastic fenders as a test.
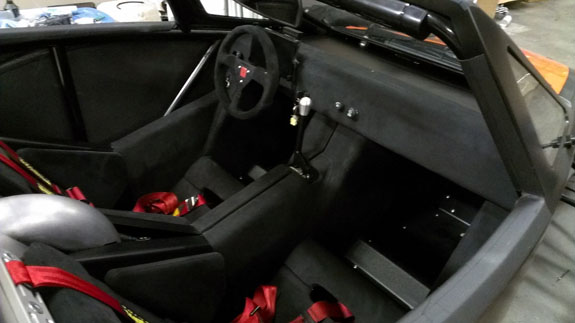
In the above pictures you may have noticed the glass being bonded in.
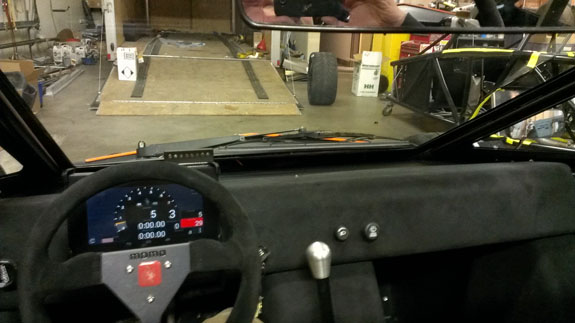
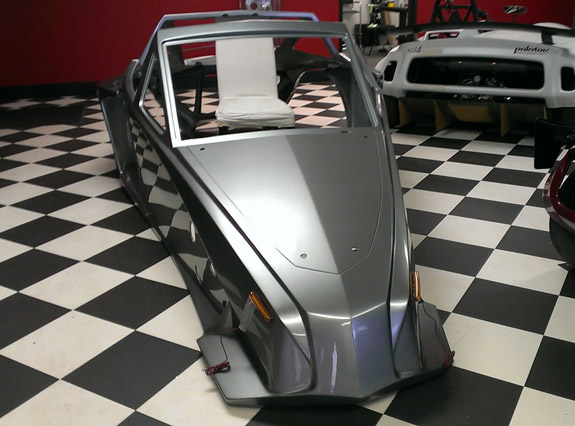
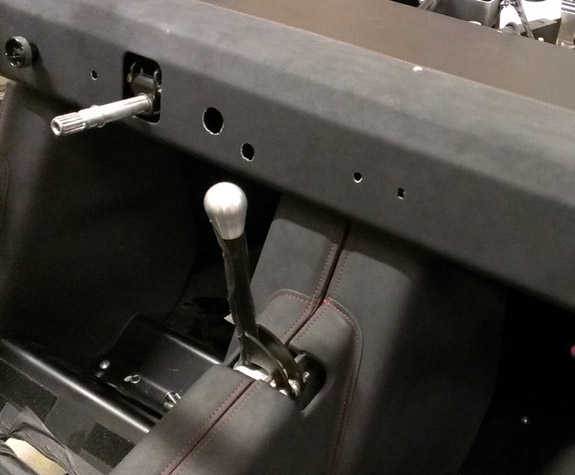
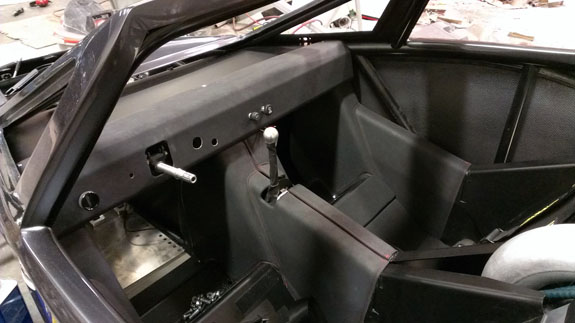
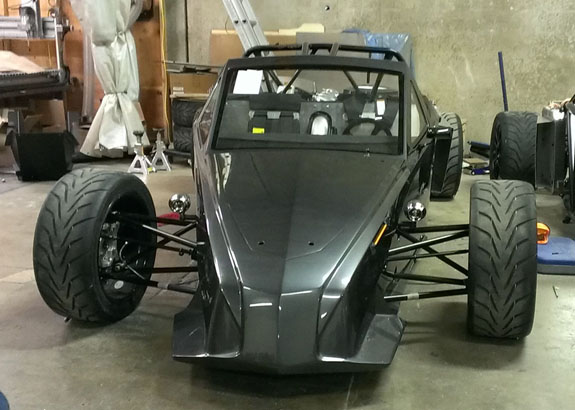
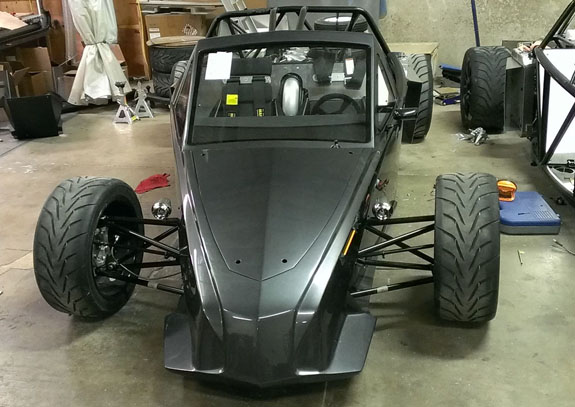
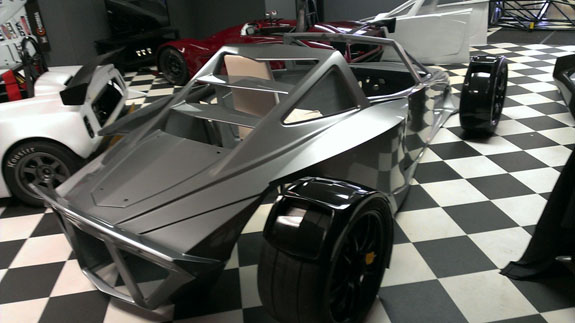
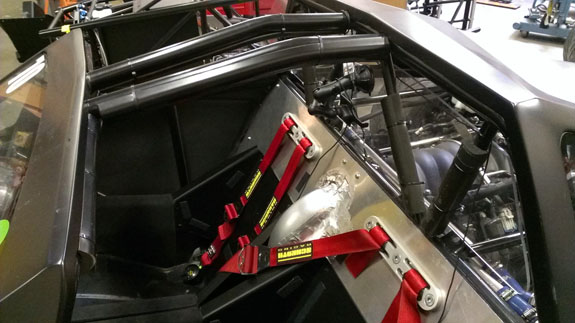
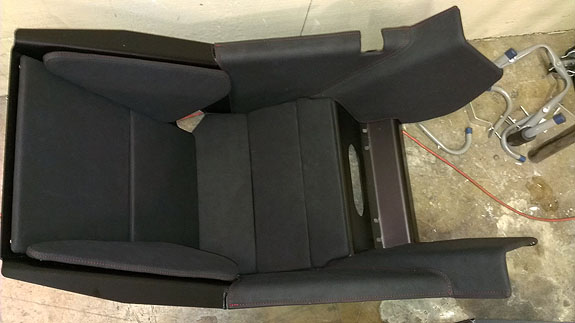
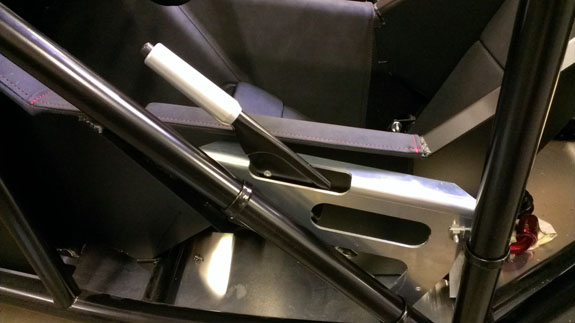
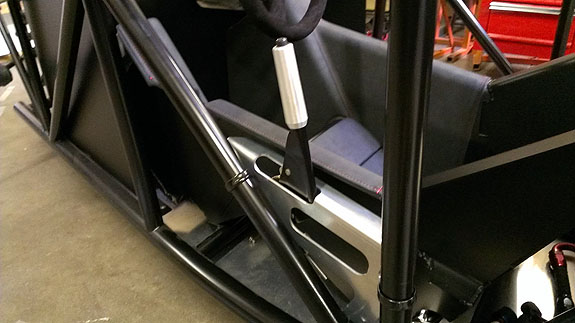
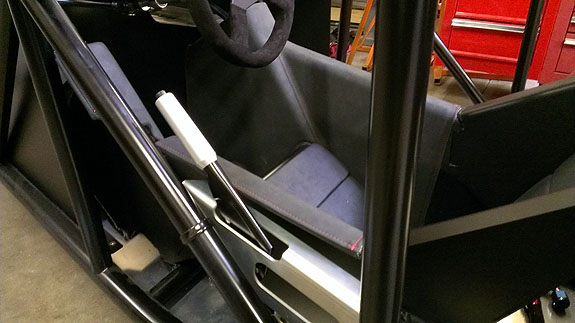
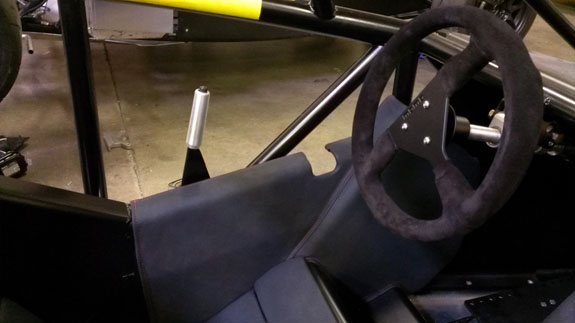
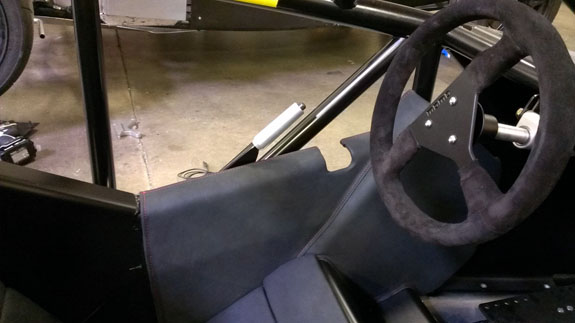
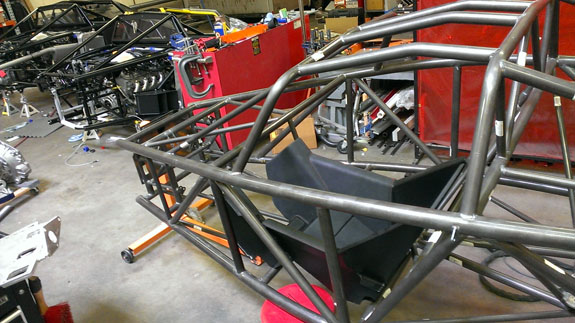
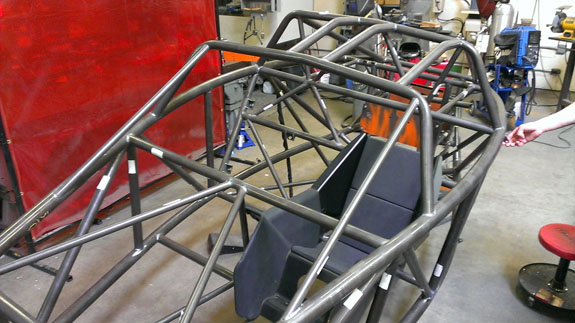
It's attached with special adhesive that takes a while to cure. So far seems to work quite well. We've also tested the windshield wiper functionality, now that the windshield is in. Here's a quick video of it - nothing too exciting, but another step forward. It has variable speed intermittent control and two regular speeds. Next thing to report is a new version of the interior. May take some tweaking still but I really like how it's coming along. The seat padding is modular and removable so we can tailor fit to individuals. The third picture shows the latest version of the dash, too.
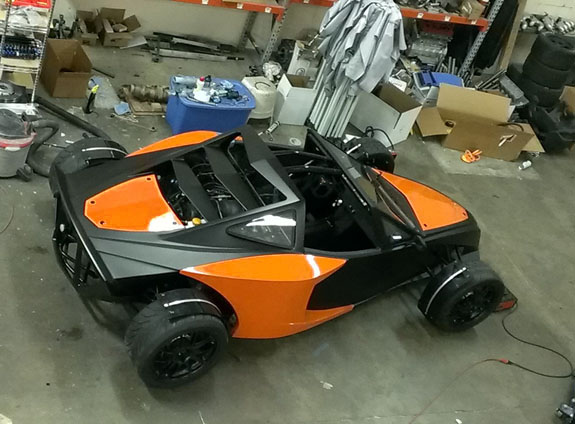
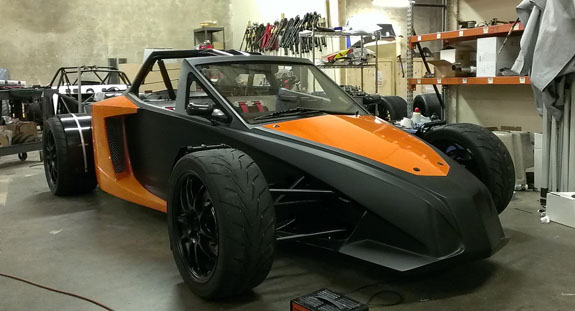
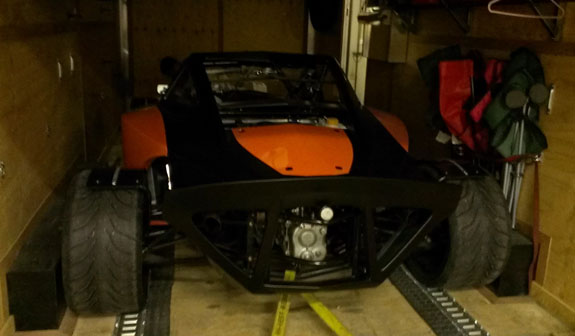
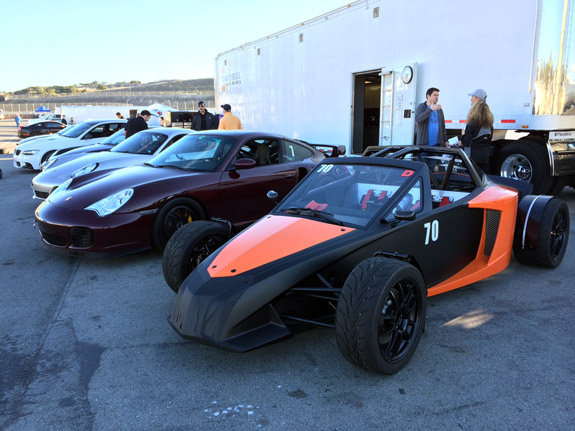
Pete is taking his car to Laguna this weekend. It will be the first event of the season for a D2 and the first one with bodywork on. A bit of a milestone :) So yesterday we finished up the car and loaded it into the trailer.
This morning I met Justin, who is driving the Cantrell transporter, in the PIR parking lot to tranfer the D2 for its trip south.
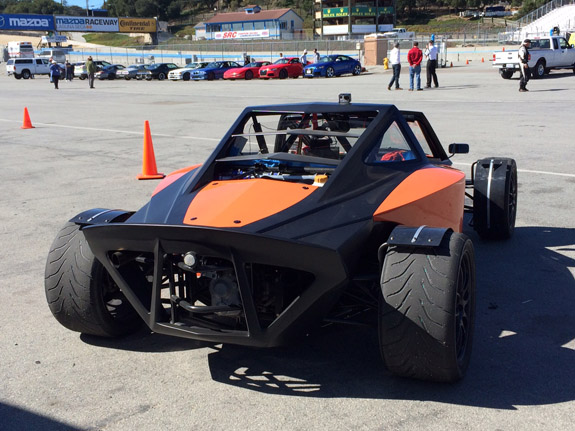
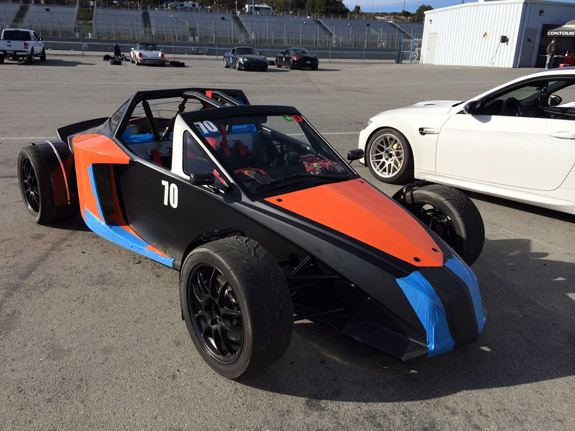
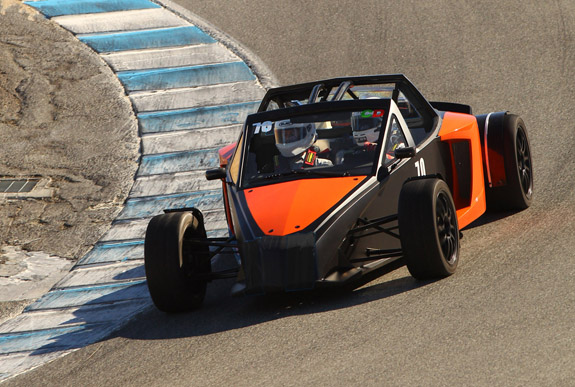
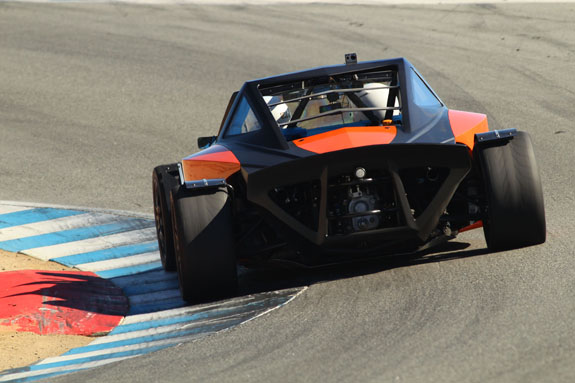
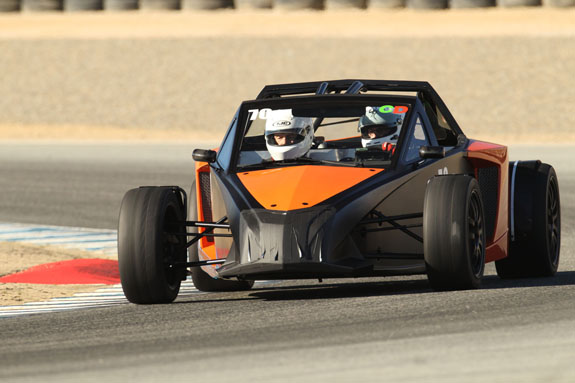
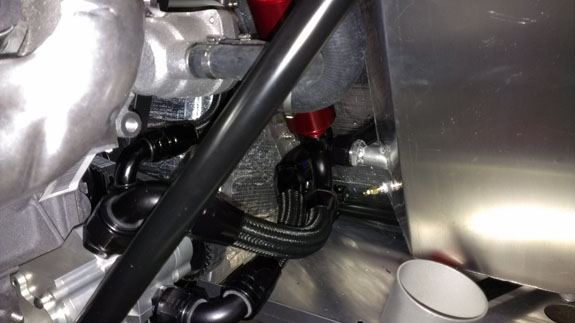
I'm looking forward to Pete's report. In the meantime our work continues full speed. 02/25/14 Pete had a fun weekend at Laguna and while generally things went well, we learned a bunch of stuff from the first outing with bodywork on. There are some tweaks we need to make to the mounting scheme. There is now a LOT of heat entering the cockpit, I need to finish the rear glass mount and firewall insulation. On the plus side the radiator ducts seem to be very effective and water temps stayed low. The bodywork does make the car a bit more stable but we really need to finish the aero bits to give drivers the confidence they need to push hard. And paint protection film is a must - we're working on a kit.
Pete will probably have video uploaded at some point, I'll link it then. In the meantime we do have some shots of the car in action.
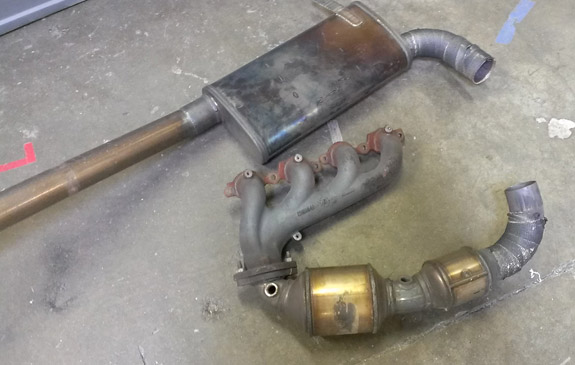
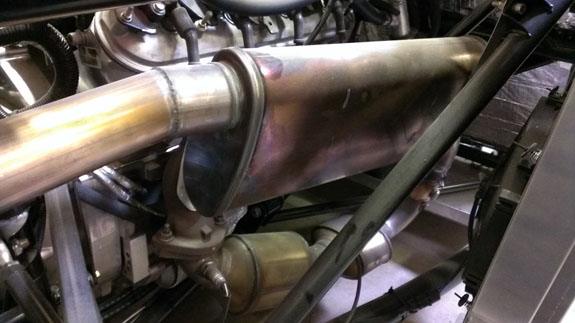
Some of the lessons include learning that non-gloss paint is quite difficult do work with and that lighter colors probably would suit the car better - or at least make it more photogenic. Now that the car is back we're making some updates and sending the gearbox in for a service (4th gear synchro seems reluctant and LSD might be making noises). It will be interesting to assess the wear after 30 trackdays. This is 3-4 years' worth for more casual track enthusiasts. Pete has managed it in 10 months - yes, that's 3 events per month average, living in Seattle! Exhaust is also going out for ceramic coat. This is what it looks like after some use.
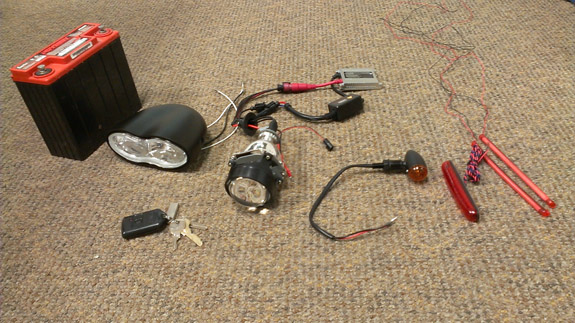
The coating will help with heat a little bit although in my experience the benefits of ceramic coat are mostly costmetic. Which is perfectly valid, seeing how these parts are readily visible on the car. Several other owners are getting theirs done at the same time. Back at the shop, one of the current challenges is lights. I've ordered a bunch of components but none really jump out and say 'pick me'.
All have drawbacks. We tested halogens and HIDs at night and the choice is obvious - go with HIDs. But that means designing (and probably 3D printing) full custom housings. Adam did find some pretty cool units from England but they're expensive, not ideal in mounting and availability is unknown. We'll see. Turn signals are no easier. Nothing off-the-shelf really works. I think the thin LED bars are the best bet but just using them as-is looks tacked on, I'll have to try machining custom bezels for them.
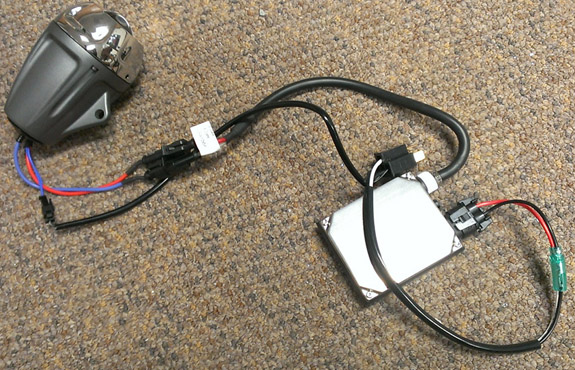
The thinner bars work much better when on than the thicker ones, not nearly as directional and much brighter too. With bezels they might look pretty good. Fender molds are progressing, interior is being evolved based on what we've found from Pete's outing, main bodywork molds are being updated (this will be a three-stage process). Additional chassis are being built, we're figuring out the LSA motor for the race car, CNC machines are running making parts, there's welding, jigging, assembly, purchasing, design and of course follow-up and expediting of orders with dozens of vendors.... That covers about half of it. Are we having fun yet? :) 03/04/14 Let's see... The lighting is moving forward. On a suggestion from Adam I got a couple integrated HID lights from the UK. Expensive, but they seem to be the best shot at getting this done sooner rather than later. The housings are very nice actually, and even match the fender design somewhat.
The downside, as you can see, is the multi-colored wires with short leads to the connectors just dangling out there. So, not ideal but could be made to work. After a few attempts and complete re-dos, the current solution is promising.
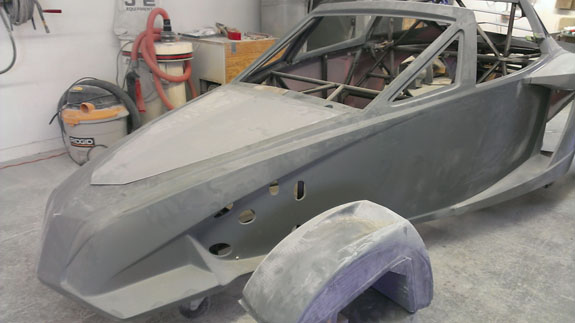
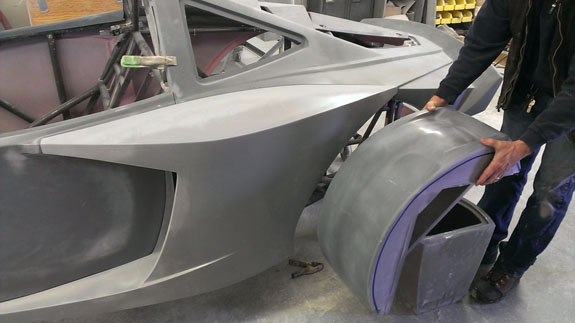
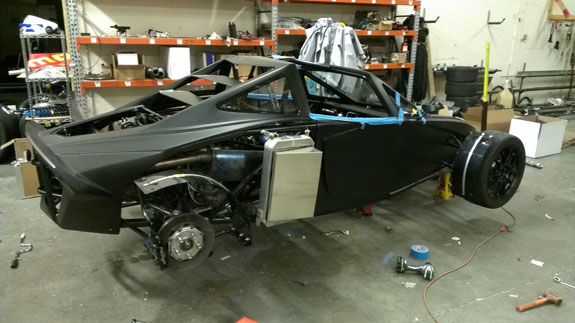
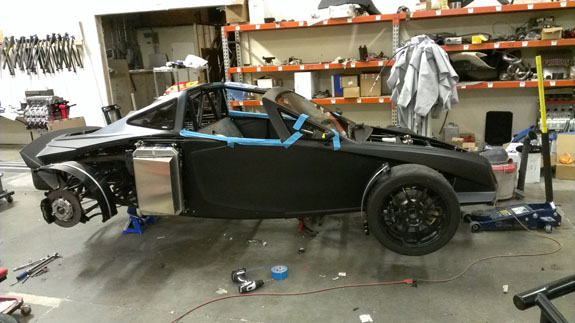
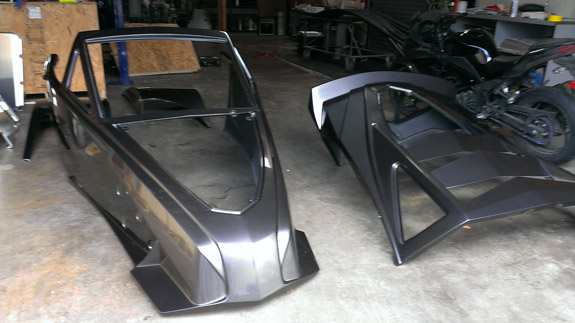
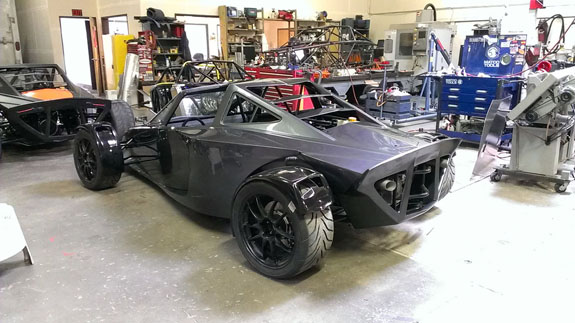
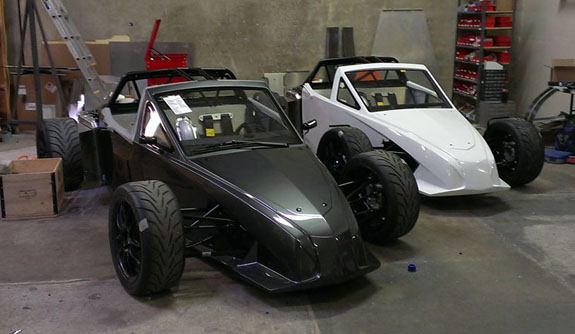
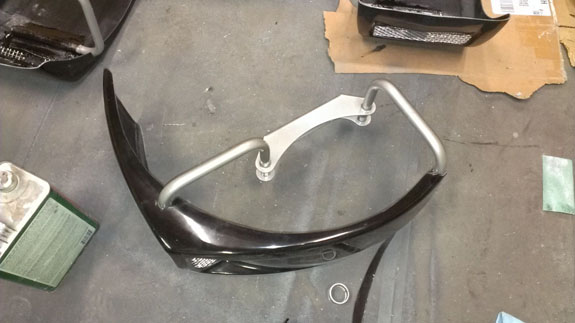
The mounts just poke through the bodywork right next to the pushrods and attach to an existing bolt so it should be unobtrusive and can be done with minimal effort even on painted bodies (which is a necessity at this point). Lasered sheetmetal parts will be ordered tomorrow. We'll see how this works. Alex's bodywork is back from paint. This one is in a 'Sparkling Graphite', darker than Joe's car but lighter than Pete's. It's a cool color.
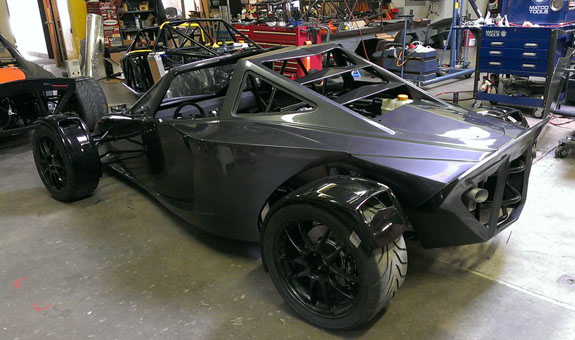
The interior is evolving somewhat too. Waiting for some modified side pads to finish it up.
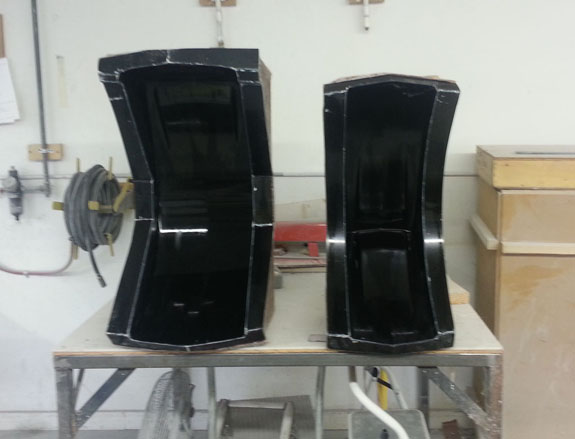
Today a visit to M&W to follow up on the mold mods yielded some good progress and some pix of the fender molds that are coming along quite nicely. Should have first parts Monday.
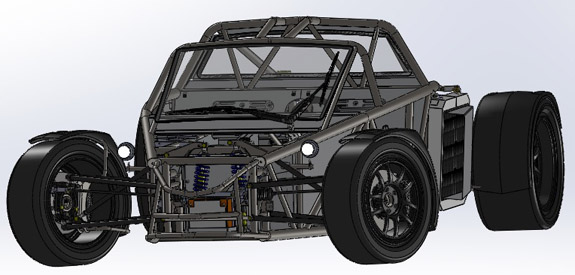
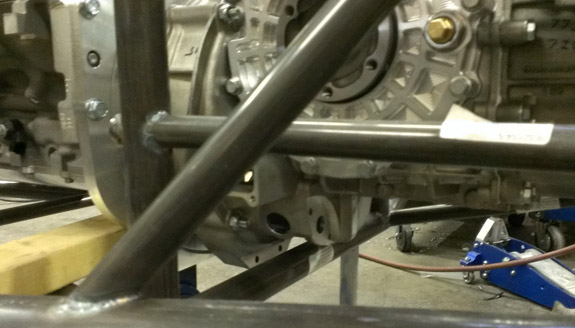
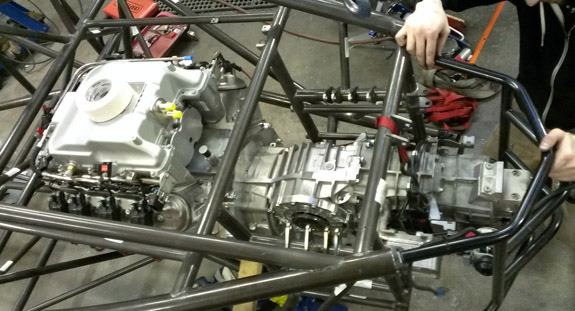
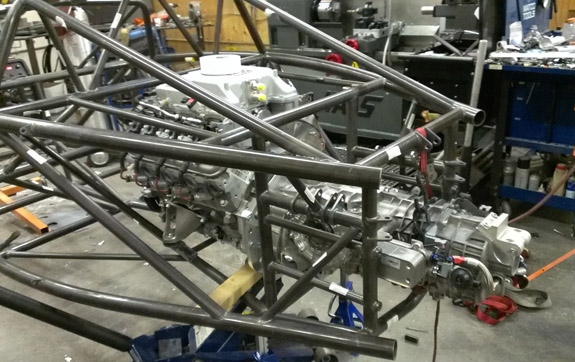
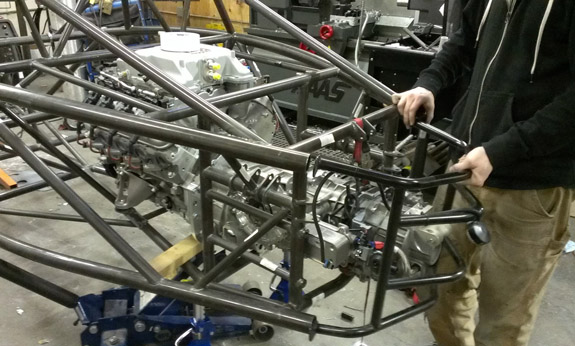
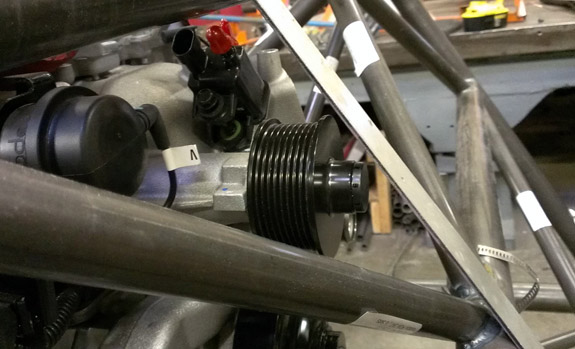
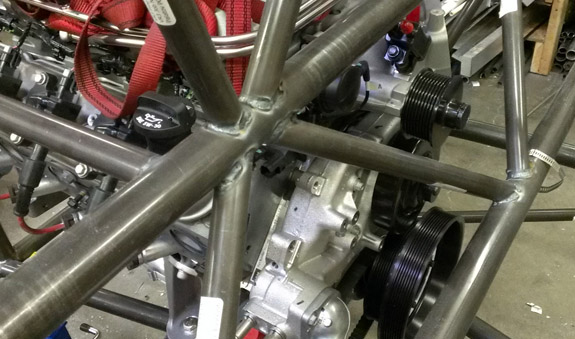
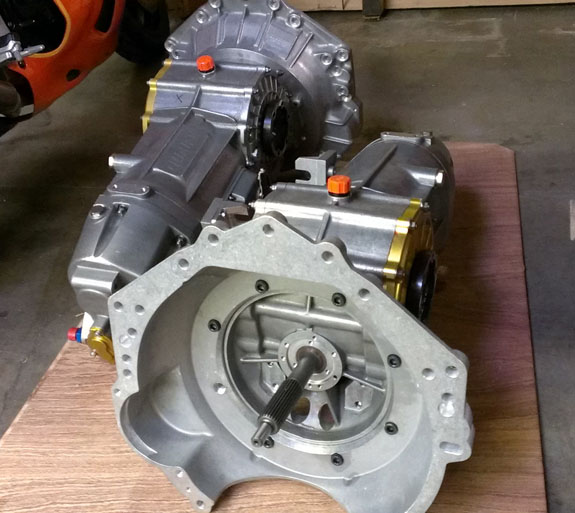
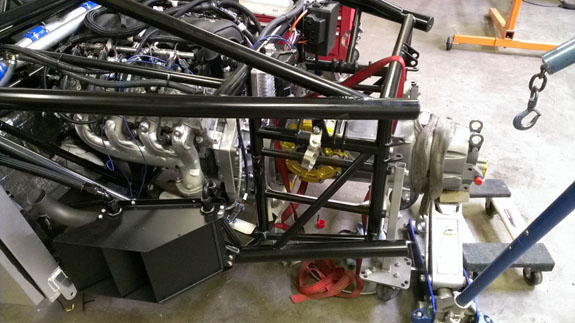
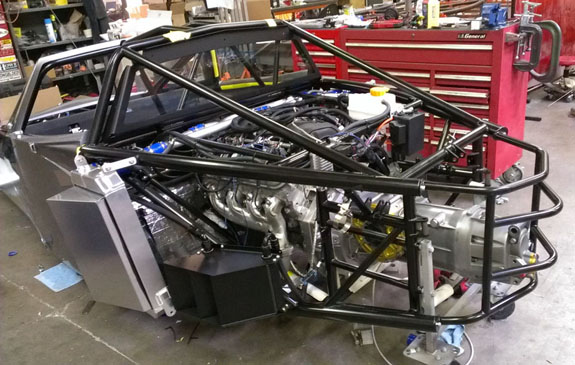
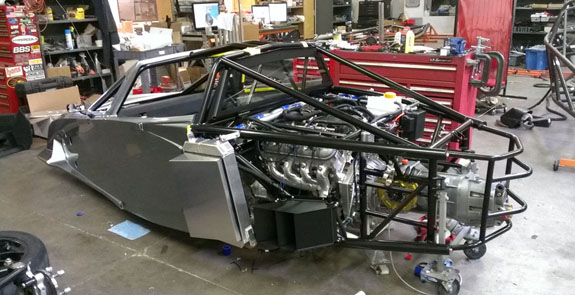
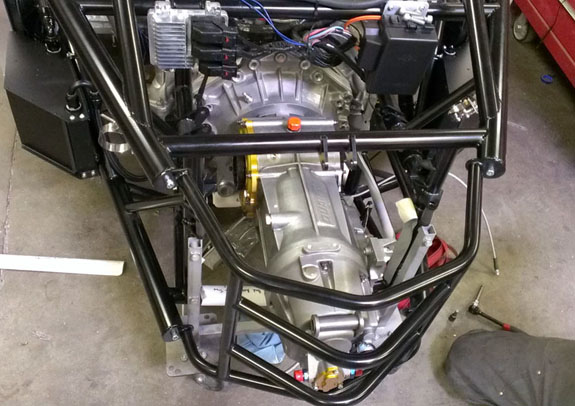
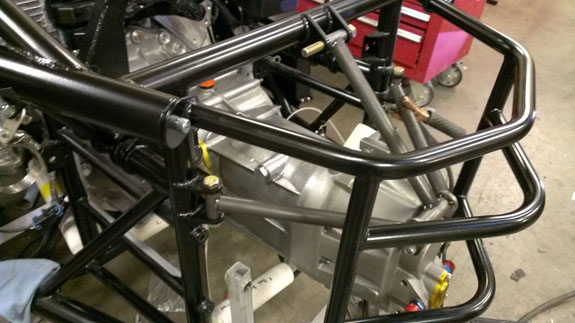
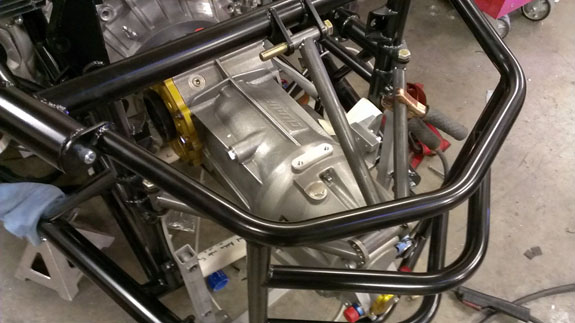
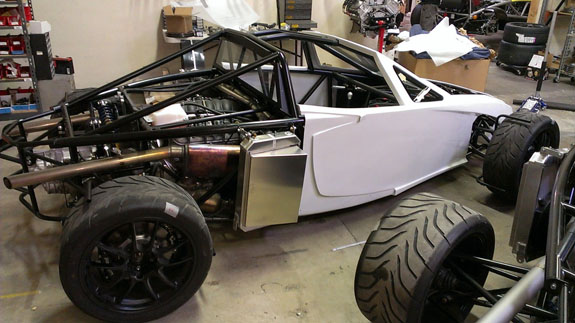
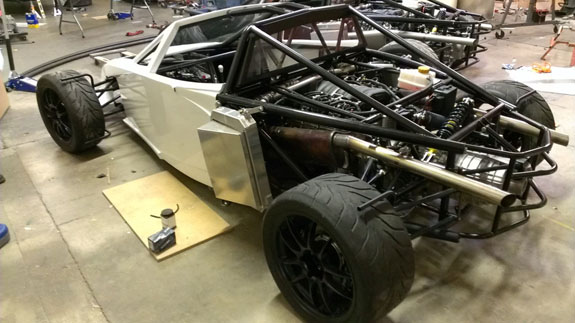
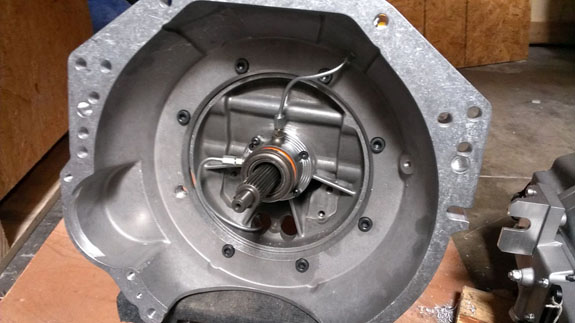
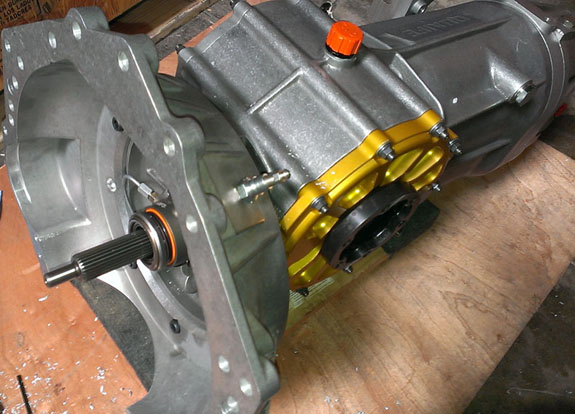
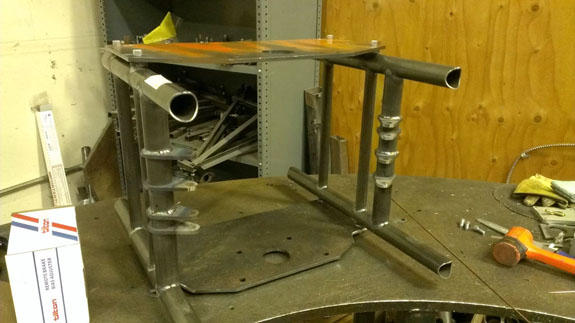
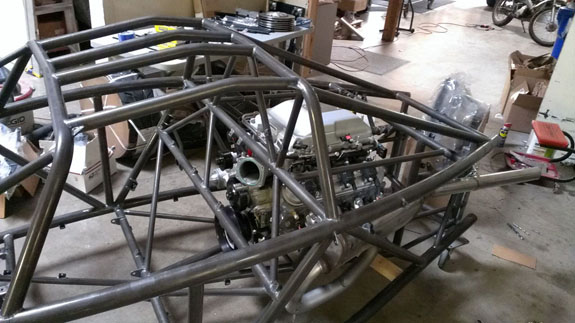
The transmission for the Sector111's D2 showed up. It's different from any that we've fit previously so we'll have to make a different mount. To facilitate that we've test-fitted it in the chassis we're building. The most convenient engine to fit it with happens to be the LSA we have for the Pikes Peak car so we just popped it in.
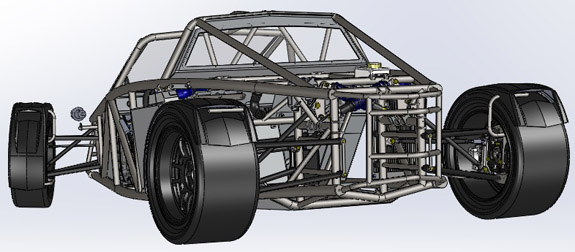
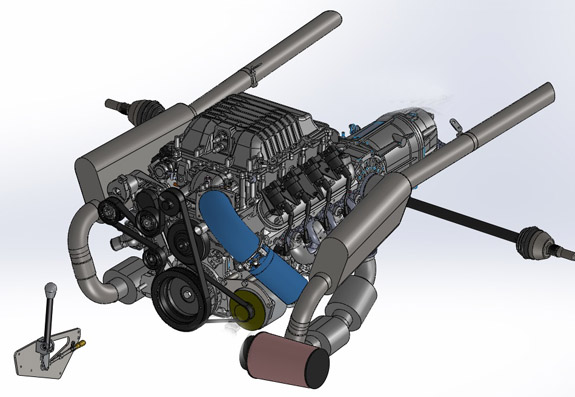
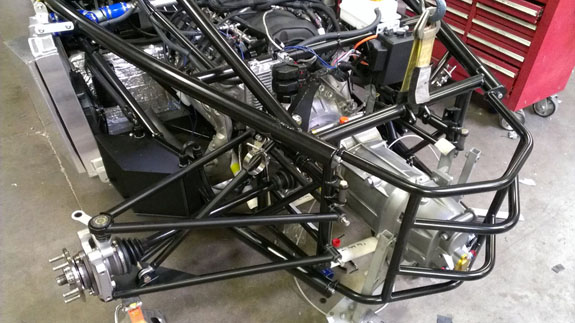
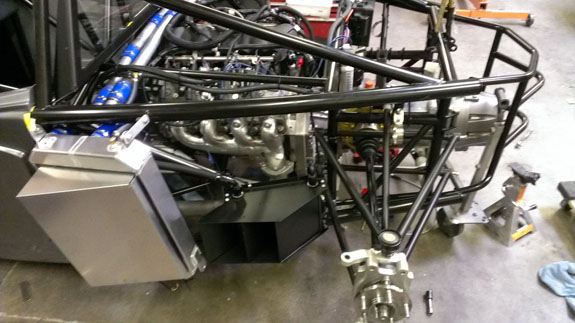
Fits pretty well and now we can move forward with making the mounts. In the meantime the first batch of sequential transmissions is finally on its way from England. Really looking forwat to installing and running these! It'll be a bit of a development process to get actuation correct. We're going to start with manual shift, then add cut for upshifts, then blip for downshifts, then full paddle actuation. Lots of work but generally I know what needs to be done. Speaking of mounts, we have moved from our own fabricated engine mounts to using the stock GM ones to allow fitting a wider variety of engines. In order to do this the frame-side mounts had to be redone. All seems to fit well. The LSA is a tight squeeze in the chassis but it does fit, exaclty per CAD. We will have to move the throttle body and rearrange driver side seatbelt anchors of course but that's already well underway. My usual 1/4" clearances in all dimensions of course. No point in wasting space :)
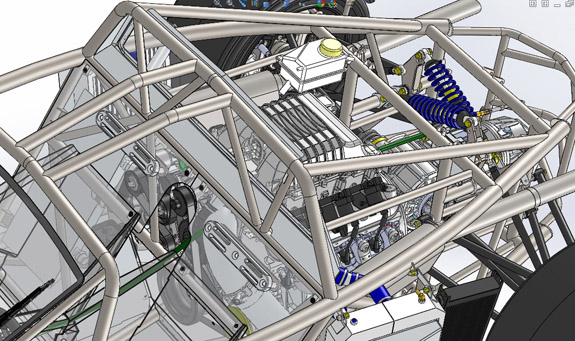
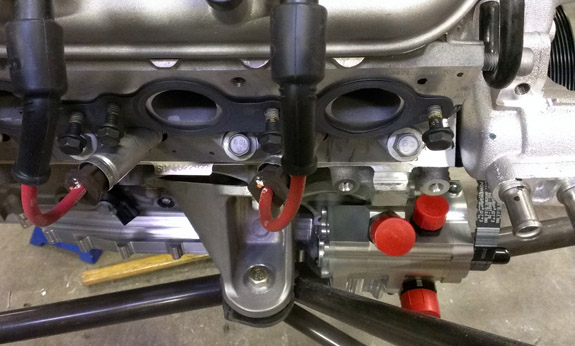
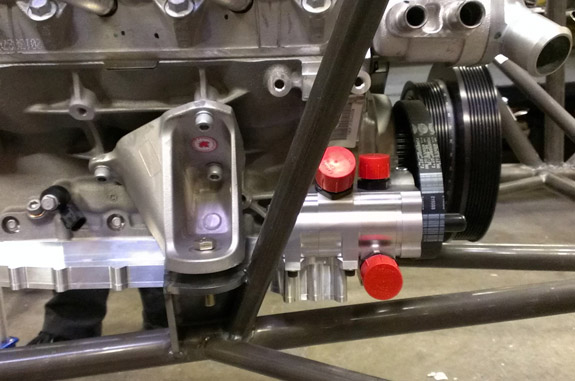
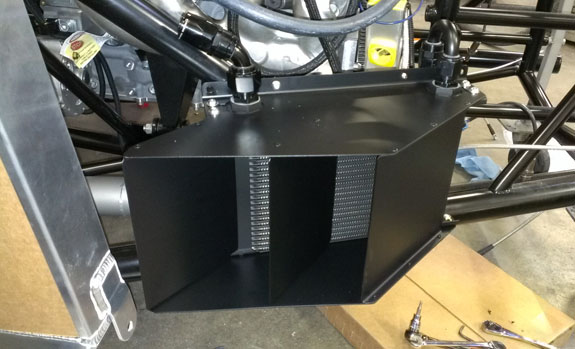
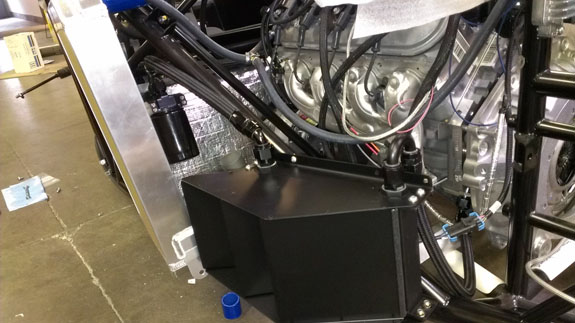
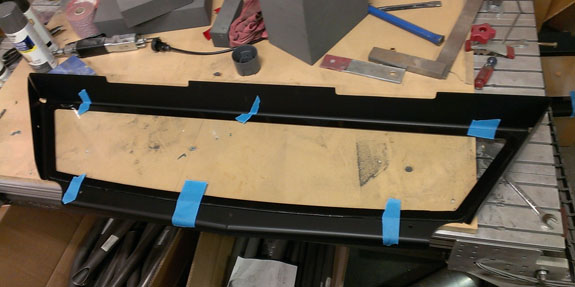
Yes that's an ATI damper and a 10% overdrive pulley on the engine. All the belt drive components are figured out just need to order the parts (off-the-shelf GM stuff for most of them). As you may have noticed from the CAD pictures above the rear glass bulkhead is now designed. Parts have been ordered. It's part of the strategy for dealing with engine heat. The other part is insulation which is also in progress and is being installed on all the cars.
A myriad other projects are moving forward as well. These are just the highlights. 03/11/14 The production quantity of the lights has been ordered, downside is that it'll take over a month to get them. It's still faster than it would have taken us to design, make and assemble a custom enclosure. But I have now designed the mounts and we know what trimming needs to be done to the bodies (quite minimal) so all this can move along in parallel.
The controller for the lights is coming along as well and so is the production version of the electronic dash. All these pieces are going to come together at about the same time. Of course I (and I know many others!) wish it would have been at this point months ago but at least progress is being made and parts from many different sources are on their way. Speaking of which, the sequential gearboxes have finally shipped. Here's a video of one during break-in on a dyno. This mostly just illustrates the noise level more than anything else, not a very exciting video otherwise :)
Fender molds are done and the first parts are out. Should have a full set on Pete's car in a week.
The paint protection film kits are being designed and made. Laying out the patterns is both a craft and an art form especially for a complex shape like the D2. OneSource is doing the work for us and the goal is to have a pre-cut kit that can be either professionally installed or a DIY.
The interior work is well along also.
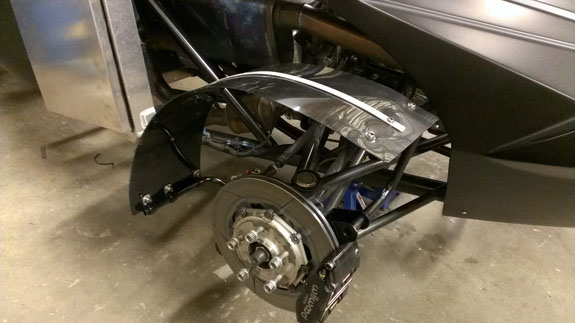
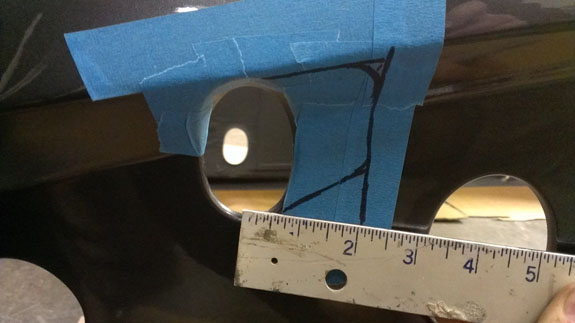
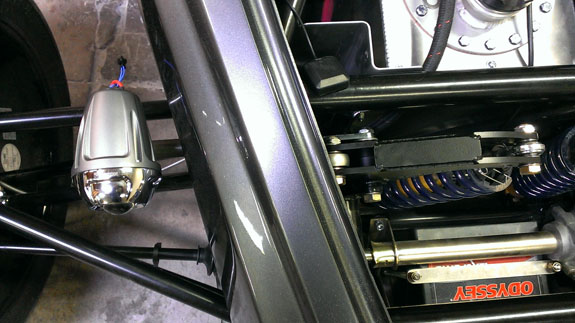
Many other bits like the rear glass bulkhead have been designed and are being made. 03/12/14 It's been a long, frustrating and expensive process but I've finally made the selection of lights for the D2. The headlight mount parts are here and we've tack-welded a couple together. They fit and work well. It's a simple bolt-on using existing front bellcrank pivots for attachment and indexing on the frame tubes for orientation.
Came out pretty good I think. In states where headlight height is an issue 2" extensions would be very easy to add without screwing up the looks too bad (the lights are at 22" by default so it's not likely to get pcked on anyway).
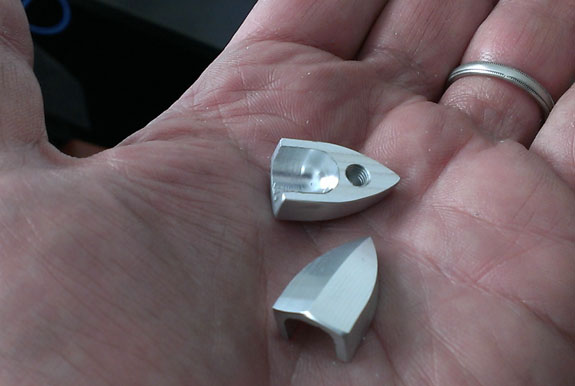
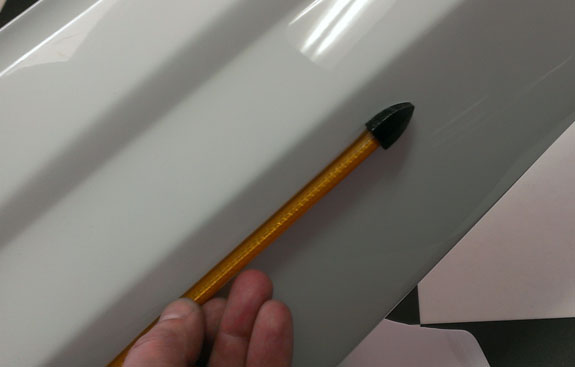
For turn/brake/running lights I've settled on the thin LED bars. These actually have 50 LEDs each and are very bright and visible from every direction. This is in contrast to dozens of other units I've tried that are only bright when viewed head on and dim very quickly at angles. I'll be machining little billet 'endcaps' to give the bars a more finished look and to better secure them to the bodywork (vs just sticking them on with double-sided tape).
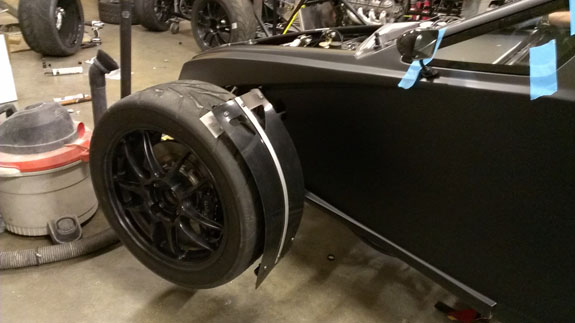
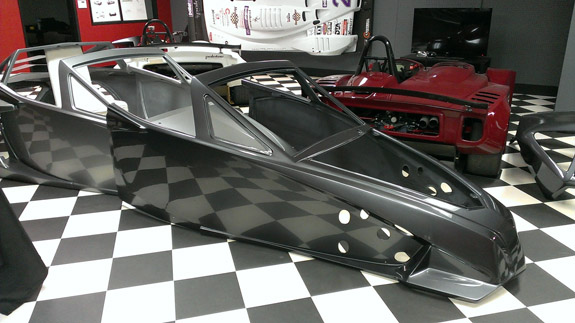
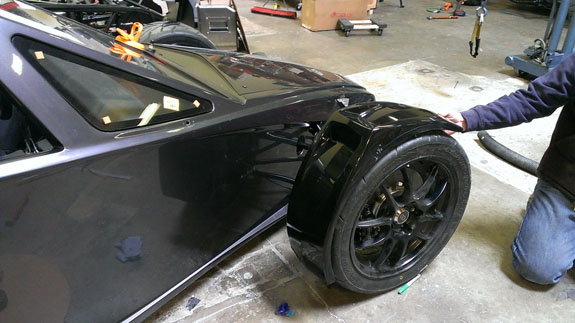
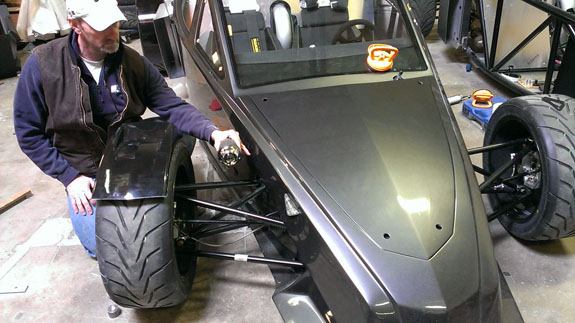
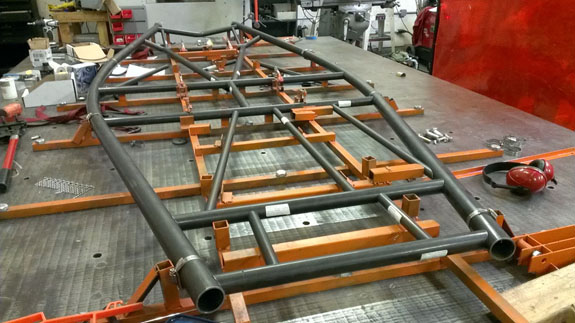
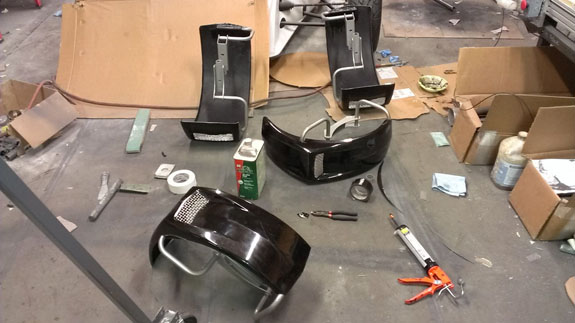
One more unknown out of the way, just a matter of finishing up the details and getting the parts in /made now. 03/22/14 Just realized it's been 10 days since the last post - been so busy haven't even had a chance to sit down and write about everything that's going on. A quiet Saturday afternoon at the shop, while the CNC is running, is a good time to do it I guess :) So here are some updates in no particular order. The first two sets of production fenders are here so we can do final trimming and attach them to the mounts.
We also set them down next to the light silver bodywork.
I personally like the combo but the customer has chosen to get them painted body color so we'll be getting that done shortly. Should look pretty sharp. Several sets of fender mounts are now welded up and off to powdercoat, along with headlight mounts and a few other parts. I designed and machined some 'endcaps' for the LED turn signals. They jump out a bit visually in silver but in black it's nice and subtle. Black anodize will be the standard finish.
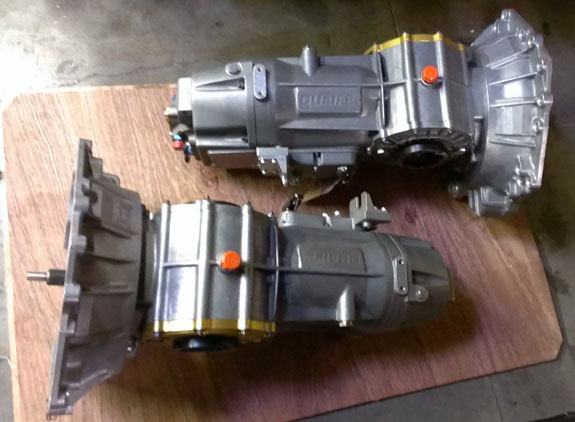
The sequential transmissions are here. Figuring out all the fitment and mounting details now.
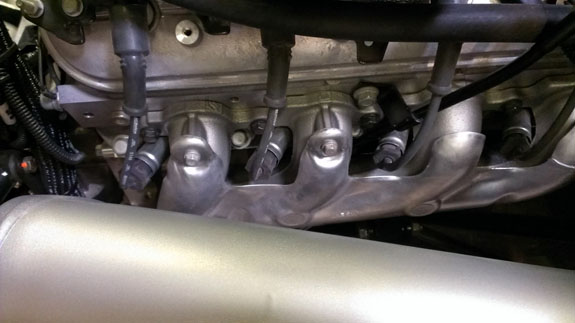
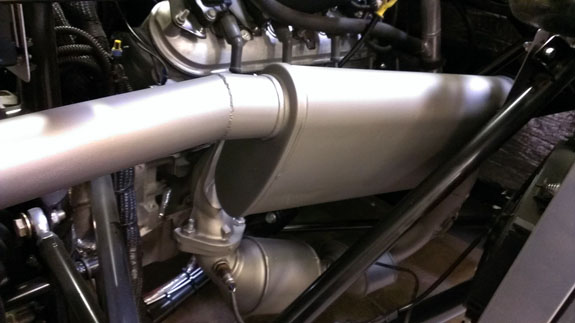
Exhausts are back from ceramic coating. The uncoated GM manifold tends to rust and since it's visible through the bodywork it's nice to have the coating there. I don't know if it'll help with heat any but just the cosmetics alone are worth it in my opinion. Pictures are before and after.
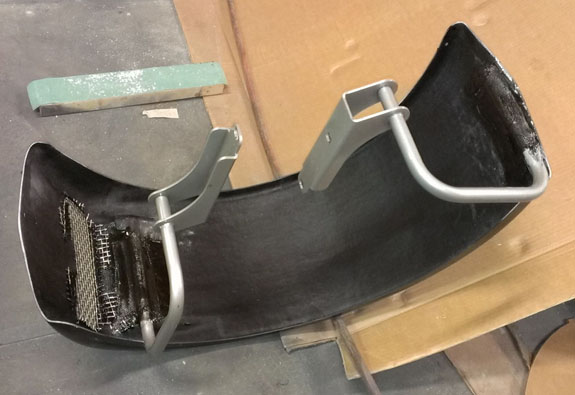
We've been using off-the-shelf rollbar padding (see pictures) but I'm now in the process of getting nicer custom-molded pieces quoted.
Pete, Josh and company spent yesterday working out some final details on the electronic dash. It's nearly ready to go and I'm really excited about all the functionality. I'll do a full writeup on it when all is done.
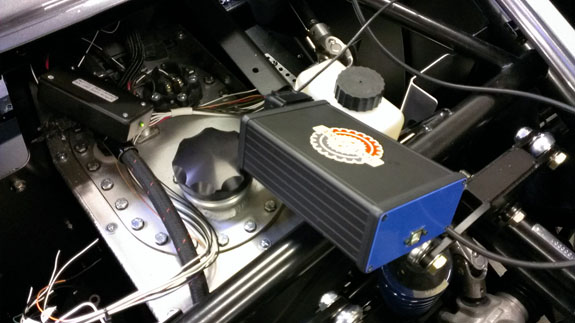
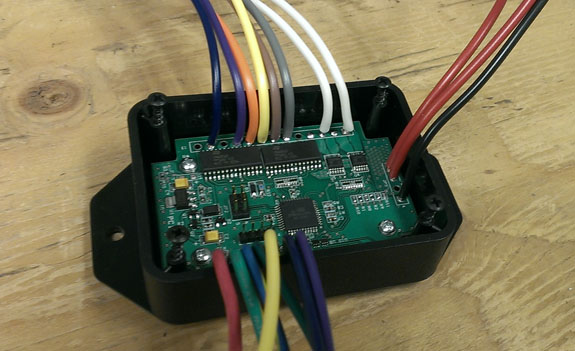
The other piece of custom electronics that Clay has been designing, the lights controller box, is done also. It eliminates the need for fuses and utilizes modern self-protected solid state switches for everything. It also handles all the multiplexing so we can do running lights, self-canceling turn signals, brake lights and hazards all with just a single LED bar per corner. The box also controls the high and low beam headlights and is fully programmable.
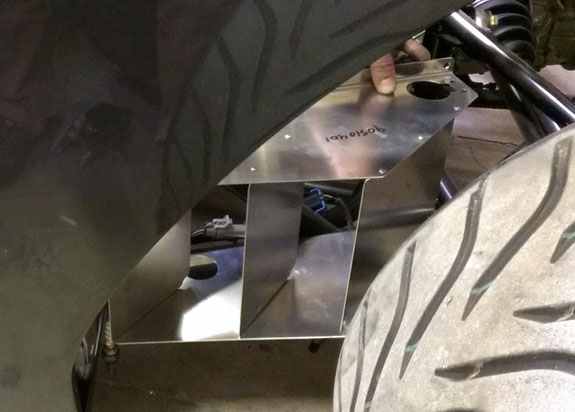
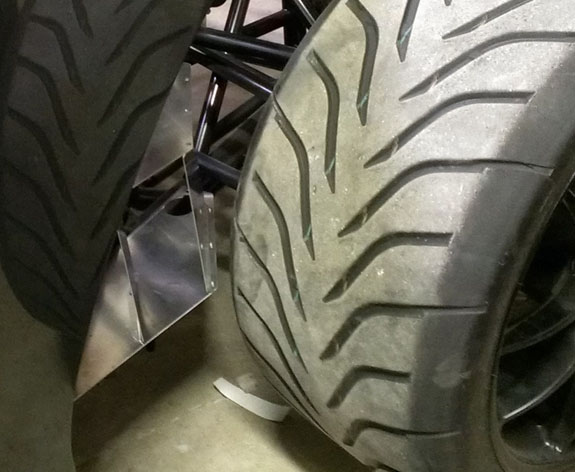
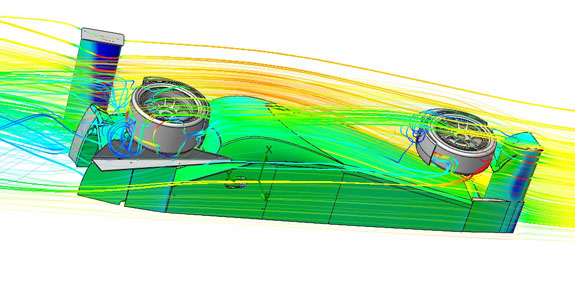
Oil cooler ducts and mounts are designed and made. There will be a cooler for engine oil and another for the gearbox on the opposite side of the car. The coolers are positioned so that they are fed from the high pressure area ahead of rear wheels. CFD shows that there is a good deal of airflow there. The ducts are off to be powdercoated black so they should be essentially invisible when installed.
There is a lot of other stuff too but this is what I have pictures of right now. 03/29/14 Parts are now arriving from various vendors and we're doing final assembly on several cars at once. The oil cooler ducts are back from powdercoat, the drysump plumbing has been finalized and all the fittings are here (after vendors sending us wrong ones a couple of times, having to return them and waiting for replacements).
The upholstered seats are arriving. The picture below is of the wider 18" seat. The narrower 16" is standard. Besides accommodating bigger drivers, the wider seat can also be used by those wanting to make a custom 'bead' seat insert like those used in our D1 and D4. We can provide fitting and custom upholstery for those.
More painted bodies are arriving. Also, the paint protection film kit is now fully developed and test-fitted so those are avialable as an option now.
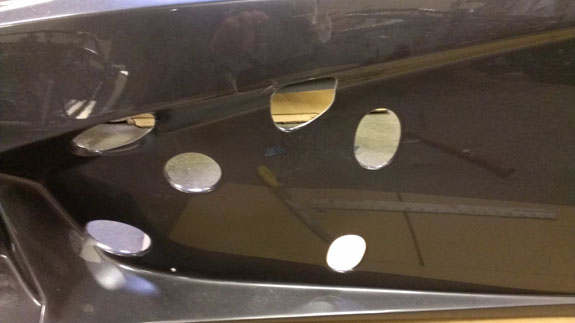
Fender mounts are back from powdercoat and we have several sets of fenders which we are bonding to the mounts. The mounts in the picture are silver, black is standard. The openings in the fenders will get wire mesh screen same as radiator intakes.
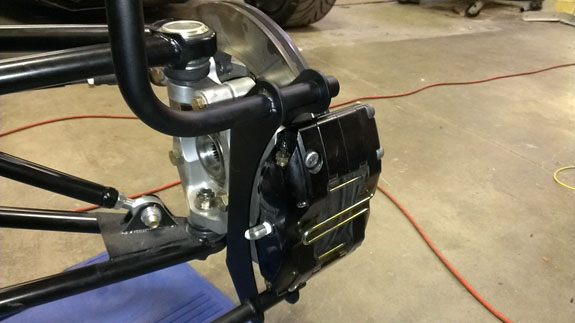
Parking brake mount has been designed, the brackets are made and test-fitted and off to powdercoat now. Still need to do cables. Separate parking brake calipers and caliper brackets are already designed and made. The whole system fits pretty well and should be functional and effective.
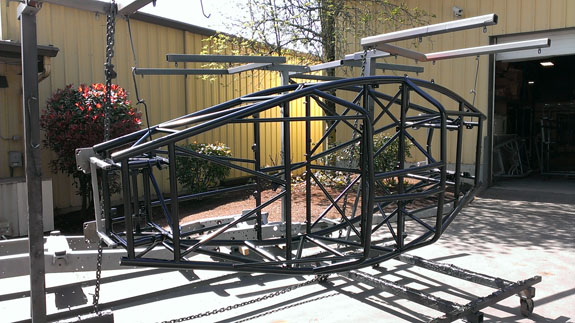
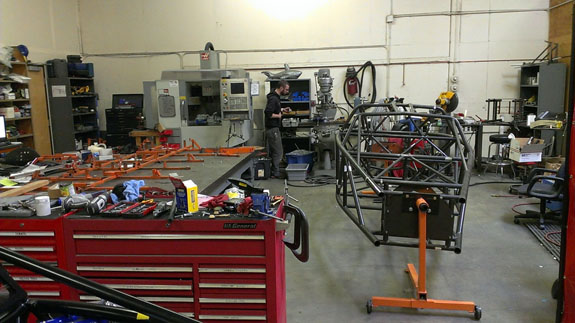
These are the highlights. As everything comes together the pace of progress accelerates. To put the work in perspective - we now have over 900 tasks on Wrike.com since we switched in December (roughly 3/4 of which are completed). In using our recently added data sync tool (all data is backed up off-site daily) I noticed we have over 17GB data in our main CAD folder, in over 13,000 files. These are all CAD files that we (mostly I) created over the last 5 years. There are a bit over 3,000 part numbers in the system so it averages out to roughly 4 files per part number. SolidWorks file, drawing file, pdf of the drawing and a .dxf or a parasolid would be typical but of course some part numbers have more files associated with them (like NC programs and/or analysis such as FEA or CFD), and some fewer. On the average it works out to about 7 new CAD files a day, every day, for more than 5 years :) Doesn't really work like that in real life obviously but gives a perspective on part of what it took to get here (there's also designing, welding, machining, building, testing, redesigning, sourcing parts, ordering, receiving, inventory, accounting, etc.). The data backups came in handy recently when my laptop harddrive crashed. I did lose about half my emails and had to spend a couple days messing with server configuration and setting up another laptop to use while I wait for a SSD to show up. Then I'll have to set that up too... Computers are wonderful tools and because of that I've gotten very dependent on them. So when one breaks it is not fun. On the plus side, as a confirmation of our IT practices CAD work was not impacted other than the time I lost to dealing with the issues. And now my email is set up better too. On a random note - I designed our Ducati bracket a long time ago thinking I'd build 5, sell 4 and mine would be free. We're now at almost 800 shipped to date. I don't know how many Sport Classics Ducati has produced, but if I were to guess 10,000 that would mean that nearly 1 in 10 of these bikes worldwide have my bracket on them. Pretty good feeling :) Now if we could pull that off with trackday cars that would be something. 04/05/14 First, an announcement - we've just added another capable set of hands to our team. Mark has been building racecars for a long time. He is an expert welder and will be doing most of the welding for us going forward. This way Tristan and Jay can focus on final assembly and other tasks. More stuff coming together. Overall, the shop looks like this now which I think is progress.
The specifics - After being mysteriously lost for 3 weeks the rear window bulkheads finally arrived and are now back from powdercoat and installed on the 4 chassis that are in final assembly right now. Another step that makes the cars look that much more finished.
Apparently different assumptions were made by different parties in the sequential gearbox project and now we're having to sync everything and make it work. It's taking more effort and shipments from the UK than anticipated but the outcome will be positive when all is done. The good news is that everything fits, after some work. We had to check a number of things (it's a very complex 3D puzzle with tight tolerances in every direction, as always). The halfshafts clear the pushrods by over 1/8" so we're good :)
Now the mount can be designed and fabricated. Which is what we did.
The Sector 111 bodywork has been back from paint for a while so we temporarily test-fit it on Adam's car. The purpose is to see what the cutout around the supension looks like when installed. I like it. So does Adam, so much so he decided to have his car done the same way. This is obviously not the Dragon bodywork, but the cutout is what facilitates easy removal for fitting alternatives. Other than that one area, it's standard D2.
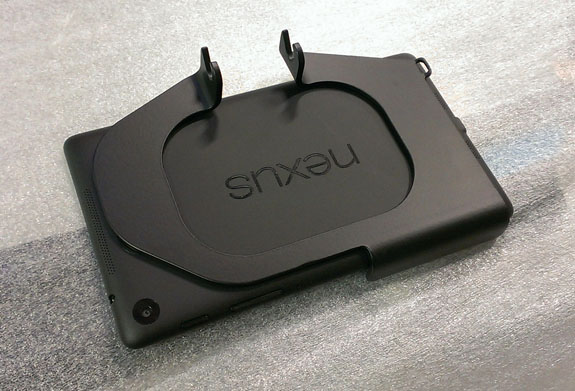
More fenders are getting assembled, interiors getting done, and so on. On the subject of interiors the dash mount brackets are back from powdercoat. The dash is bonded to the bracket for a clean look and minimum weight/space. There will be a second tablet paired to the dash via Bluetooth for trackside data analysis, video uploads and so on. The forward facing camera is readily seen in the picture. There is also one facing the driver, if that view is needed.
04/11/14 Well, the space is getting a bit tight in the navigation bar above and we're getting very close to a turning point in the D2 history, so it all works out. We're only a few weeks from completing several cars at once and when that's done, the development chapter of this blog will be finished and a new chapter will begin. In the meantime, more progress. Our Pikes Peak race chassis is done in the welding rotisserie and another D2 is started in the jig while yet another is back from powdercoat. The pipeline is moving along. We're getting better at this every day and are pretty decent already :)
On the subject of Pikes Peak, I checked our 2012 blog and that's about the stage we were at back then. So while it'll be close, still pretty much on schedule. Look for a long-overdue dedicated blog and fan-sponsored effort shortly. The sequential box saga continues, hopefully all will be done shortly. Got the release bearing, adapters and plumbing sorted in the meantime and the mount is now back from powdercoat.
The lighting system bits are arriving, wiring harness work is in progress and I even designed a nifty license plate/backup light bracket which has now been ordered. More pix of that when it's all done. Also getting more sets of fenders and installing them on mounts. Very production like.
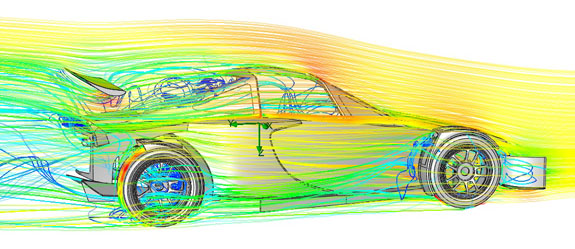
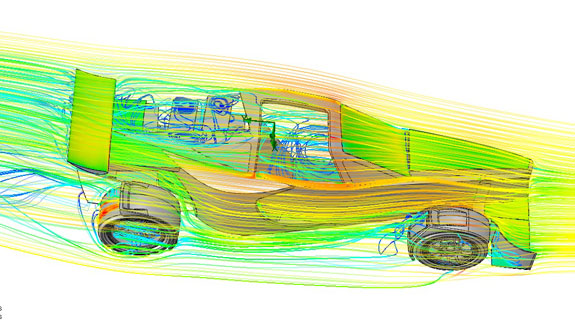
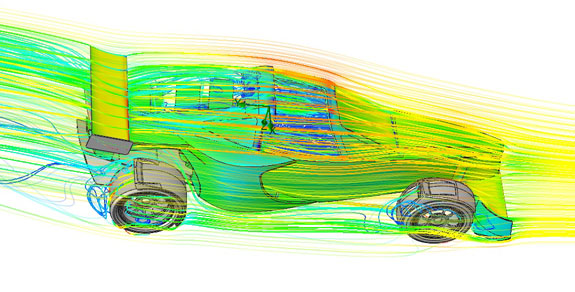
One of the remaining items is the stock aero package and to that end I've been running more CFD. This is a rather synergistic process - the initial setup did take a while but it was done long ago. Now, I just tweak one thing at a time and start the run last thing at night. It takes 10-12 hours so first thing in the morning I check and save results and next evening it's ready to run again. Roughly 15 minutes of my time per day, all-nighter for the computer. I love it when work is getting done while I sleep :)
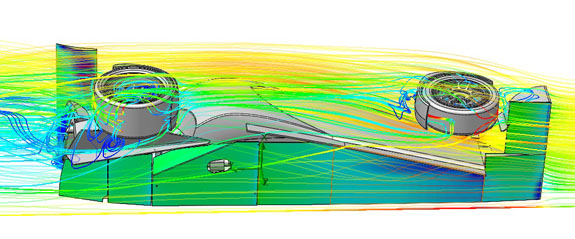
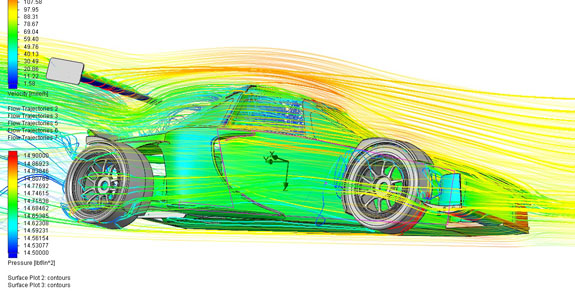
Of course the results have to be taken with a lot of caution but with back to back runs I can get a sense for what a particular item does or doesn't do. All this feeds into my in-head simulator and will eventually result in real parts that have a better than even chance of working. It's been (and will continue to be) a lot of effort but looking around I can see it all coming together. It'll be fun :) 04/19/14 Some more on CFD. I've been running iterations (process rather short on instant gratification - change one thing, wait 12 hours, but still very useful). I now have a configuration that should give around 400 lbs of downforce, evenly balanced, at 100 mph. And it should be fairly independet of rideheight. Which was the goal. As a result I have a wing profile that we can go and get made. I'll leave it to sharp-eyed readers to spot the differences between earlier pix and ones below. You can also deduce what tools I have for tweaking downforce if need be :) Or you can just take my word that after all this experimentation I have some. That's the real purpose of CFD - give you a promising set of tools to bring to the track for real life testing.
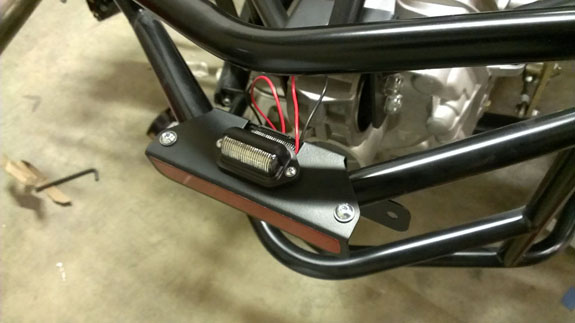
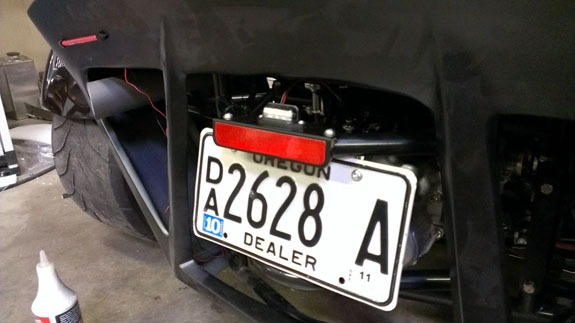
While on the subject of downforce and CFD, I want to revisit the importance of reality checks. Case in point - I was looking for some off the shelf wings to buy and the only interesting thing I found was the GT1000 from APR. They even have some impressive looking CFD data. Something didn't look right though. This is a roughly 6' x 1' wing - model airplane size. Yet their numbers are pretty astounding - up to over 1,600 lbs of downforce?! OK reality check time. What they're basically saying is that if you stick this model airplane wing on a Cessna it will fly. Or, with 500 lbs of force at 80 mph, if you have two 250 lb guys holding on to one of these in the back of a pickup truck at 80 mph, they will both catch air. Or, if I put two of these wings on a Miata I could drive it upside-down at 120 mph. Uhm... not likely. So what's the story? Well, I can only guess but here's my take. The pictures they have do look too simplistic, air is never that neat, so I suspect some of the parameters were not set appropriately for the particulars of the simulation. Still, the results are just too far out from what I would expect. So my best guess is that they got results in Newtons (fairly common) and put them on the website as pounds without the nearly 5:1 conversion factor. Probably just a miscommunication and not a deliberate attempt at misinformation. This stuff happens. As a quick reality check of this theory - a wing of this size producing about 350 lbs at 160 mph and around 100 lbs at 80 is probably about right. My results show just under 400 lbs at 100 mph from TWO wings that are about 30% larger each. Anyway, pretty pictures and official-looking reports are all well and good but don't forget to use your head :) And we'll be making our own wings rather than buying them pre-made. In the meantime, there's progress on more mundane things. Like the license plate bracket which also houses the licence plate light, reverse light and a reflector. Downforce? A couple ounces, it's what the whole thing weighs :)
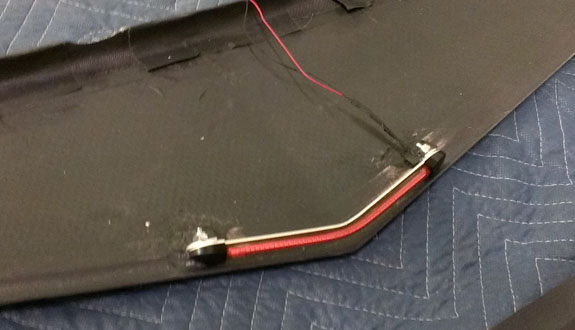
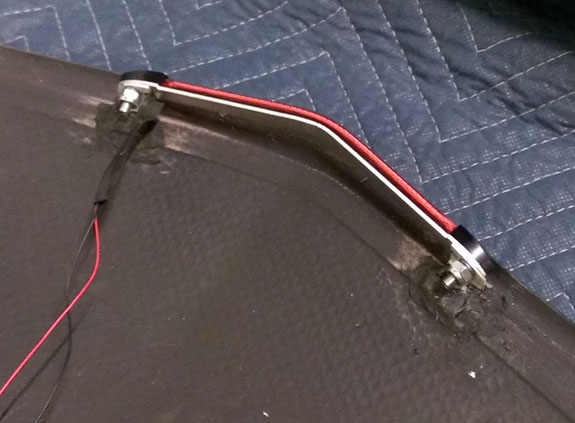
Some details of the CHMSL (AKA stop light).
Also another chassis is out of the jig and is in the rotisserie for finish welding, while work commences on the nex one.
On the Pikes Peak car we're figuring out the intake for the LSA engine. Look for a separate Pikes Peak blog and this year's crowd funding effort shortly. There's much to tell there :)
Stay tuned. Site Sponsors and Links:
|