|
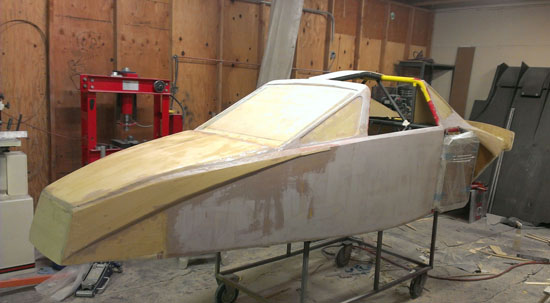
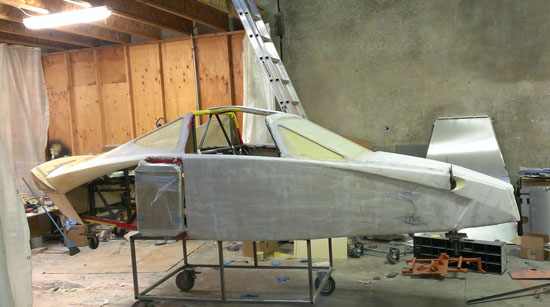
06/22/13 The bodywork is in full swing. I"m now basically just sculpting it by hand and using CAD as a quick and dirty reality check, only inputting enough to give me an idea of what it might look like. The various methods, materials and techniques I'm coming up with seem to be working quite well. This is a lot more cost effective than CNC, takes only a little more labor (most of it is in the finish sanding anyway) and when building on top of a precision frame with frequent measurements and some templates, it's just as accurate. Plus this feels more like art, which I enjoy :)
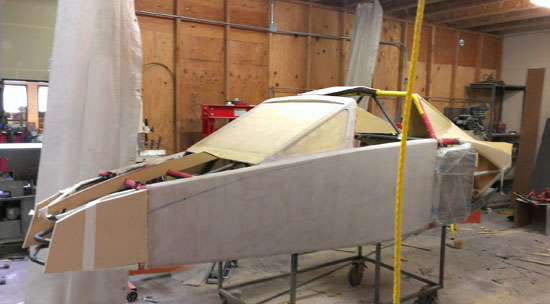
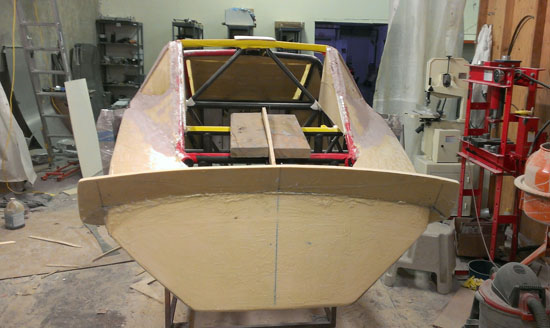
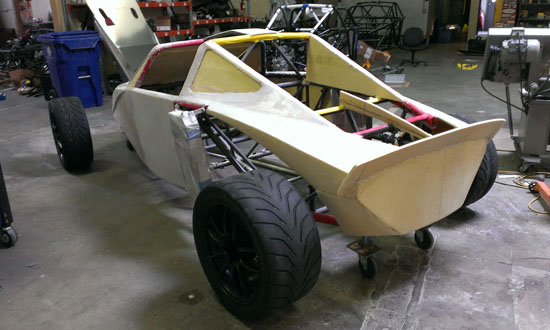
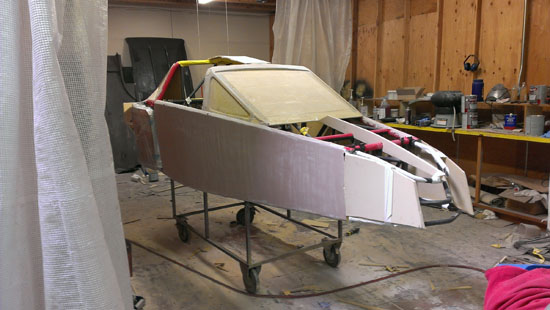
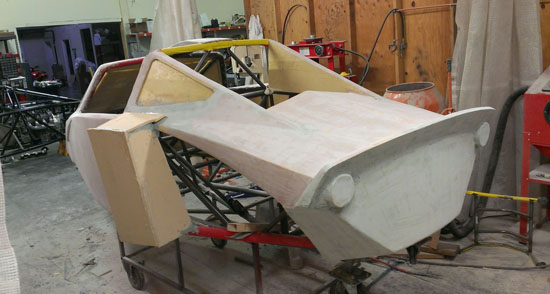
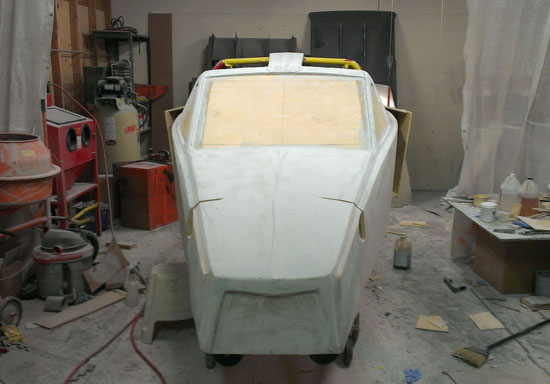
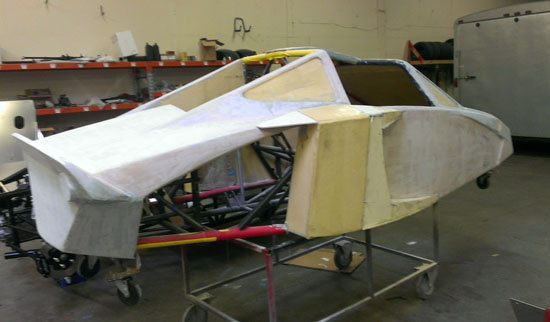
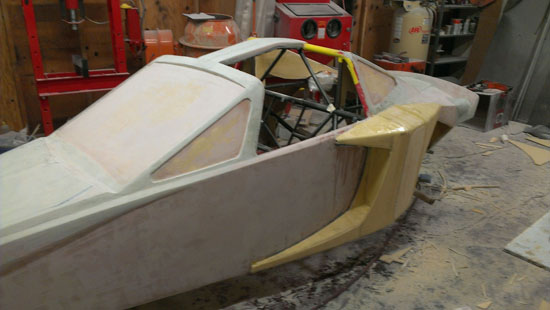
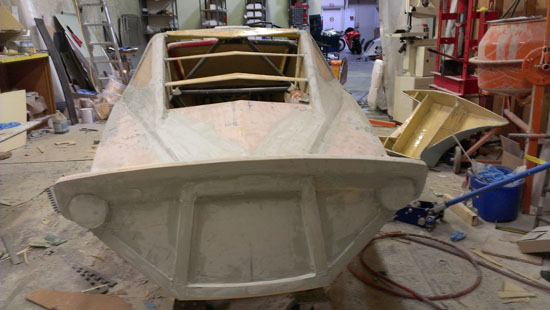
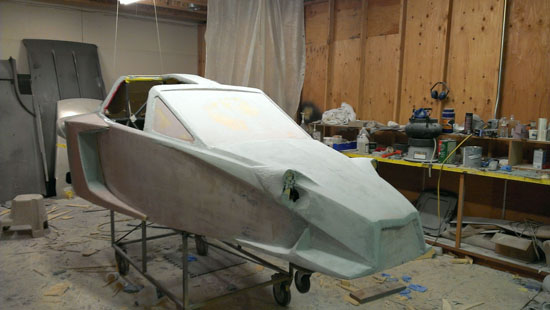
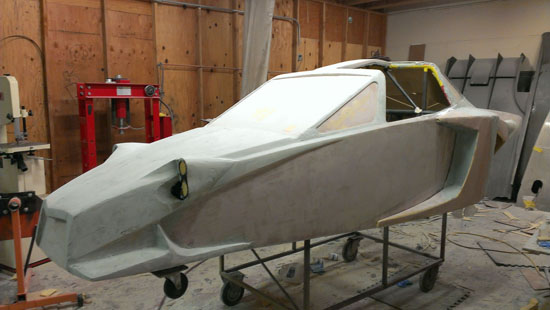
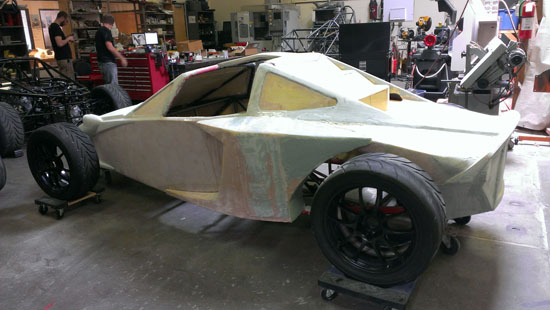
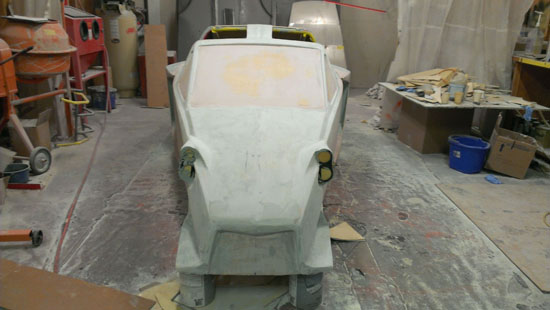
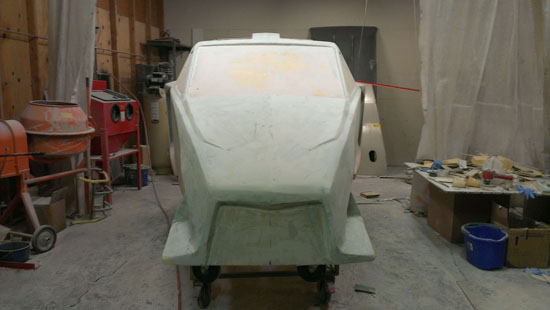
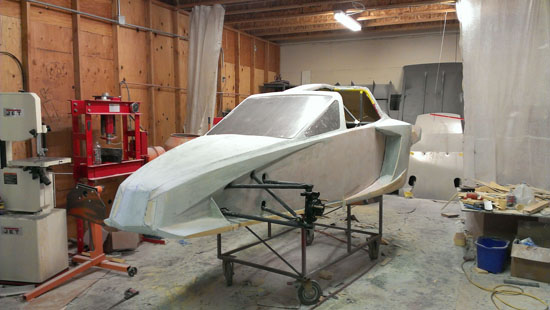
Of course this is still work in progress but as I go along I'm figuring out how various bits will be done and what they need to be. Yes, there will be a fairly substantial spoiler on the back but it will look more refined than the temporary panel. Think along the lines of Lancia Stratos (which is one of my all-time inspiration cars). Weekends are great for doing this kind of stuff with no distractions from the thousand daily business demands. There will be more progress tomorrow. 06/24/13 It seems I only get to do this once a year or so, on the average, and always as I watch the car evolve I also watch my reactions to it. Sometimes things that I thought would look right don't quite, but then sometimes a series of decisions makes everything fall together just so. It's hard work but it's fun. Below are some pictures from the last couple of days. No it's not the final shape, just getting some structure in place. The nose won't be a flat rectangle. And I do have various access panels, styling accents and all that planned. Just bear with me. It's a process.
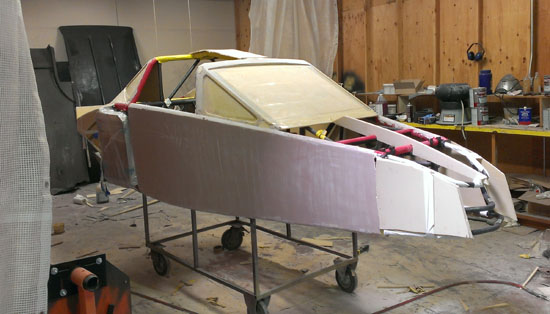
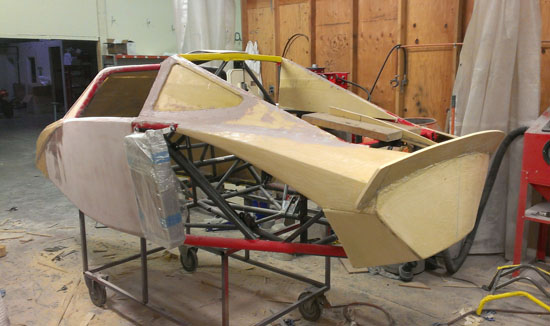
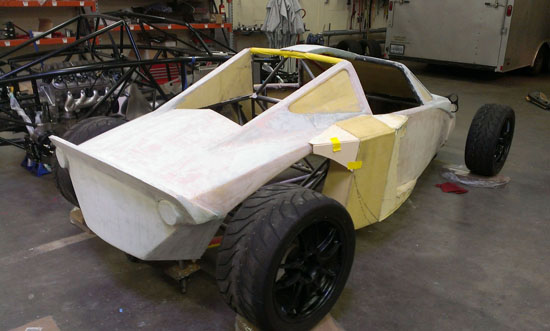
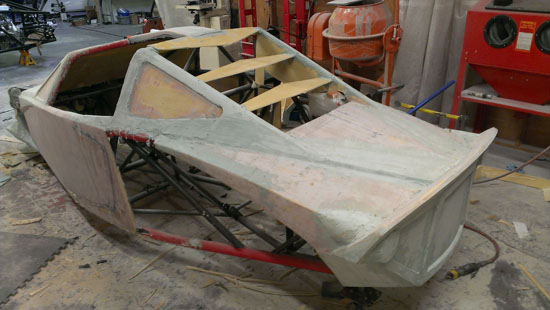
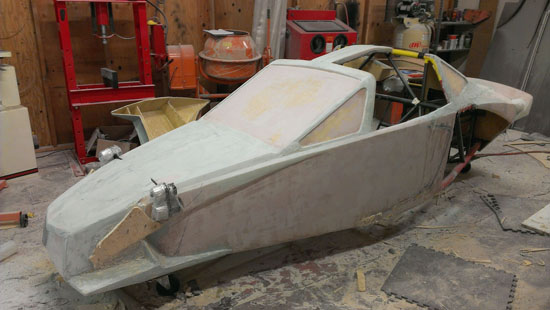
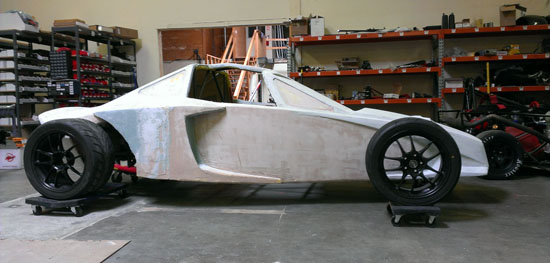
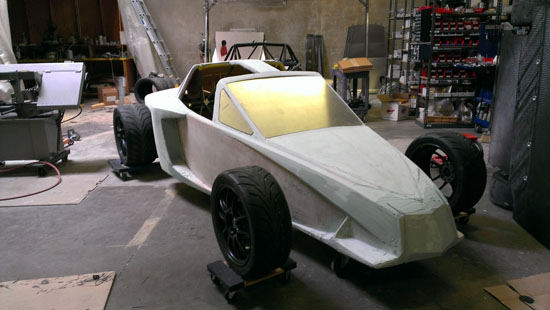
Yes, more than one person has suggested putting an outboard motor on the back :) It'll look more like a car and less like a boat when it's all done. Not that there's anything wrong with boats - in fact they're another source of inspiration and another thing I'd like to try my hand at designing someday. 06/26/13 It's gratifying to see steady progress. The work is physically demanding, dirty and toxic but the results are worth it. Today we put the plug on casters which make it easier to see what it might look like as a car. Still a couple inches higher than it will eventually sit but very useful nevertheless.
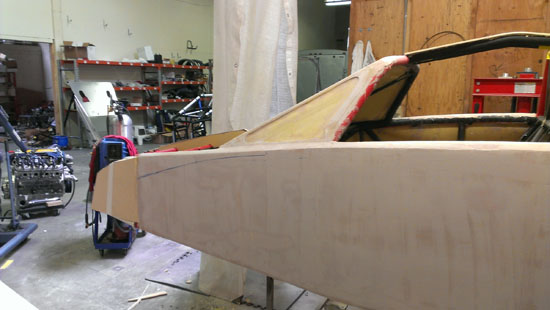
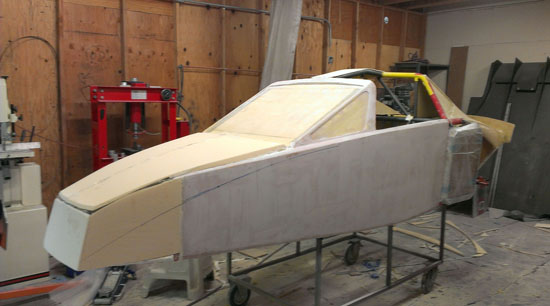
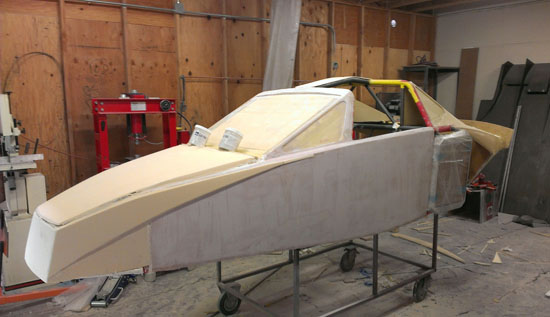
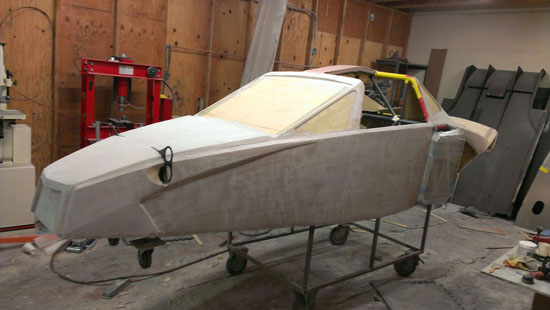
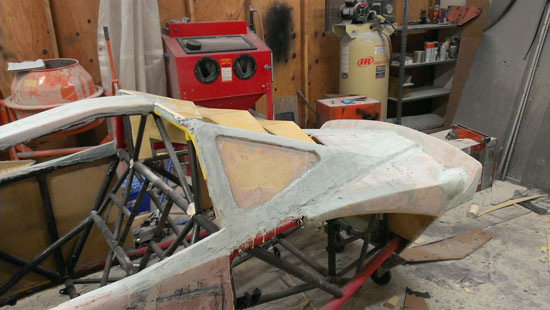
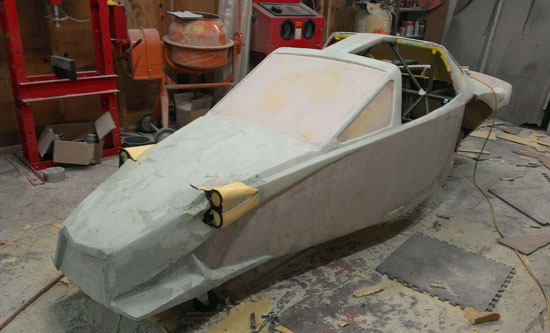
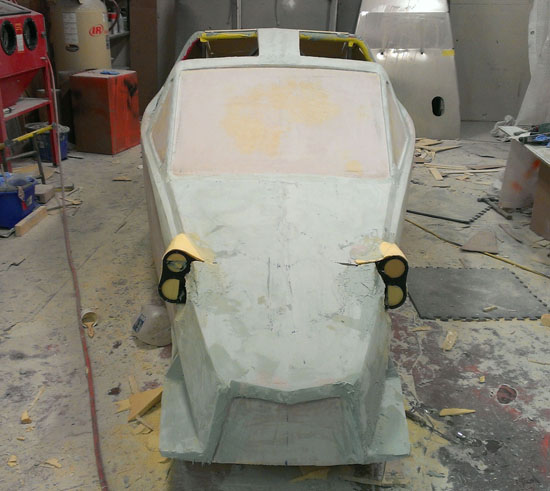
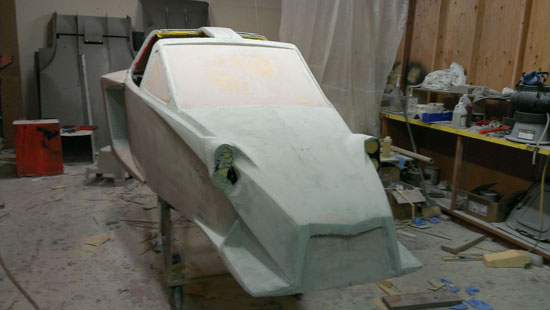
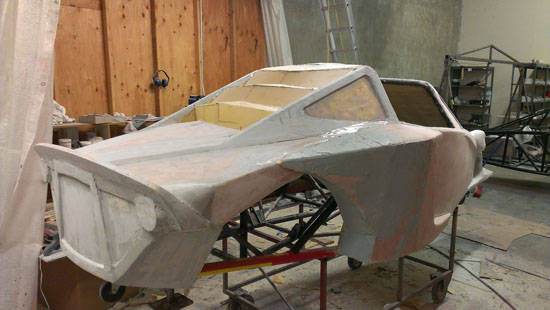
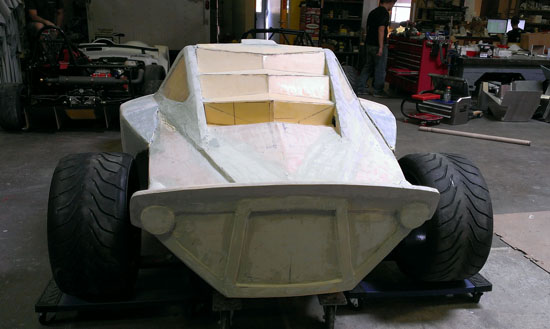
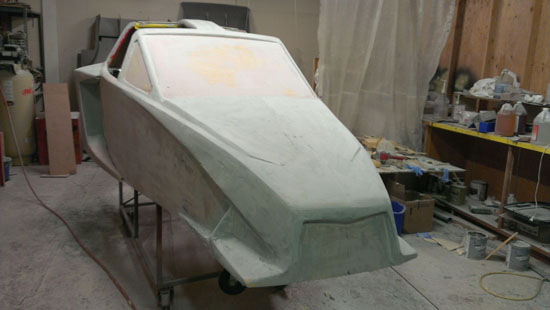
The nose is coming along. Above are some temporary pieces of foam to see what a styling solution might look like (requires lots of imagination to visualize final product). Below is the later-in-the-day evolution of the concept. Still needs work but I already have the next steps planned.
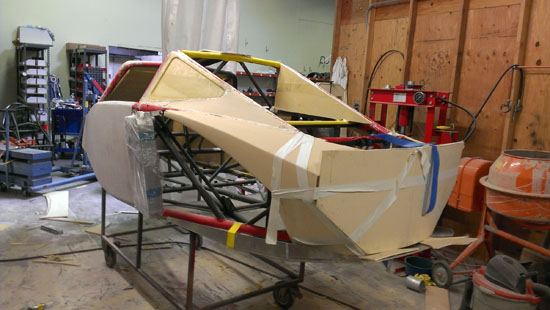
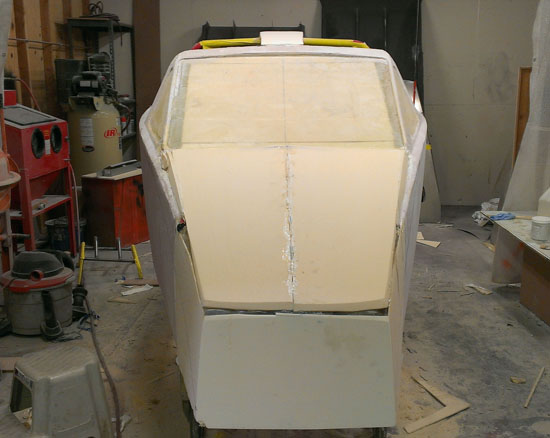
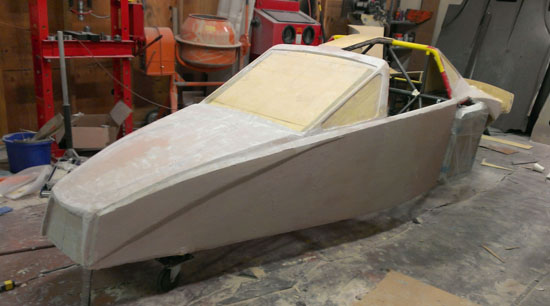
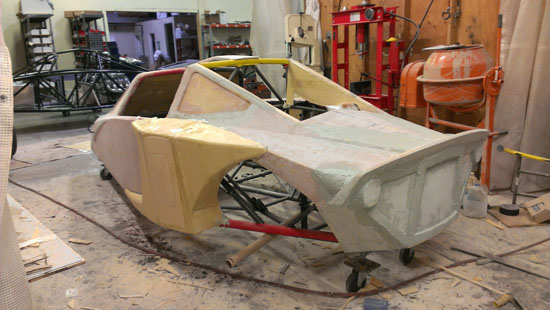
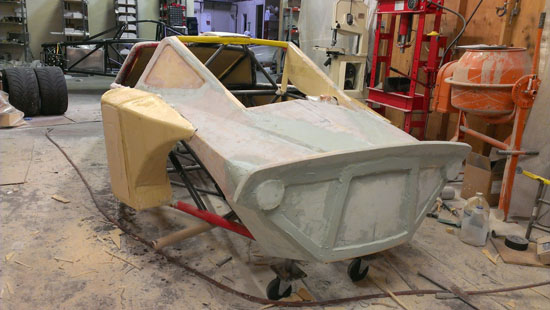
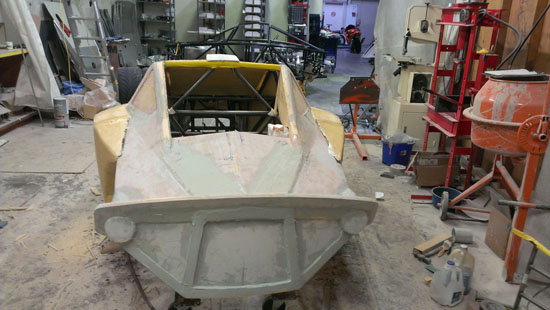
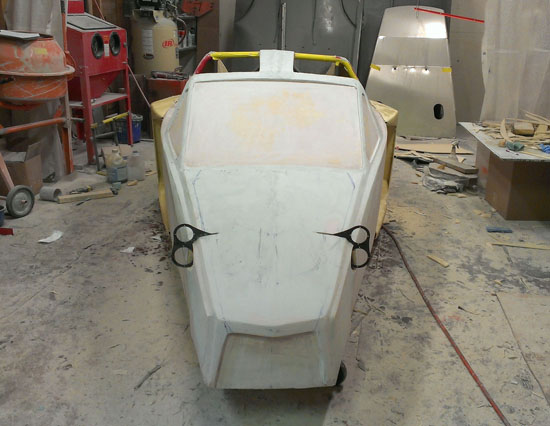
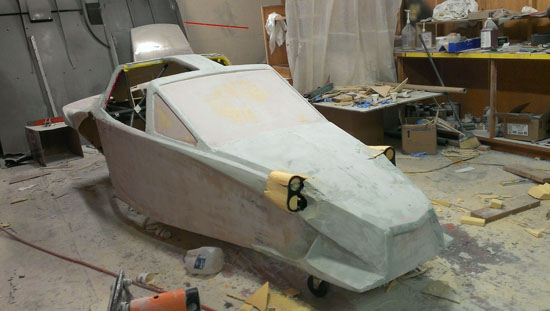
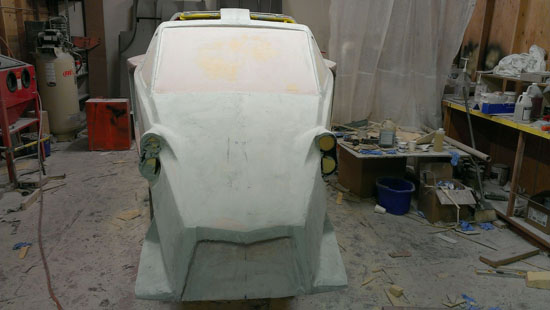
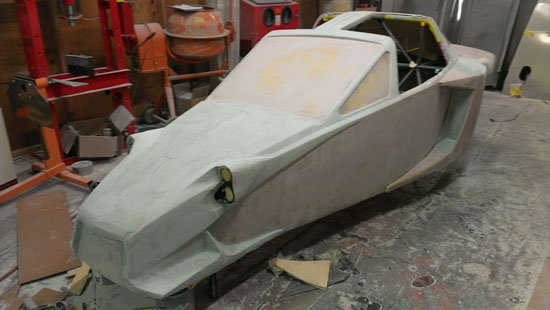
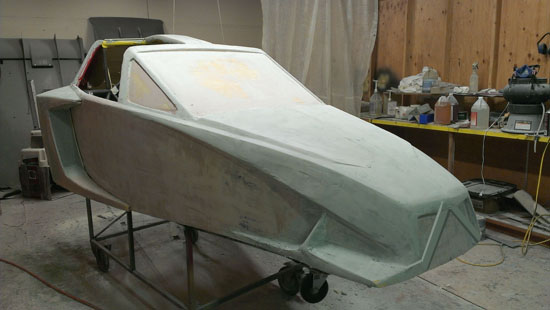
For now I'm just getting basic surfaces down. Very soon I'll add the headlights which will change the look a lot and may require some additional surgery. All part of the process. So far I've used four 4x8 sheets of foam, four gallons of resin, a bunch of glass tape and four gallons of bondo. Going forward it will be mostly bondo (I expect another 4 gallons approximately) although some foam and resin are still needed for the radiator scoops. All in all not too bad. 06/27/13 The one drawback of posting work in progress is that people end up forming opinions based on what they see and not on what eventually will be, since they can't see into my head. Which, I guess, is the way it is. I still choose to post things because it's a record of where I've been. For myself as much as anyone. As of today the design has progressed from this...
To this...
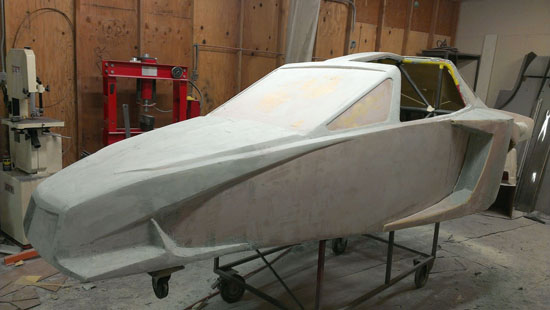
To this (and it's still not done of course).
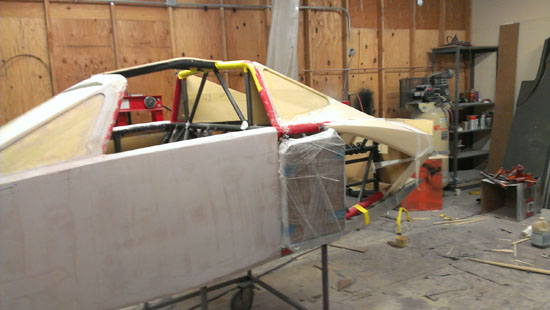
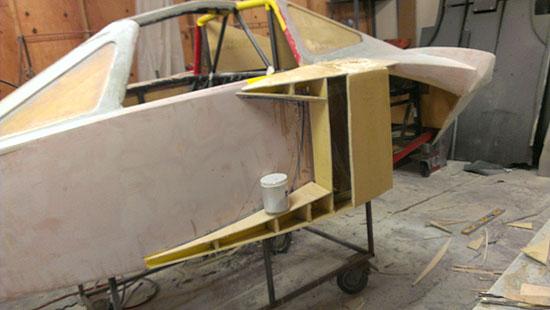
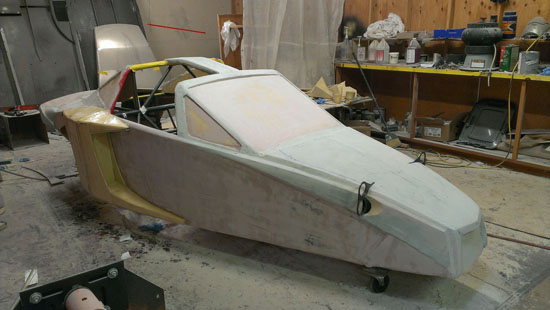
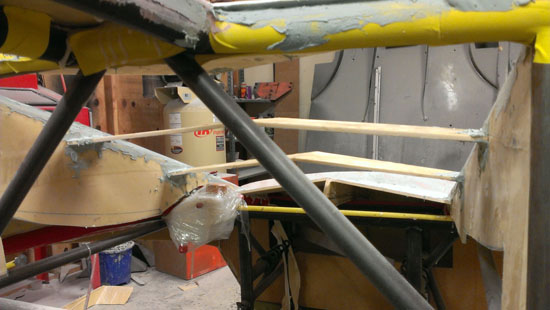
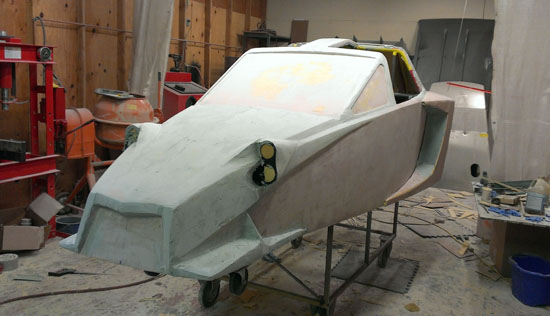
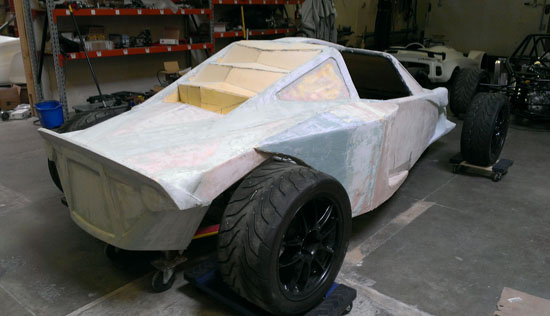
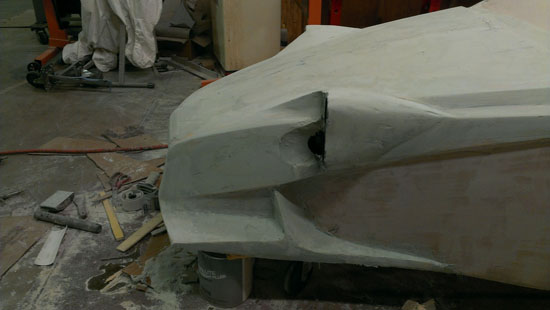
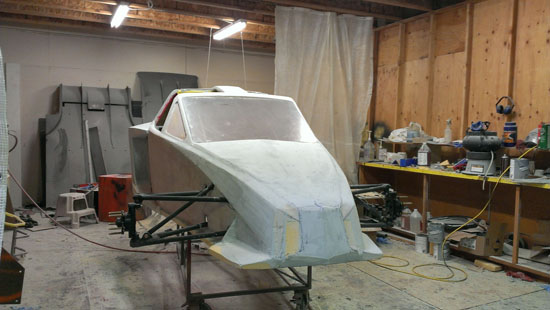
I have roughly two more weeks left on this, before I turn it over for finishing and then eventually molds and actual body panels. 07/01/13 Lots of bondo and sanding. It's been hot, 100F yesterday, and the composites room is not air conditioned. Have to bring a change of clothes to the shop. There's steady progress though and the time has come to start on the radiator ducts.
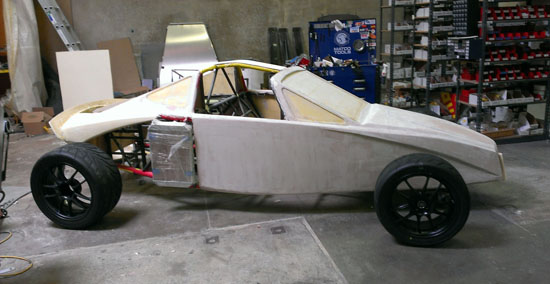
The rough shape will come along fairly quickly, then finish-shaping and sanding, then the tricky part - removing the ducts from the plug so that the rest of the bodywork can be finished. The duct structure has to be strong and stiff enough to keep its shape when separated from the plug. What you see in the pictures above is the beginnings of it. Someone mentioned that it's starting to look like an aircraft. Good. Part of the theme for the cockpit area is the attack helicopter look. It's coming along. In other but related news, yesterday was the Pikes Peak race. Loeb demolished the record with an 8:13. Based on everything I've learned, if we were running the D4PPS this year and all went well we'd be 2nd or 3rd right around the 9 minute mark, but nowhere near the Peugeot. But this does get me thinking - the D2 is already at about the same weight as the Pug and getting 850 hp from an LS with a couple turbos is damn near trivial these days. We'd need a sequential box strong enough ($$$$$) and good aero, which we have room for on the car and CFD capabilities to develop. So for next year we can have a D2 that's similar in performance to this year's winner. Of course beating a multi-million dollar factory effort and a WRC champion driver would take some doing, but we dare try. All we need is someone to put up the cash, and not a lot of it relatively speaking. Way less than what a Porsche Cup car costs and we'd be much faster. Any takers? Get in touch. 07/03/13 Some good progress on the radiator ducts.
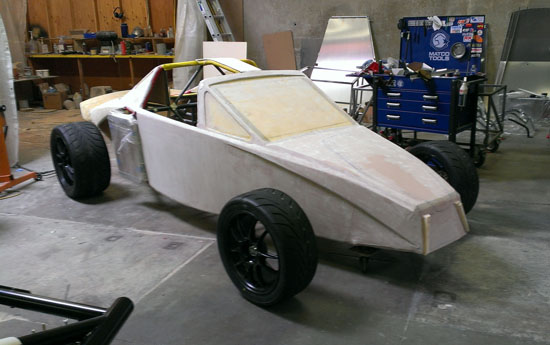
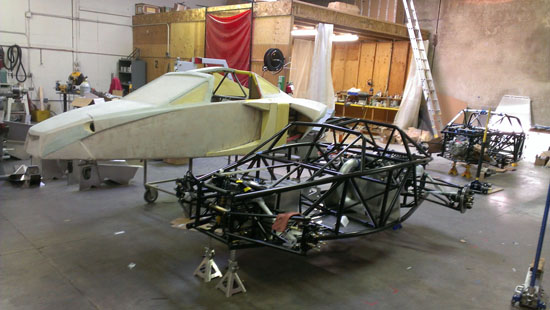
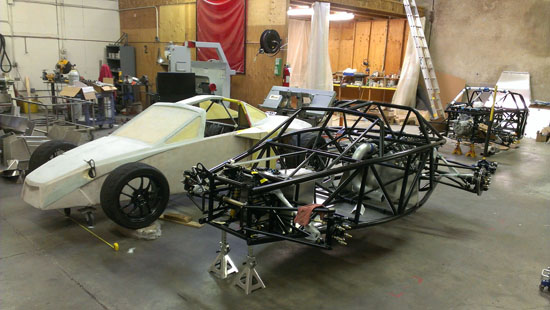
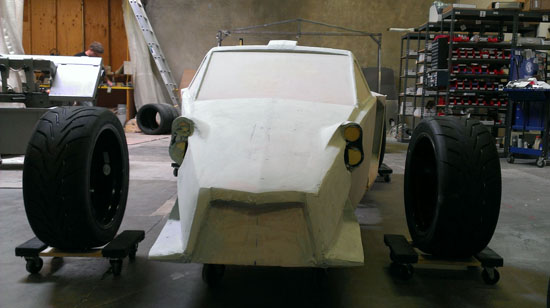
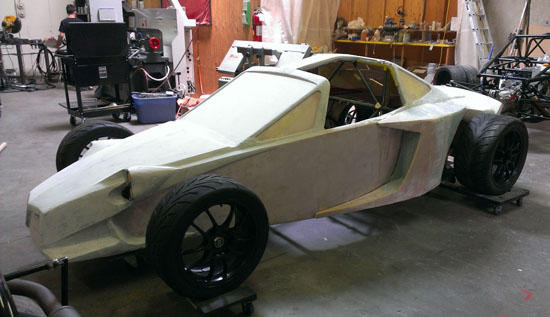
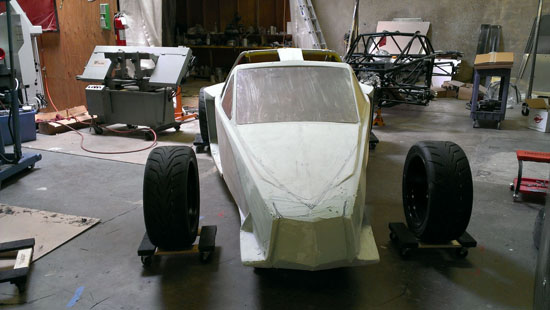
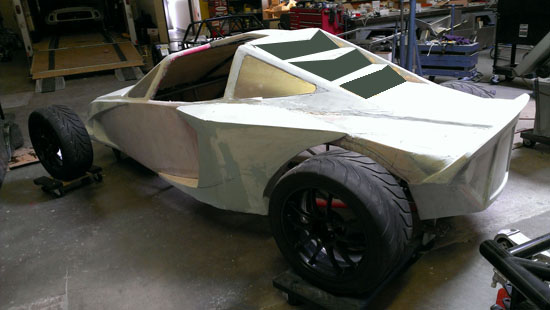
At this point it made sense to put the plug at more-or-less working height again and see what it looks like with wheels next to it. Which is what we did.
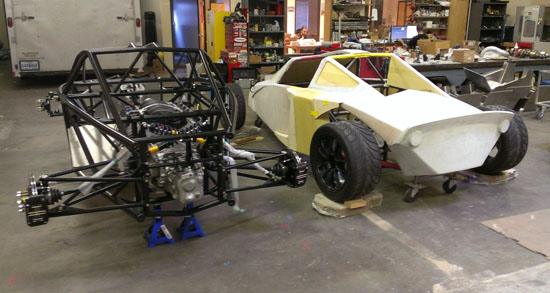
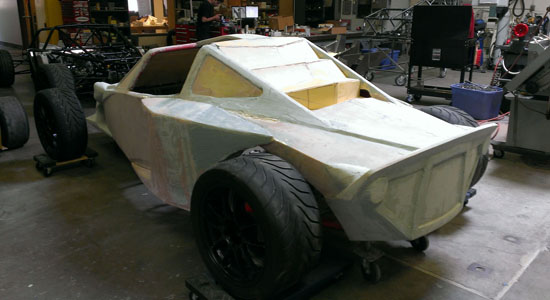
Not done yet of course but getting there. The car is now taking on a very distinct identity of its own, which I like. Yes there are many influences of course but the D2 is its own design. In the meantime, Pete's bodyless chassis is asserting itself by being the fastest car at every trackday it attends now. It's a good start :) We're learning a lot every time we run. The evolution will continue. 07/09/13 Pete has been having fun with his D2 (chassis) - I've lost count how many trackdays. 7, 8? Yesterday was PIR - here's a video of that. Tomorrow is another one. It is awesome to have a customer who is willing to be the test driver - we've discovered a number of tweaks to do, verified other things and generally it's great to see the car out there being used. In the meantime, in addition to good assembly progress on several other D2s, the bodywork continues. I ended up redoing the radiator ducts twice but now I think they're just right. So, a layer of glass to hold the shape and after it cures, much bondo and sanding. This is just the foundation and the finished shape will be much more refined and not as angular. Quite a few detail changes to the tail, too. It's coming together. In the meantime John is making progress on his LS7 powered D2 as well.
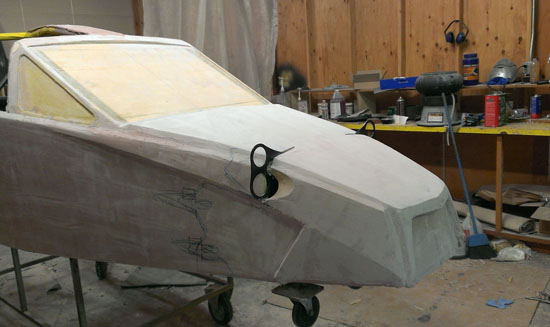
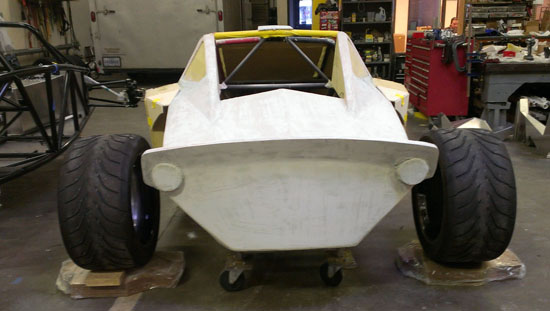
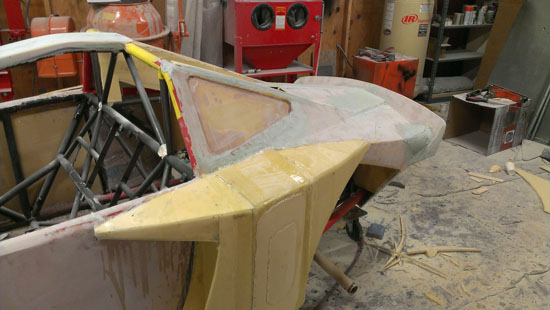
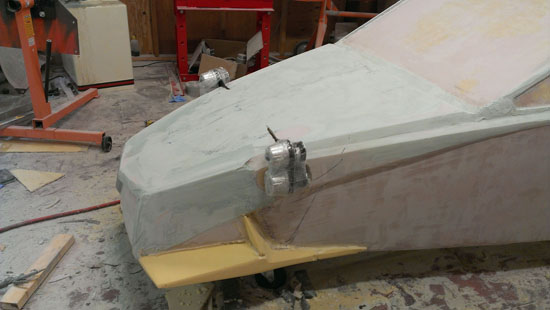
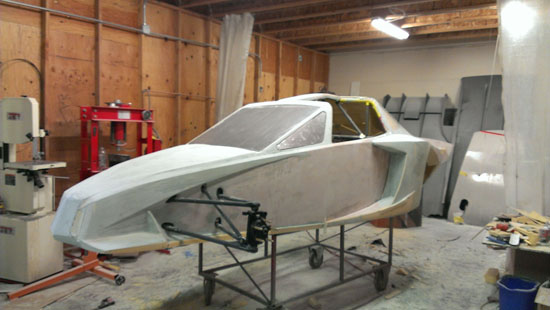
The taillight 'fairings' fill a somewhat awkward gap that was there before, and they'll make even more sense once the headlight fairings are done. It may or may not be obvious, but I'm also trying to maintain some styling continuity with other members of the Palatov stable - the D1 and the D4. 07/13/13 Couple days ago we did a prospective customer test at ORP with the D4. Pete, as a lead customer, was invited and brought his D2 for some brake testing. I of course recruited him to do a lead-follow session - here's a video of that. Neither car is pushing it very hard, this being the first session of the day, but they're still moving right along :) The D4 is ultimately the faster car but it makes you work for it. D2 is a lot more user-friendly and more accessible to recreational drivers. With that break out of the way, it's back to the bodywork. Something has been still bothering me about the nose but I was hoping I could get away with it as-is... Then I was reminded that the nose does in fact look weak and needs more work. Damn. So, that's what I did today - update the nose to make it more aggressive and integrated. It's not final yet of course but this is the current direction. Headlight fairings will complete it nicely I think.
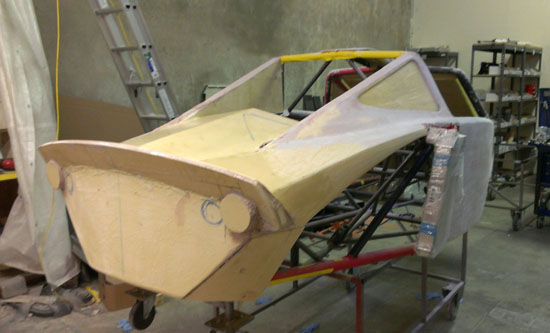
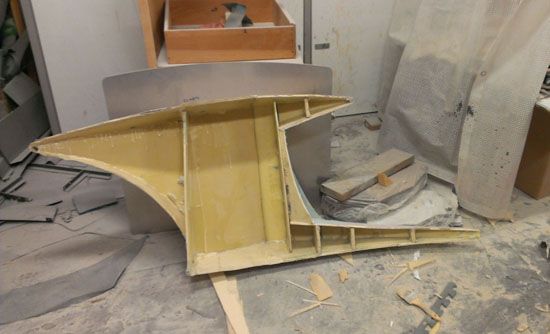
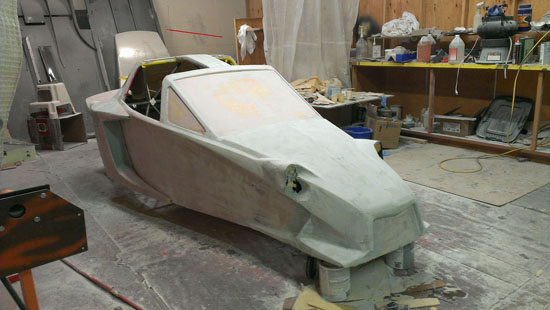
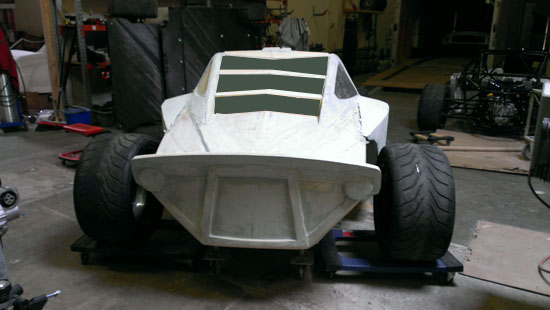
The 'dive planes' give the nose more presense, provide an additional styling link to the D1 and D4, and actually serve an aerodynamic function too. The near-vertical ribs serve as vortex generators and when blowing dust away with the air hose it's fun to watch the aerodynamics at work :) The very front will be an opening that provides interior ventilation air and any excess is going to exit through vents below the headlights. Besides the aforementioned headlight fairings the other major shape item that remains is rear louvers. After that it's a lot of finish surfacing and figuring out how the molds are going to be split. Getting a start on the mold splits, we've separated the radiator ducts from the main bodywork. they will be mounted back on for finish shanding. The reason I popped them off early is that if anything is going to crack or distort I'd rather it happen now, before a lot of finish work is invested in the parts.
Took a bit of doing but both sides came off without incident and seem to hold their shape well. 07/14/13 Good progress today. Figured out the louvers. What I'm going for is a balance of having the engine visible vs not having a big gaping hole. I also didn't want to end up with 80's louvered Camaro look. I think what I've got works reasonably well.
A bit more work on the nose and other details, too. It's coming along. 07/15/13 And now, some attention to the nose. It's shaping up to be a pretty unique looking car which is good.
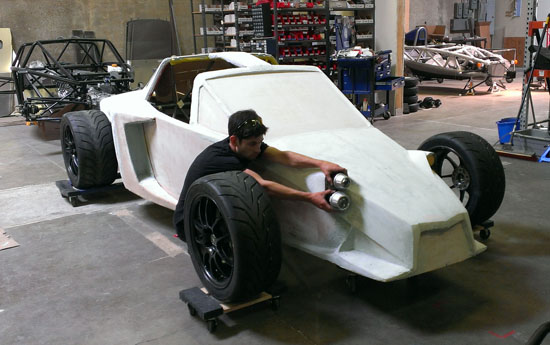
07/16/13 Just a few more progress pictures. My hands are killing me! :) All part of what it takes though. No pain, no gain. And yes, hand sanding would still be necessary if I had gone the CNC route, although probably less of it. But this way I get to see it in the flesh and adjust as needed. The pictures below are after several revisions.
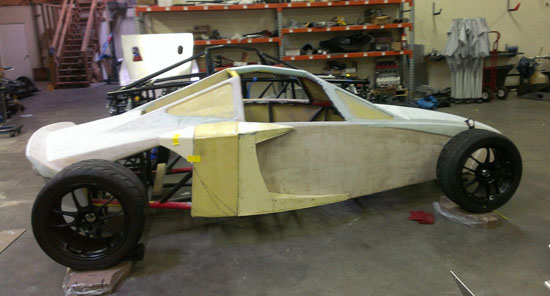
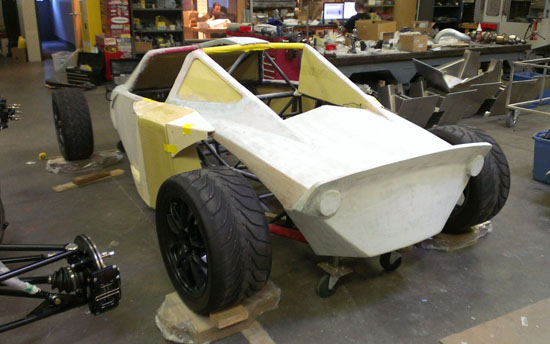
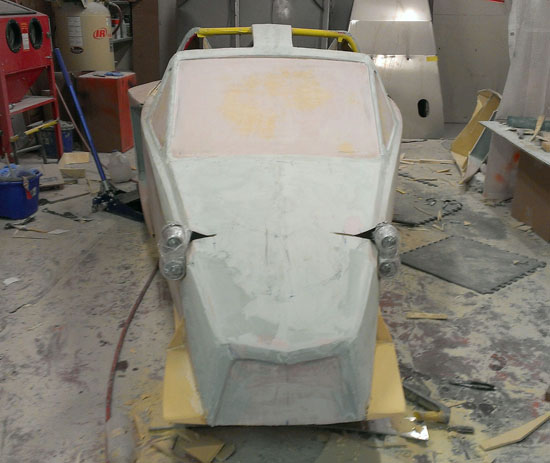
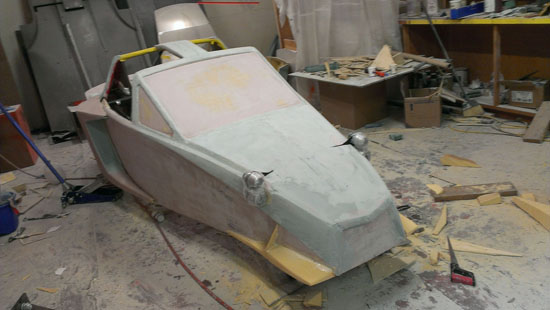
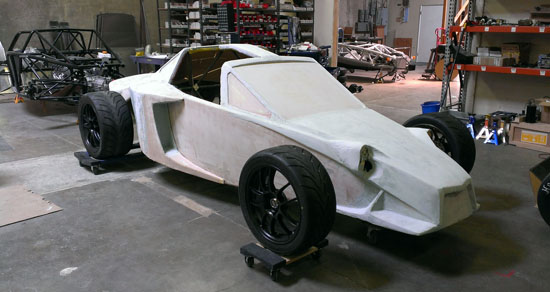
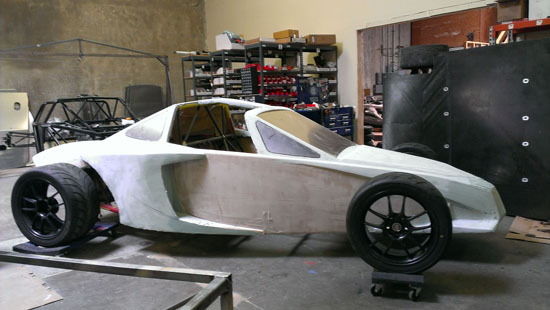
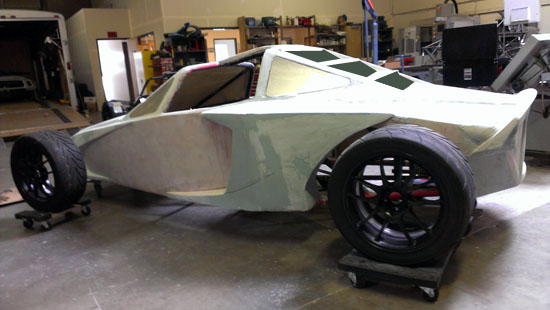
Pretty soon, tomorow most likely, I'll have to lower it and put it next to a set of wheels/tires again. 7/17/13 As mentioned yesterday, the next step is to set the bodywork down next to wheels/tires and see what it looks like as a complete car. So today that's what we did.
There are so many elements to interact that adding, removing or repositioning them relative to each other makes a big difference. Headlights are one example.
In looking at the above I realized that the nose needs more work. I tried a few different things in photoshop but eventually it hit me that the issue is a sublte conflict of the various surfaces that come together. So I spent a few hours sanding an bondo-ing. Not done yet but the progress can be seen below. Basically the nose is now wider and less convex. The 'dive planes' will probably need to grow some. Top of the nose needs to be less rounded. Other things will change as well.
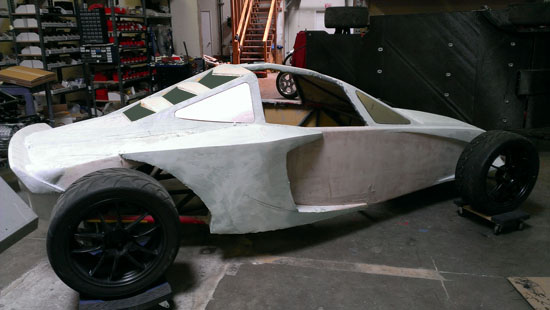
There will be additional changes, this is not done yet. Just a new direction. As the design evolves the changes should (hopefully!) become smaller and more subtle. At this ponit a lot of refinement still needs to be done but I'm generally happy with the overall shape and how the variuos elements combine in both form and function. 07/18/13 I suspect a number of people will be happy or relieved about this. The integrated headlight pods are gone. It wasn't necessarily my favorite feature of the design to begin with but I thought it could look reasonably good with fairings. Having gone as far as I care to with the fairings while I think they're ok they're not great. Then I started thinking about how the molds would work, as well as installation and alignment and they got a lot less appealing. The final straw was the fact that we ordered another set of lights almost a month ago and there's still no update on order status. Locking the molds to a single-source light module design with uncertain availability is not a good idea. So, out comes the saw and chisel (bondo is impressively tough!) and a couple hours later it's like they were never there. Still need to clean up the lines a bit of course, they are a little wobbly right now after the headlight removal surgery. Basically this gives me a lot of flexibility in how I do the lights. Can still do pods which mount directly on the body, our out on stalks like some earlier concepts. The mounting points that are already on the frame will allow either approach..
I do think the nose still could use more work and it can range from a subtle tweak to something more bold. We'll see. It's a process :)
07/20/13 I asked a couple professional industrial designers to come by the shop today and give me their opinions. It was a very productive meeting. Great to get a fresh perspective and I got some very good input some of which I'll incorporate over the next couple of days. In the meantime, here are some pictures of the most current state of the bodywork, with aluminum 'glass' and some drawn hints of what's to be changed (the louver openings are p-shopped for the moment).
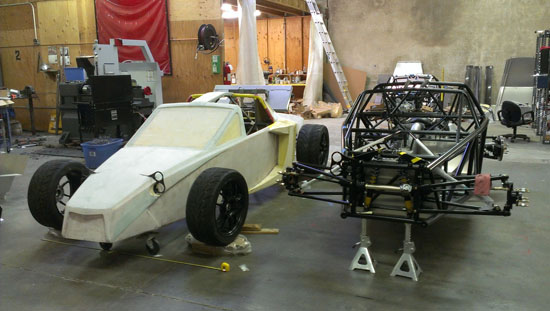
07/23/13 The process continues. One thing I had to make sure of is that the front suspension pokes out of the body where I think it should. The idea is to put features in the mold that both make cutting clearance holes for it easy and make it look like it belongs and isn't an after-thought. The advantage of building the plug on a frame is that I can actually mount a full suspension to it and check everything as it would be installed. Which is exactly what I did.
Sharp eyes will notice more changes to the nose (still not final), the sides and other areas as well. While I've been messing with the nose, our interns Robert and Matthew have been working on the radiator ducts and a number of other featurs - it's great to have some help on this! I'm not fully satisfied with the design as it is but I do feel that it's getting better with every iteration. A few more to go. The tail will get worked on next, then I'll return to the nose.
|