|
03/20/04 Another day of sanding. This is almost like being a sculptor. I tweak a few lines, take several steps back, assess the progress and adjust as need be. It's a lot of work but quite satisfying, and it's easy to get into a rhythm and just keep going for hours. As I run my hands over the curves to check for low/high spots I realize this will be a fun car to wax ;)
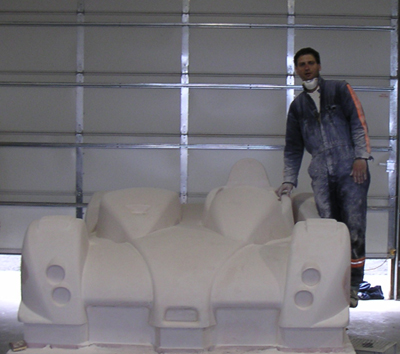
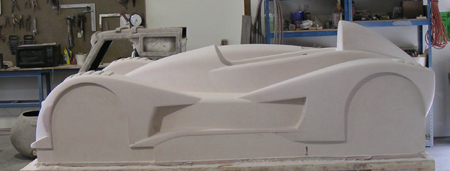
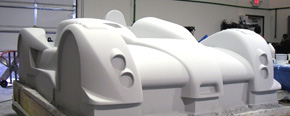
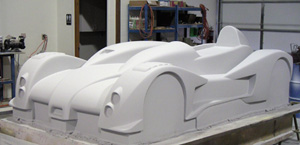
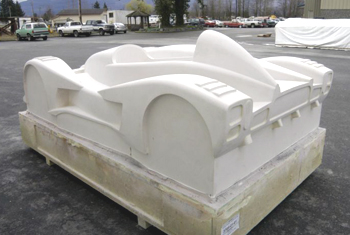
The picture gives some idea of scale. The car will actually sit 2" lower than that. Yes, this thing is LOW. The shape is coming together little by little. I figure another full day of sanding and the basic contours will be set. After that it's primer and sand, repeatedly, to get the desired surface finish.
So far everybody who sees the plug likes it (or they're just being polite, but if so they are all very good at faking enthusiasm ;). "Can't wait to see it finished" is the common comment. Yeah, ME TOO! On the way home took the fun route, Skyline boulevard. Lots of twisties and little traffic. Caught up with a superbike in the hands of what looked like an intermediate street rider. He obviously thought he was pushing hard and trying to hang off and stuff. Since his bike had no mirrors he was oblivious to the stock MINI hanging on his tail - until he slowed down for a stop sign and I exaggerated the throttle blip on downshift to let him know i'm there. He looked over his shoulder but still didn't believe it and pulled a wheelie away from the stop, attacking the corners with more vigor. Needless to say in the first corner I was right there again. The pace wasn't too bad, really, but slower than what I'd do unhindered. As he slowed to turn off a couple miles later I blipped the throttle a couple more times to let him know he should buy mirrors. Not much traffic the rest of the way. If I gotta commute, this isn't all that bad :) 03/25/04 Finally a first coat of primer. It creates much better contrast than the marble-like putty, thereby highlighting any surface irregularities.
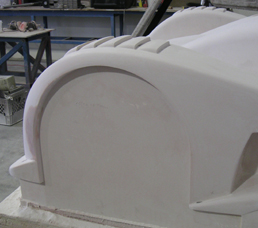
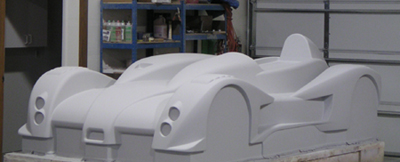
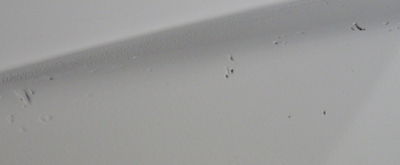
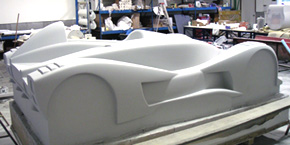
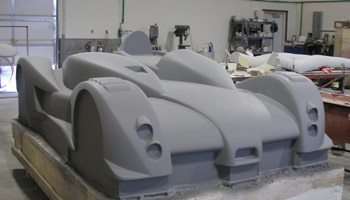
All the pinholes had to be filled (the picture above is of the worst section, most of the surface is MUCH better than that). Then a lot more sanding. I'm getting the fender shape to where I want it to be. Also most pinholes are in areas where I removed a lot of material. The lesson here is that it really pays to spend a few extra hours on CAD so that the plug is closer to final shape right out of the machine. Well, this is supposed to be educational. So far so good. Some may have noticed that I've been resisting adding page 10, choosing instead to combine earlier ones to make room for new pages. Ths is because there is a lot more to come and the nav bar is only so long... 04/02/04 Got a second coat of primer on the plug and did more filling of pinholes and sanding. The shape is almost what I want it to be now, just a few minor cleanup-type tweaks remain. Once those are done the focus will be on surface finish. The pictures below illustrate the progress so far:
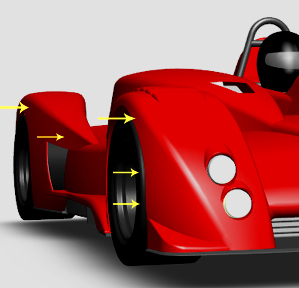
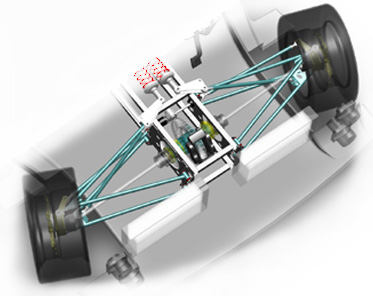
The yellow arrows on the SolidWorks rendering show some surface inconsistencies. The plug as it was out of the machine very accurately reproduced all of them - it looked exactly like the model. Below it is the plug as it was this morning, after several days of sanding and filling. All in all it's satisfying work although there is a lot of physical effort. I definitely feel it the next day, every time. 04/09/04 Between all the sanding of the plug and the variety of other things and projects I have going on I finally managed to make progress on the suspension. The majority of effort went into making sure that none of the various linkages and parts interfere with each other over the full range of motion. Getting the front pushrods to clear the halfshafts at full lock was the toughest. But now there is at least 0.2" clearance between everything at all times.
Other items were to verify shock motion ratio (exactly 1:1), bump steer (less than 0.2 degrees over full +/- 2" travel, after tweaking the uprights a bit) and then ackerman and steering angle relative to rack displacement (both correct). SolidWorks is awesome for this - don't know what I'd do without it. Now I can go get all the suspension pieces fabricated.
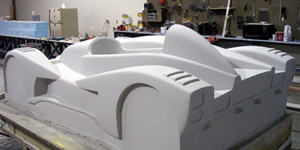
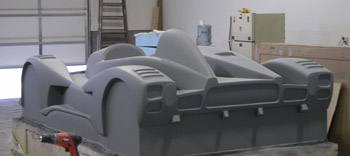
Also still messing with the floor, the picture above showing the latest iteration. The longitudinal strips are 3/8" thick nylon 'skid bars' that both protect the floor from scrapes and help direct airflow a little. CFD seems to show better performance WITHOUT a front diffuser, which in a way makes sense since higher velocity, cleaner flow is preserved over the whole unerbody. I did make some effort to reduce interference from the front wheels and channel most of that air out to the sides. The back was also reworked to reduce lateral flow. Of course the CFD data is still not validated so I'm treating it more like an additional input to my guessing rather than a definitive design tool. The real test will be in the driving. 04/23/04 Today was the first day sanding with 180 grit paper. I'm now done with major shaping and from here it's just getting the surface smooth. Since I'm still sanding through the primer in a couple of spots one more coat will be required. Then retouch with 180, then 320, then 1000 grit, then wax and polish. Even with 180 the surface is becoming nice and smooth and it's really quite a bit of fun to work with.
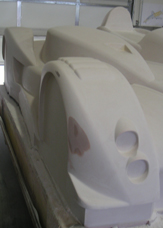
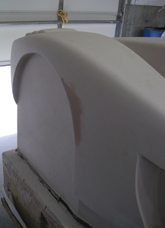
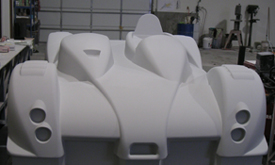
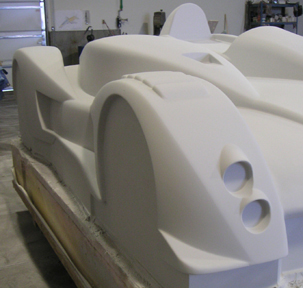
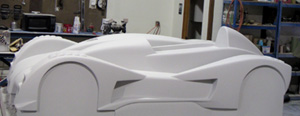
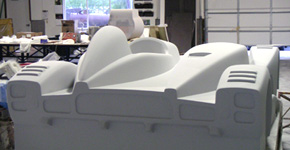
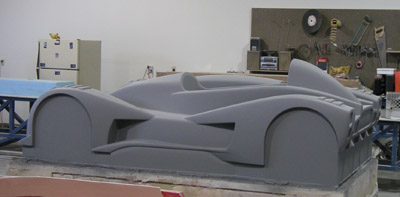
In the process of all the sanding I've made quite substantial (if subtle-appearing) changes to the shapes of all four fenders, as well as the engine cover and the helmet fairing. Below is a picture of the plug as-delivered for comparison.
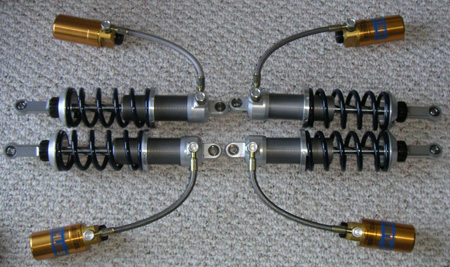
I am now quite happy with how it's turning out, particularly how the shape makes what is essentialy a 'square' car with no overhangs appear relatively sleek. Just goes to show that as good as the computer tools may be these days there's still no substitute for human touch. The machines just help take care of the tedious work and make it easier and more efficient overall. I must also once again extend my gratitude to Composites Unlimited for letting me do this at their facility and especially to their bodywork guy Jesse who is a true craftsman and an excellent teacher. I am very fortunate to have such a resource locally. In other news I've ordered shocks (Öhlins ST-44) and springs (200# 6" Hyperco) from Shock Shop, a local outfit that comes highly recommended. So far in my conversations with Chris Billings, the proprietor, he has proven to be very knowledgeable on the subject and quite helpful. Chris custom valves and assembles all the shocks to the exact requirements of the application. Of course mine is a weird one (very low spurng and unsprung weights) but he is willing to work with the spec and find a solution. Cool. The downside is that the parts are a bit spendy (the four shocks with springs end up costing nearly as much as the complete engine/gearbox unit - a real testament to the amazing value of bike engines!). Hopefully they will work and last well enough to make it worthwhile. 05/19/04 The first of the final round of sanding, starting with 320 grit paper and moving to 400, 600 and then 1000. The final coat of primer is on. This primer is different from the one used before. It has more resin and less filler content, so that it can be polished to a fairly high luster. It is also darker in color and I think the car looks cooler this way ;)
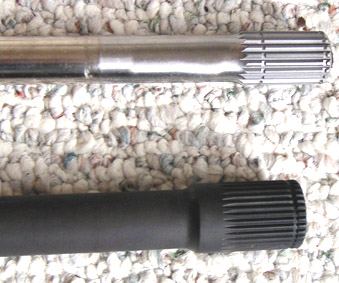
Some shine is already visible in the raw primer and it will be much more so once I'm done sanding and polishing. The next big step will be using wood partitions to split the mold into several pieces, after which the mold itself will be made. Then a steel frame to hold it together and aligned, after which, finally, comes bodywork. Hoping for a month's timeframe but it's likely to stretch beyond that. In other news, finally received the new halfshafts (black colored in the picture below). They are quite a bit beefier than the old ones...
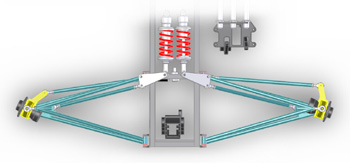
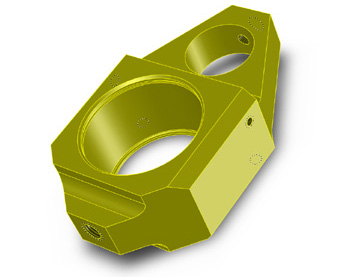
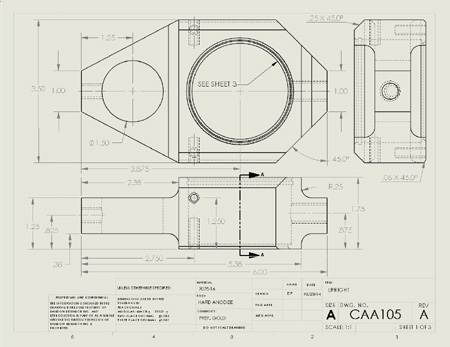
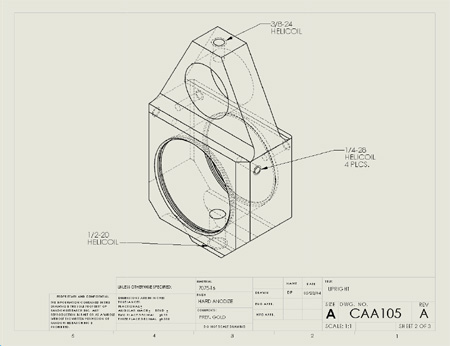
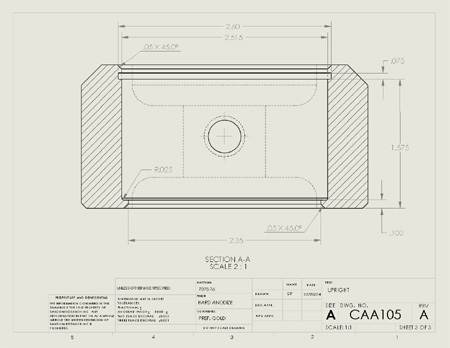
The old ouside diameter is 0.750", the new is 0.890". This roughly doubles the strength and stiffness, increasing weight by less than 20% (i.e. less than a pound per shaft, around 3 lbs total). Not bad. Also, it seems I have an agreement in place to get the suspension fabricated. Hopefully it will work out. The chassis is next. I'm still shooting for mid-summer first drive, but it's starting to look like a pretty aggressive goal. We'll see. 05/23/04 I've been secretly hoping to avoid this, but the time has come to deal with the inevitable - generating production drawings for all the parts. This is quite an ordeal, although once I got started the process is actually not too bad because SolidWorks really takes most of the tedium out of it. And of course if the model is changed the drawings update automatically, which is very nice. Below is the suspension upright for example...
The program even outputs the resulting drawing in PDF format if needed. Can't imagine how many man-hours it would have taken to produce the drawings the old-fashioned way. This particular set took me about 3 hours which included a lot of tinkering and trying to find my way around the menus and features to make it happen (I have yet to open a SolidWorks manual - not sure I could even find them now). Would have been about 30 minutes otherwise. Subsequent ones should go easier. The upright design is probably the fourth iteration and weighs only 1.25 lbs. Fortunately I've been able to design most components so that identical parts are used on all four corners, which simplifies things quite a bit. Still, there's a LOT of drawings still to be made. Hopefully I'll knock most of them out today, at least as far as suspension goes. UPDATE: Another eight hours and 23 drawing sheets later, the suspension is pretty much documented (except for bellcranks which I still need to finalize - torn between machined and welded alternatives). Whew... The frame itself is going to be the tough one. I've been procrastinating on the completion of its design because it's a lot of fiddly work but I guess the time draws near for that one too. 05/24/04 Got the shocks and springs. The shocks are Ohlins ST-44 and springs are Hypercoil 200# units. They are spendy but Chris at Shock Shop includes a full custom valving and dyno test with every unit which makes it worthwhile. Especially since my car is so unusual in terms of low sprung and unsprung weights combined with relatively long shock travel (1:1 motion ratio). When I dropped by Chris was still tinkering with one of the shocks and was kind enough to take it apart, showing and explaining its internal workings. Very educational. Shock response curves are set primarily with shim stacks and sometimes using different piston apertures. The adjusters on the ones that have them are limited in range and effect primarily low-speed damping, if my understanding of their function is correct.
The units are nice and light, too, with the complete shock and spring assembly weighing just 5 lbs. Also based on a discussion with a potential vendor regarding my uprights I changed the design yet again, making them 1/2" narrower so that standard size 3"x2" bar stock could be used. A side benefit is that now they should weigh 1.0 lbs, a quarter pound less than before. Also I had guessed at bearing bore dimension but wasn't too comfy with it. So I did some more searching on the web and found that my initial guess was quite a ways off. Glad I checked. So now the uprights should be all happy - this is where the auto-update feature for the drawings really pays off. Click a button, move a couple dimensions around and you're done. Cool... On the plug sanding front I did a couple more hours today and I'm almost done with 320 grit. Next comes wet-sanding with 400 and then 600. I'm told wet-sanding is going to be messy :) |